A Pose vs T Pose: Which Should You Use for Rigging and Animation?
Quick Summary
- T pose and A pose are the two standard reference poses for humanoid characters, chosen before a model is rigged and skinned.
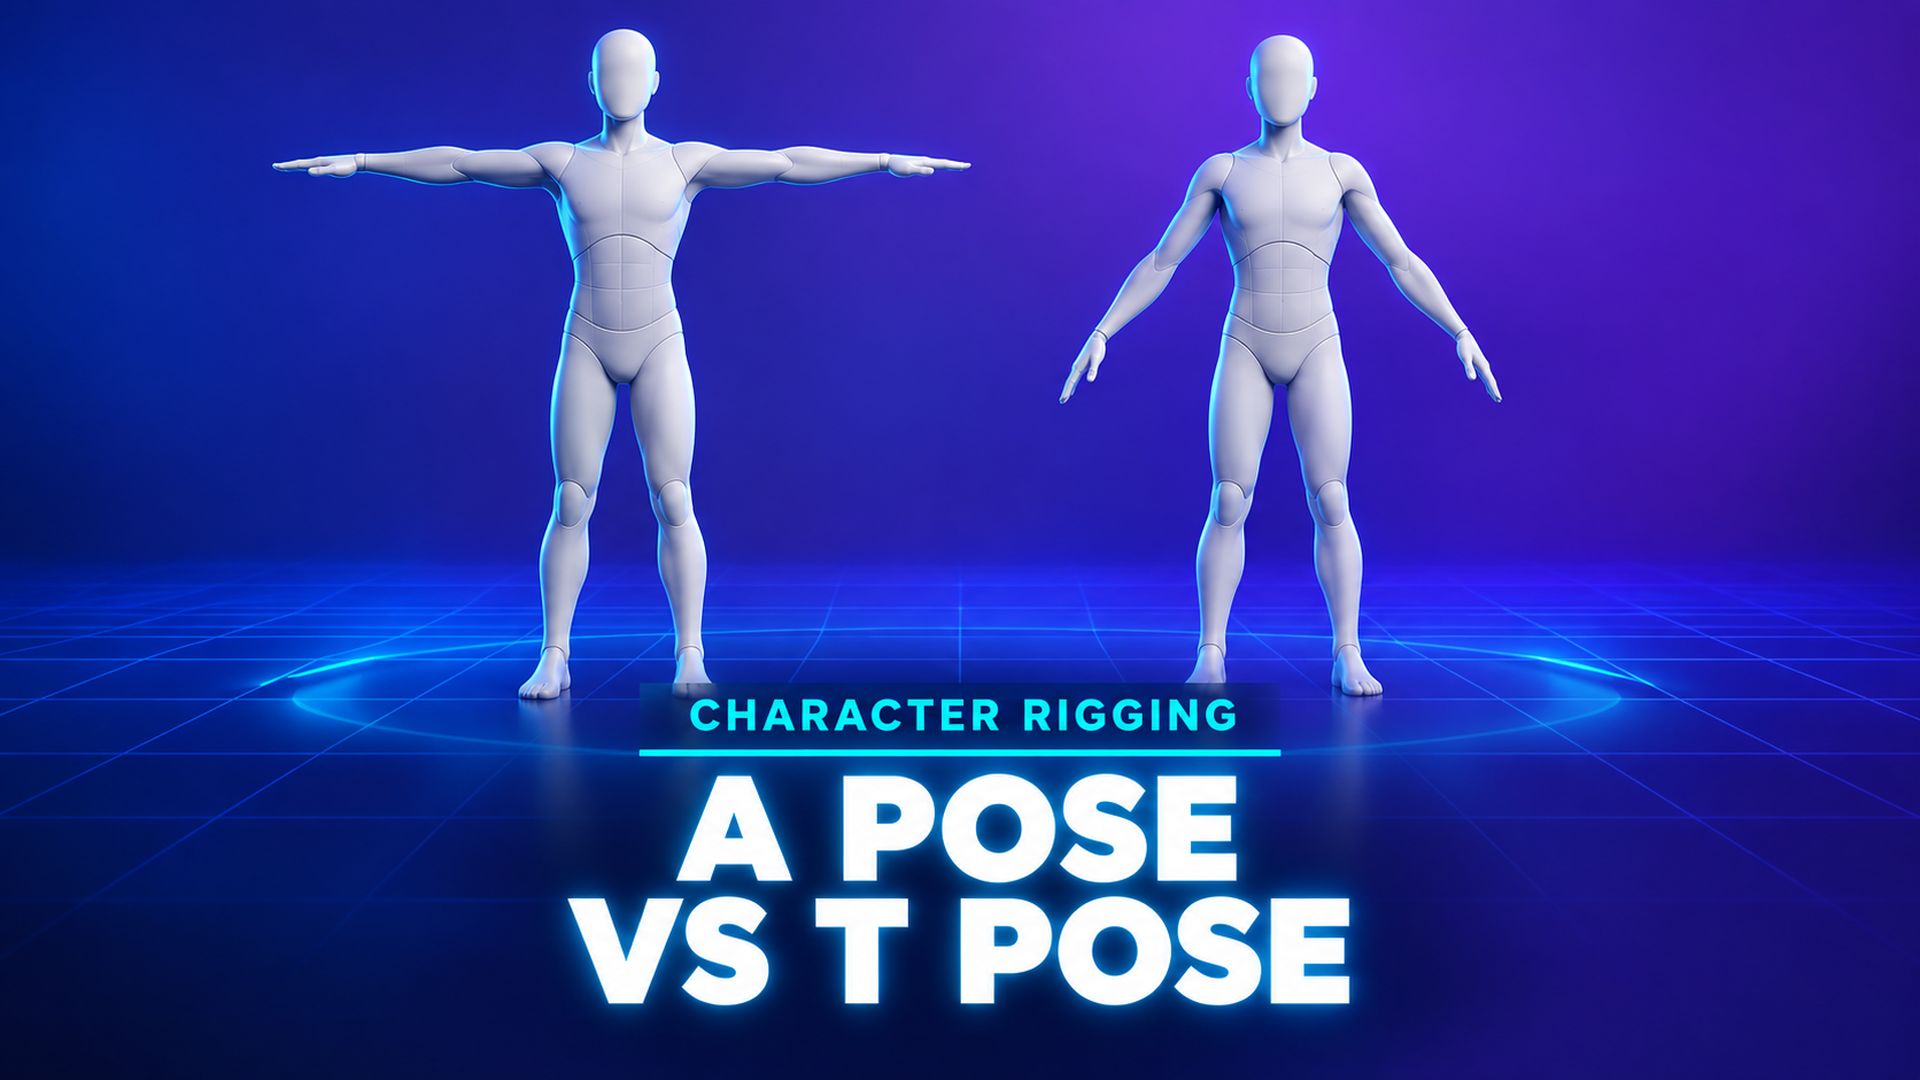
- T pose spreads the arms flat at shoulder height; A pose drops them to roughly 45 degrees below horizontal.
- Auto-riggers, engines, and motion capture favor an extended T pose because the joints stay axis aligned and easy to read.
- A pose usually deforms better at the shoulders and armpits, because the arms already sit near their natural resting range.
- Neural4D can generate a rig-ready humanoid directly in A pose or T pose, so the base mesh arrives in the bind pose your pipeline needs.
The pose you bind in decides how much shoulder deformation you fight later. Work through how a pose vs t pose behave across rigging, skinning, and retargeting, then pick the bind pose for your character instead of copying the default.
Contents
- What Are A Pose and T Pose?
- The Core Differences at a Glance
- Why T Pose Remains the Rigging Default
- Why A Pose Usually Wins on Deformation
- A Pose vs T Pose: A Decision Framework
- Rig-Ready Poses Straight From AI GenerationHOT
- Common Questions on Character Bind Poses
- Start With the Right Pose and Skip the Repose
What Are A Pose and T Pose?
If you rig or skin humanoid characters, the reference pose you start from shapes how much cleanup you do later. The core question is a pose vs t pose: do you leave the arms locked out flat at shoulder height, or drop them to a relaxed angle around 45 degrees? T pose is the long-standing default because its joints sit axis aligned and easy to read. A pose usually deforms better, because the shoulder stays close to its natural resting range. Which one is right depends on what the character does next, and the sections below map out the trade-offs.
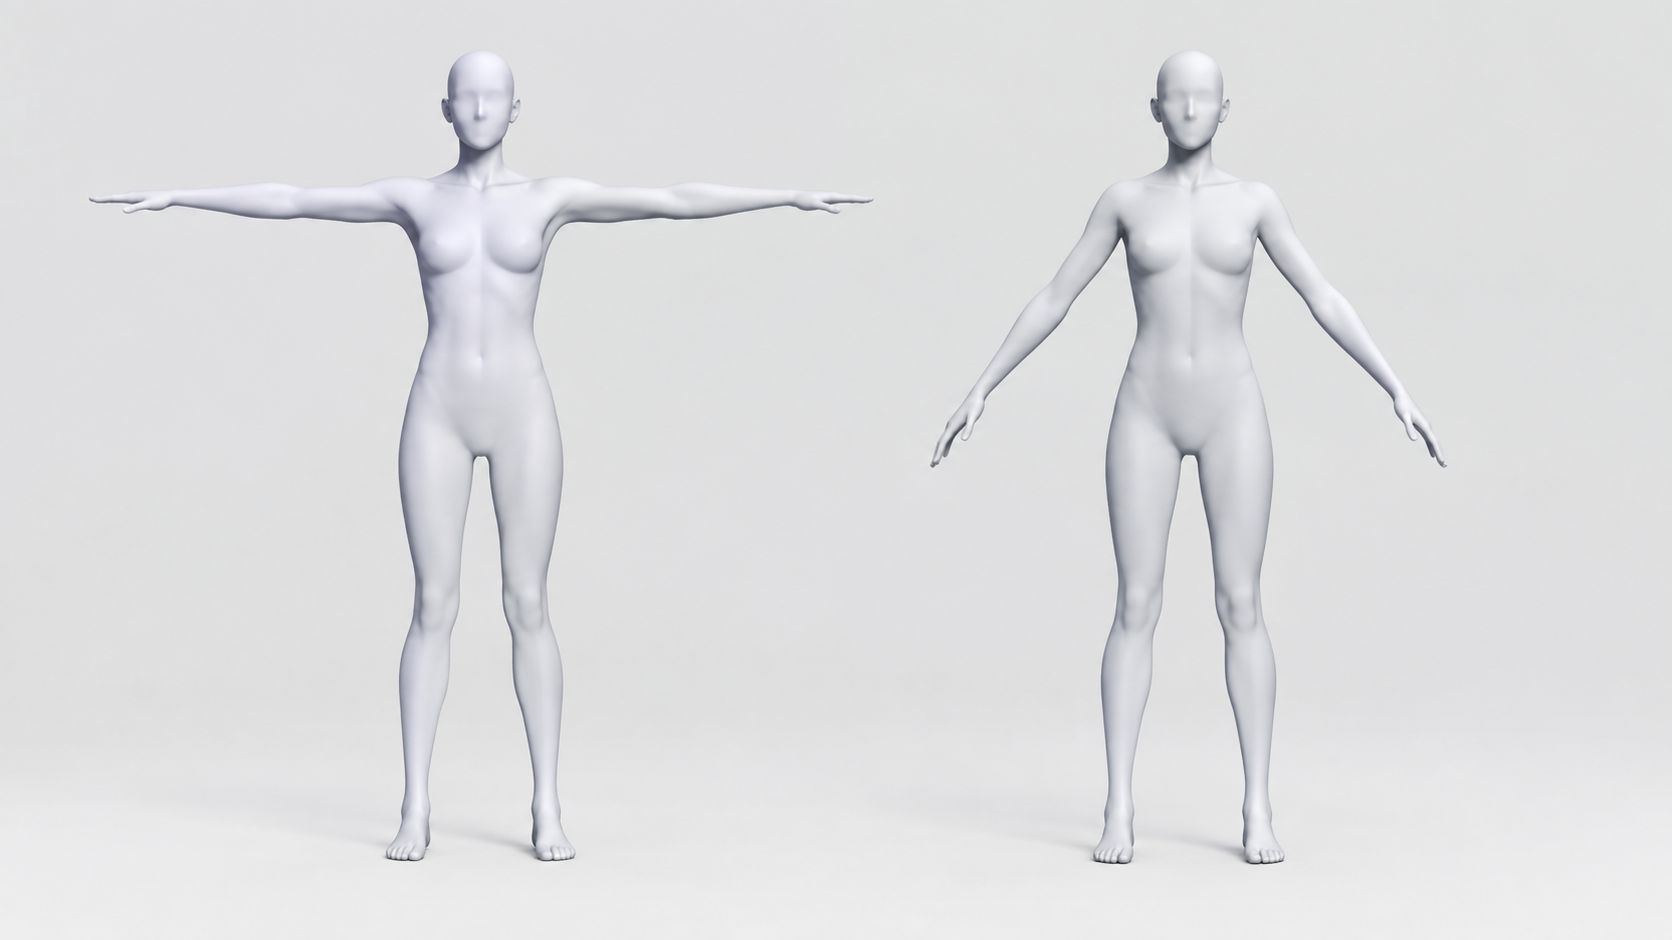
In a T pose, the character stands with legs straight, feet flat, and arms extended horizontally out to each side at shoulder height. The shape of the letter T gives the pose its name. Because the arms are spread away from the body, no part of the mesh touches the torso, which gives you clean working space for UV layouts, textures, and weight painting. It is the pose you see on rigging reference sheets and on the default mannequin before a game character is animated.
In an A pose, the arms are still out to the sides but rotated downward so the hands land around hip or upper thigh height. The silhouette forms the outer strokes of a broad letter A, and the drop is usually described as 40 to 45 degrees below horizontal. The body stays symmetrical and readable for rigging, but the shoulder joint now sits close to where it will actually be during most animation, which is the fact that drives skin quality later.
The Core Differences at a Glance
For the legs and the spine the two poses are mechanically identical. The meaningful differences all live in the shoulders and arms, so that is where a comparison table should focus.
| Criterion | T pose | A pose |
|---|---|---|
| Arm angle at the shoulder | 90 degrees out to the side | 40 to 45 degrees below horizontal |
| Joint readability for auto-riggers | Best, limbs fully extended | Very good, limbs still extended |
| Symmetry for mirrored weights | Perfect horizontal axis | Symmetric but angled |
| Shoulder and armpit deformation | Weakest area, arm travels ~90 degrees to reach rest | Stronger, arm travels ~45 degrees to reach rest |
| Distance from a natural idle pose | Far from resting position | Close to resting position |
| UV, texture and sculpt working space | Best, no self contact | Good, hands near the torso |
| Mocap calibration and engine retarget | Standard convention in most tools | Some tools need an offset handled |
Why T Pose Remains the Rigging Default
Axis alignment and joint detection
In a T pose the arms, legs, and spine line up with the coordinate axes. That makes it trivial for a rigger, or for an auto-rigger, to reason about where each joint should sit. Shoulders, elbows, and wrists are unambiguous because the limbs are fully extended, so bone detection rarely has to guess. As an industry convention, the pose is common enough to carry its own entry in the animation community’s standard documentation, which records it as a default standing pose used before a humanoid skeleton is posed and animated.
Symmetry and working space
A flat horizontal arm makes mirroring painless. You model and paint weights on one side, mirror it across, and the far arm lines up exactly. The spread also keeps the arms away from the chest, so when you are still doing UV layout or sculpting, you are not fighting self contact between the hands and the torso. For those reasons most character work still starts in a near-T stance.
Engine, mocap, and library conventions
Several parts of a modern pipeline simply expect an extended pose. Motion capture sessions use an arms-out calibration pose so the solver can map the performer to the digital skeleton, and engine humanoid systems map bones most reliably when the character is uploaded in an outstretched reference pose. Animation libraries and marketplace characters also ship in a T pose so that retargeting between assets has one consistent starting point. If you hand-rig, the steps from blocking bones to painting weights are the same in either pose, and the full walkthrough in our guide to rigging a model in Blender covers them in order.
Why A Pose Usually Wins on Deformation
The rotation distance problem
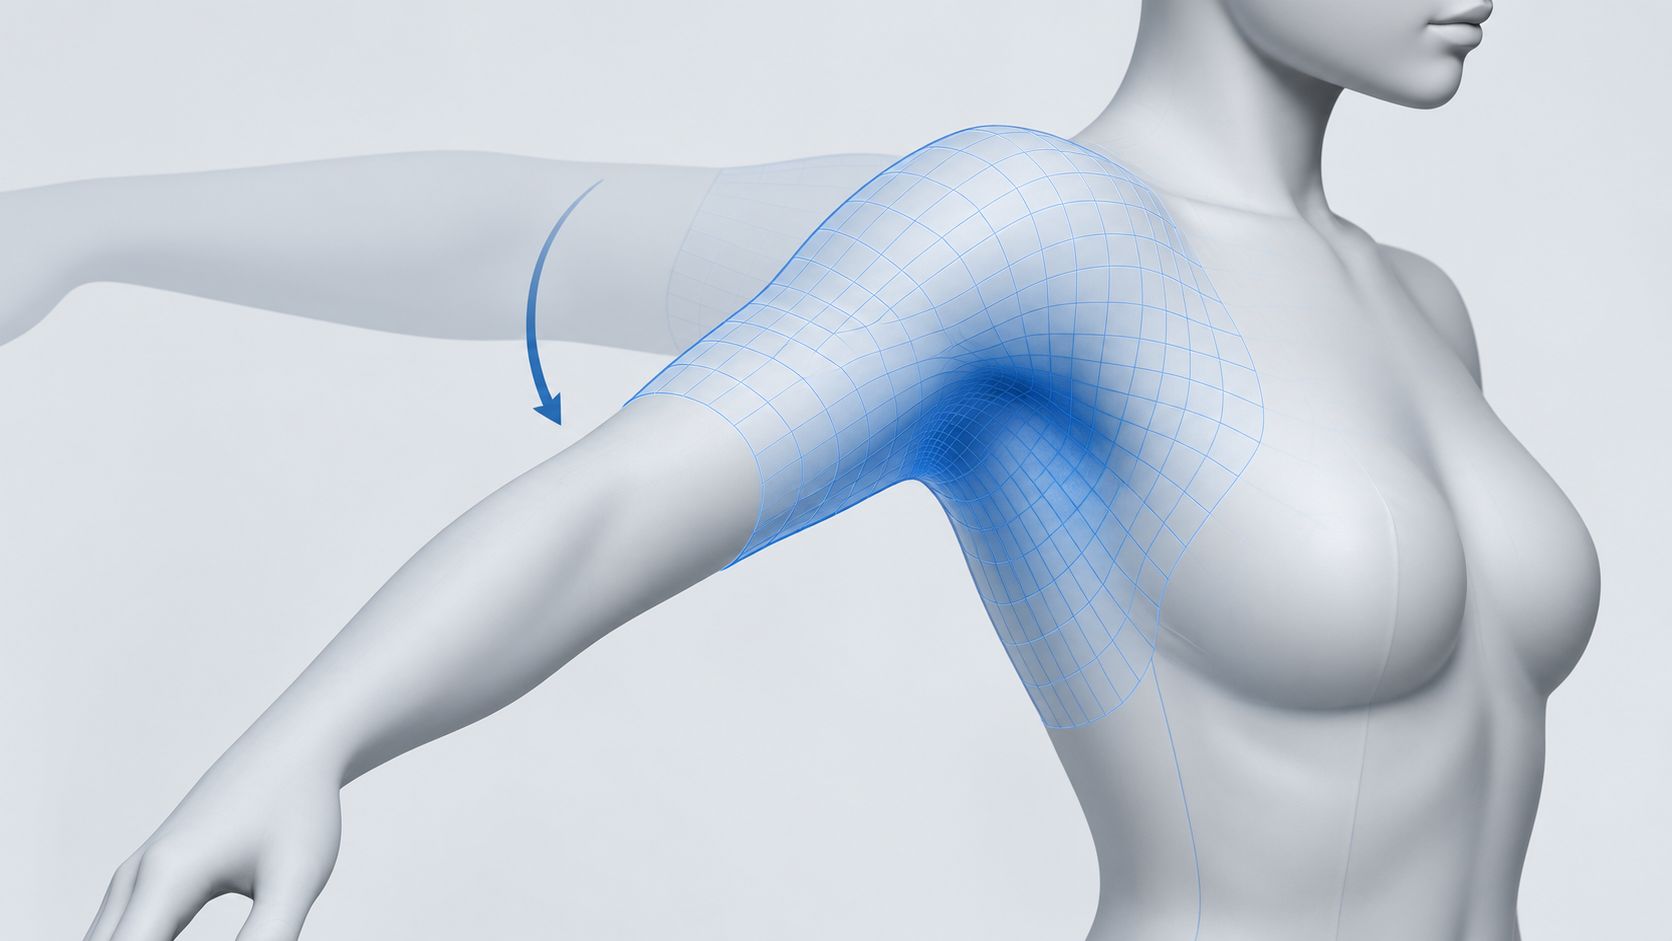
A character does not live with its arms at shoulder height. In idle, walking, and most gameplay states the arms hang below the shoulders. When a mesh is bound in a T pose, the skin solver has to travel nearly 90 degrees of shoulder rotation just to reach a neutral resting arm, and a lot of that travel is where deformation quality falls apart. Bind the same character in an A pose and the shoulder only has to move about 45 degrees to reach its most common positions. Less rotation distance means fewer in-between frames that the solver has to stretch, compress, or guess.
Why the armpit is the tell
The clearest symptom is the armpit pinch. Dragging an arm down from horizontal collapses the deltoid and underarm region, and that is where you see crushing, diagonal folds, and textures that smear during a simple idle animation. An A pose places the shoulder capsule close to its anatomical mid range, so the deltoid and the clavicle area deform around a more neutral arrangement. Characters with wide frames, heavy armor, or bulky clothing benefit the most, because their volume has nowhere to hide when the arm comes down.
The studio compromise
Because both sets of advantages matter, many character artists split the difference. Model, sculpt, and lay out UVs in a T pose, where the working space is cleanest, then rotate the arms down into an A pose and apply that as the rest pose right before skinning. That way automatic weights, which solve best on a relaxed extended figure, bake in around the natural shoulder angle. Preparing the mesh before this step is what makes the difference, and our guide on how to prepare 3D models for auto-rigging and animation walks through the cleanup that gets you there.
A Pose vs T Pose: A Decision Framework
When you are weighing a pose vs t pose for a specific model, the pipeline decides, not the default. Use the matrix below as a shortcut.
| Your situation | Recommended pose | Why |
|---|---|---|
| Hand-skinned character with a lot of arm movement in idle, walk, and combat | A pose at roughly 45 degrees | Arms rest near their natural range, so the shoulder deforms least where it matters most |
| Auto-rigged character for engine retargeting with tools like Mixamo or Unity Humanoid | Near-T stance, arms extended with a slight drop | Axis aligned limbs give the auto-rigger clean joint markers and consistent avatar mapping |
| Model sculpting, UV layout, and texturing before binding | T pose | No self contact gives the largest working area |
| Armored, wide-shouldered, or bulky characters | A pose | Less armpit crushing and fewer collisions when the arms come down |
| Static display, diorama, or printed figure with no skeleton | Either, pick the visual pose | Bind pose only matters when there is a rig to deform |
If you are building characters that will actually ship in a game, the pose decision is one step inside a bigger planning problem. Our walkthrough on how to make 3D characters for games covers the full pipeline from concept to engine-ready model, so the bind pose you choose here has a place to live.
One rule of thumb: decide the bind pose before you generate the mesh. Re-posing a finished, skinned character costs real cleanup time, and a model that already stands in your target pose skips that entire step.
Rig-Ready Poses Straight From AI Generation
The manual re-pose step is where a lot of character work loses time. After you model or generate a character, you spend a session rotating it into a standard A or T bind just so an auto-rigger can read it. A growing number of AI character generators handle that reference pose for you, and Neural4D exposes it as a dedicated Pose parameter in Image to 3D and Text to 3D instead of asking you to describe the pose inside a text prompt.
How the Pose parameter works
The Pose parameter offers Auto, A pose, and T pose options, with Auto as the default so the model does not force a stance when you do not ask for one. When you select A pose or T pose, the generator guides the output toward a character that already stands in that standard reference pose. The option is aimed at humanoid models, which matches the characters that actually need rigging and animation; for a non-humanoid prop it adds little, and the parameter is best treated as a character and rigging feature.
The result is a base mesh with clean, watertight topology that an auto-rigger can read without cleanup, exported from N4D as .fbx, .obj, or .glb so it drops straight into Blender, Maya, or a game engine. To be clear about the boundary: the export is not pre-rigged. You still place the skeleton and paint weights yourself, but the mesh arrives already posed, so you bind in your target pose instead of spending the session getting there. If you want to see where the feature fits, the Neural4D AI 3D character generator overview shows the Image to 3D and Text to 3D workflow that hosts the Pose parameter.
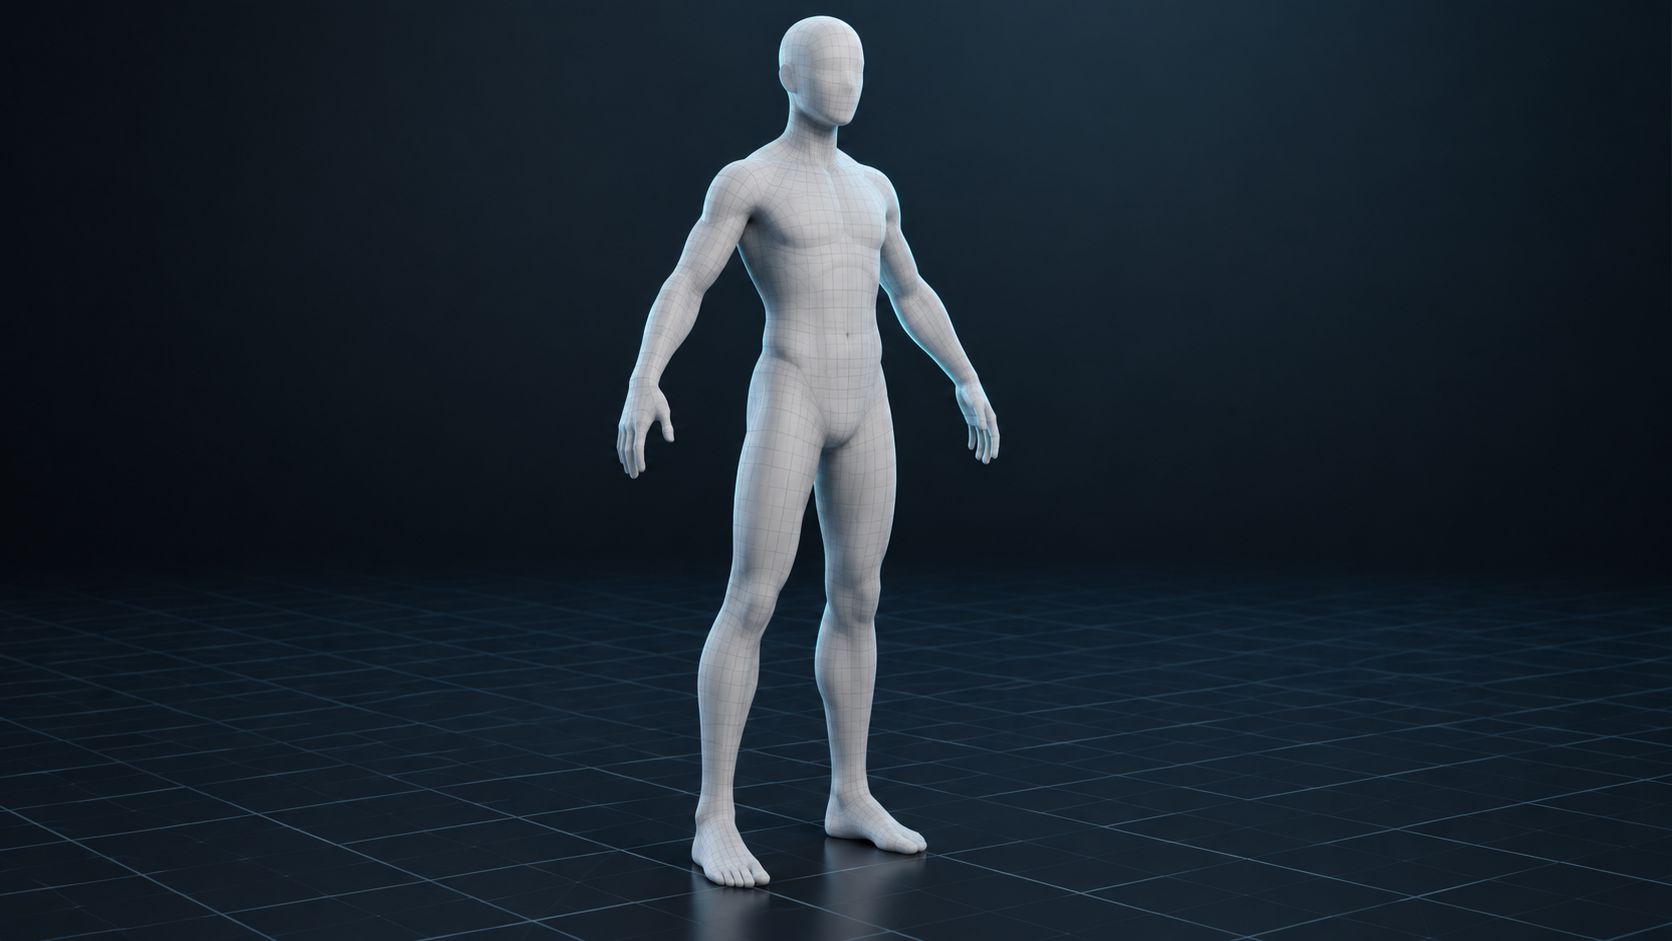
With the base mesh in a standard pose and clean topology, the next stage is the actual skeleton and animation work. Our 3D animation pipeline article connects that bind step to the rest of the character production line, from rigging through motion and final output.
Skip the Manual Repose
Generate your next humanoid character directly in A pose or T pose with Neural4D, and hand a rig-ready mesh to your animator.
Try the Pose Parameter in Neural4D Studio
Image to 3D and Text to 3D, in one generation window.
Common Questions on Character Bind Poses
There is no universal default, because teams treat the bind pose as a shared constant. Retargeting, shared animation sets, and engine avatar systems all assume one rest angle across assets, so changing it ripples through the whole library. If you work alone and tune deformation by hand, an A pose at 40 to 45 degrees is a defensible starting point. If you join an existing project, match whatever rest pose the current assets already use.
Most auto-riggers accept both, but they read joint positions most reliably when the limbs are fully extended and separated from the torso. In practice that favors a near-T stance with the arms flat and slightly dropped, palms facing down or inward. When a tool offers a pose detection option, choose the one your model actually stands in; when it does not, keep the arms extended and out of contact with the body so the solver never has to guess where the torso ends.
The common reference is 40 to 45 degrees below horizontal, which places the hands around the hips or upper thighs. Some artists use a shallower drop near 30 degrees for characters whose arms need to stay higher, and anything well past 45 degrees starts to read as a relaxed or S pose rather than a true A pose. The exact number matters less than keeping the arms symmetric and off the torso.
Engine humanoid systems map bones by name and orientation, so a strong A pose can cause the avatar to look slightly rotated at the shoulders until the offset is handled. Some tools expose a retarget pose or avatar offset setting that compensates; others want a re-posed upload. If your character is headed into an engine that assumes an extended stance and you still want A pose deformation, keep the arms close to horizontal with only a gentle drop, which most humanoid mappers accept without a fight.
Not really. A pose and T pose describe a humanoid layout with shoulders, and they lose their meaning for quadrupeds or non-bipedal characters. A horse, a dragon, or a spider gets its own reference stance built around its limb structure. In AI generators the Pose parameter is likewise intended for humanoid models, so plan a custom stance for anything that does not have a humanoid skeleton.
Start With the Right Pose and Skip the Repose
Bind pose is a small decision that sets your deformation budget for the life of the character. A T pose buys you axis aligned joints, clean mirroring, and frictionless engine and mocap compatibility. An A pose buys you shoulders that behave, armpits that hold up, and skin weights that start near the natural range of motion. Weigh a pose vs t pose against your actual pipeline instead of inheriting a default, and when you generate the next character, make the standard pose part of the output rather than a cleanup step afterward.
Generate in the Pose You Will Rig
Start from a humanoid that already stands in A pose or T pose, then bind and animate without the manual reposition pass.
Free weekly Power credits for new Neural4D Studio users.