
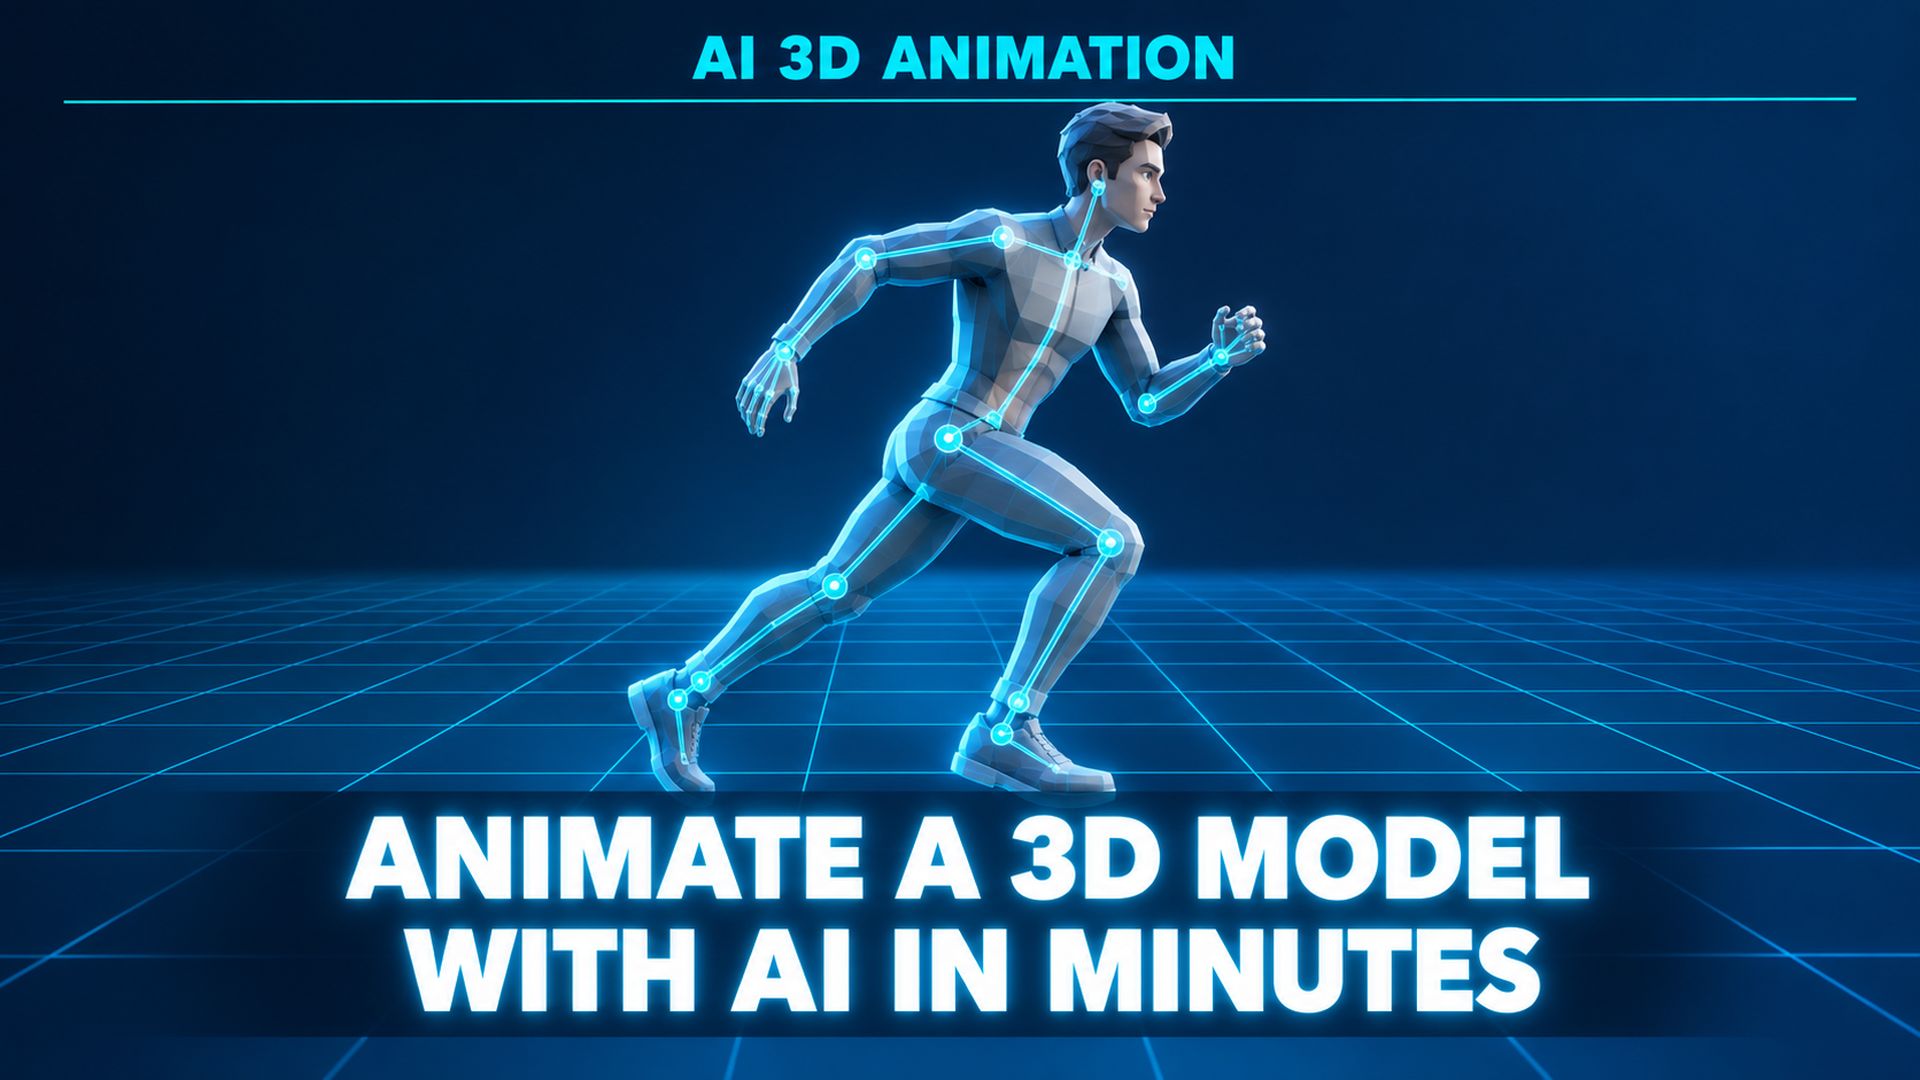
How to Animate a 3D Model With AI: Generate, Rig, and Animate in Minutes
Quick Summary
- Animating a 3D model means adding a digital skeleton, or rig, and applying motion data so a static mesh can move.
- Neural4D Animate runs the full loop on assets you already generated in N4D: select, rig, apply a preset motion, then download an animated GLB.
- Models over 300K polygons need a Remesh before rigging; clean topology and a standard A-Pose or T-Pose make the rig land more reliably.
- Neural4D’s differentiator is that your asset never leaves Studio, so rigging starts from a clean, watertight mesh instead of an imported file that can break the rig.
How to animate a 3D model with AI is simpler than the manual route because the rigging step runs inside the tool. You take a model from your own Studio assets, remesh it if it is too dense, rig it in the Animate workflow, apply a preset motion, and download an animated GLB that is ready for the web, AR, or a game engine.
What It Means to Animate a 3D Model With AI
When you animate a 3D model, you are not moving a video file around. You are giving the mesh a skeleton and telling that skeleton how to move. In animation terms, the skeleton is the rig, the joint structure that bends the mesh, and the motion is the recorded movement data applied to those joints.
Here is the workflow in its simplest form: a static mesh gets a rig, a motion gets applied to that rig, and the result is a model that walks, runs, waves, or poses on command. The same loop appears in every 3D pipeline, from game characters to product demos, and it is what the AI 3D animation capabilities on Neural4D automate for you.
Why Rigging Is the Bottleneck, Not the Motion Library
Why does this matter for AI users? Because the hardest part of animation was never the motion library. It was rigging. Doing that by hand means placing bones, setting up joint hierarchy, and painting skin weights so the surface deforms cleanly. That is where most beginners quit. A tool that rigs inside the workflow removes the blocker entirely.

Prerequisites: Start From a Studio Asset Under 300K
Start With a Model You Generated in Neural4D
Animate takes its input from one place only: the assets already sitting in your Neural4D Studio. You cannot upload a local file into Animate, and you cannot pull in a mesh exported from another tool. The model you animate must be one you generated inside N4D, through Image to 3D, Text to 3D, or any other 3D feature that saves to your asset library.
That constraint is deliberate. Starting from an N4D-generated asset means the mesh is already watertight and consistently built, so rigging has clean geometry to work with. If you want the full picture of what makes a model easy to rig, read this guide on preparing 3D models for rigging and animation.
Respect the 300K Polycount Limit
You also need to respect the polycount limit. Animate accepts models up to 300K polygons. Assets above that must be remeshed first. Because N4D generates high-detail meshes by default, plenty of models land above the cap, so plan to check your asset’s count before you start.
The 5-Step Workflow: Animate a 3D Model in Neural4D
The whole animation loop runs in one place. Once your asset is ready, these five steps take it from a static Studio asset to a downloadable animated GLB.
Step 1: Select Your 3D Model From Studio Assets
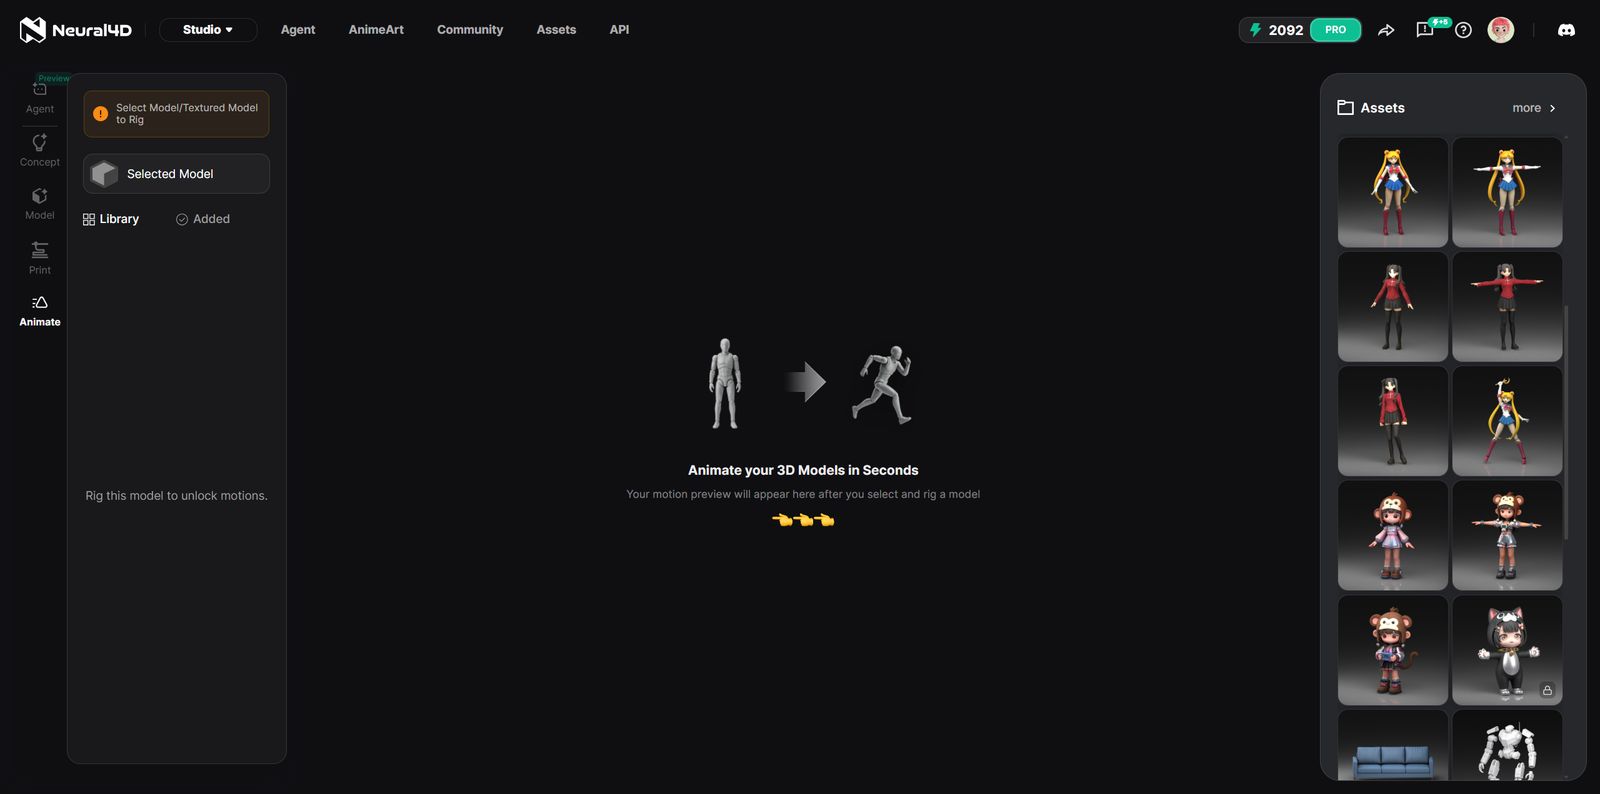
Open the Animate tool at your Studio and choose which asset to animate. The selector pulls from Studio Assets, the same library that stores every model you generated, so your recent characters, props, and scenes are all reachable from one panel.
Pick the model you want to move. If you generated several versions of the same concept, pick the one with the cleanest result rather than the highest detail, since animation rewards solid geometry more than raw density.
Step 2: Remesh if the Polycount Exceeds 300K
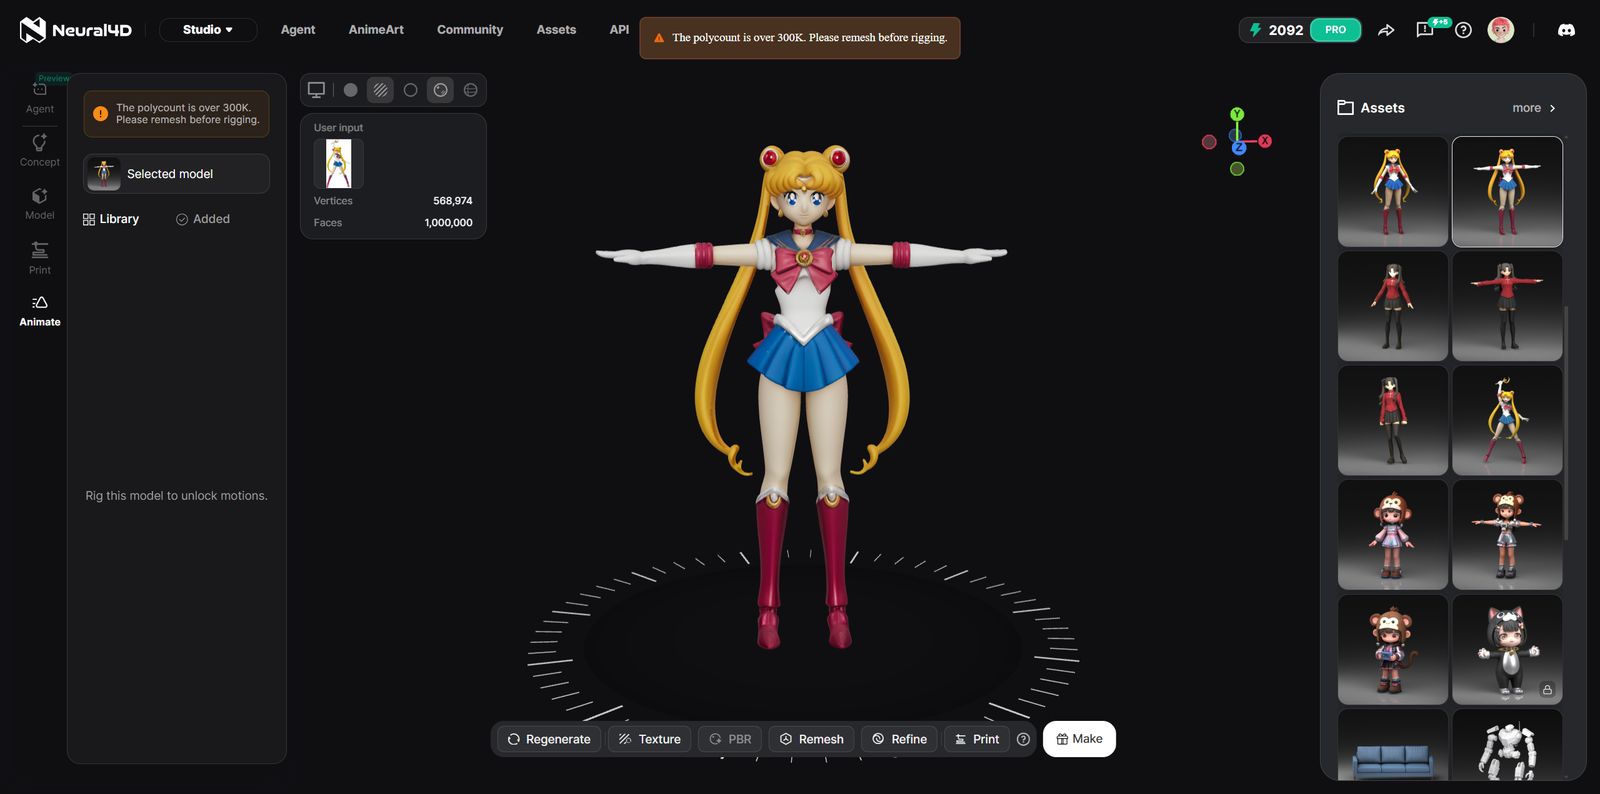
After you select the model, Animate checks its density. If your asset is over the limit, the tool tells you with the message: The polycount is over 300K. Please remesh before rigging.
Do not read that as a rejection. A high-detail N4D mesh is dense because it preserves fine surface features, and that density is great for rendering but heavy for a rig. Remeshing rebuilds the surface at a lower density so the skeleton has a manageable mesh to deform.
Tip: the Remesh option sits right below the warning inside the Animate panel. Lower the polycount to a target under 300K directly there, apply it, and the same asset continues to rigging in this workflow. You do not need to run a separate remesh tool first.
Once the polycount is inside the limit, the workflow moves forward to rigging. If you want the full detail on how density rebuilds work, our guide on remeshing a 3D model walks through the available options.
Step 3: Rig the Model in the Animate Workflow
Rigging is where the model gains the skeleton that lets it move. In N4D, this happens as a step inside the Animate workflow, not in a separate tool. There is currently no standalone rigging product; when you rig, you do it here, as part of the path to animation.
You apply the rig to the prepared asset and confirm the result before adding motion. A well-set rig is the difference between a character that bends naturally at the shoulder and one that collapses at the elbow, which is exactly why the preceding steps matter. The cleaner and better proportioned your source mesh is, the more reliably this step works.
Once the rig is applied and looks right, you are ready to give the model something to do.

Step 4: Choose and Apply a Preset Motion
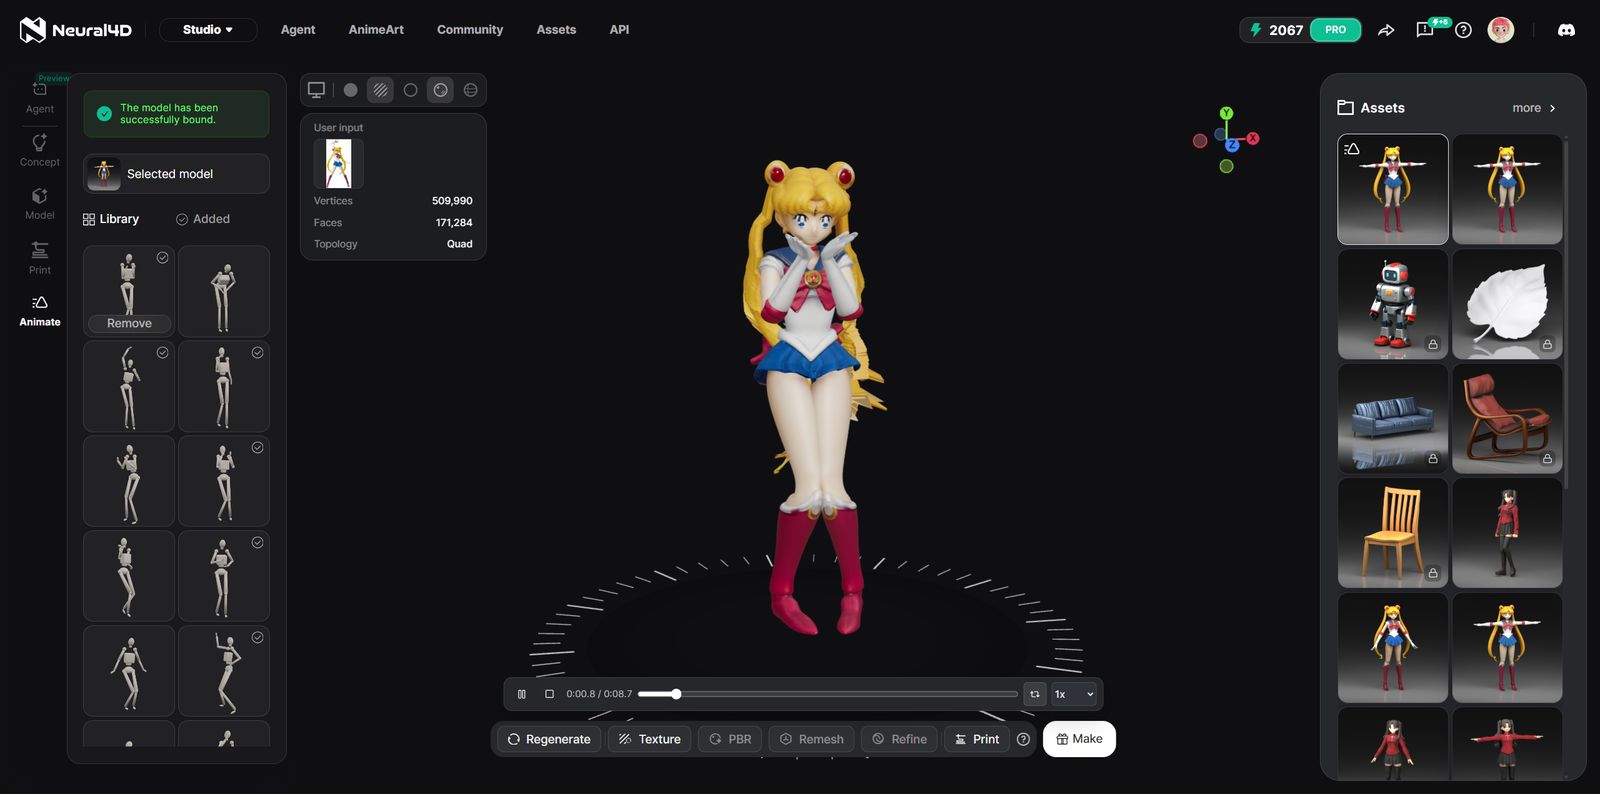
With the rig in place, you choose a motion from the preset library that N4D ships with the Animate tool. These are ready-to-use animation clips you can preview on your own model before you commit, so you can see how the motion reads on your specific proportions rather than on a generic test character.
Apply the motion that fits your intent. The same model can idle for a product demo, walk for a character showcase, or take on any other preset in the library, and switching between options is fast because you preview before you finalize.
Step 5: Download the Animated GLB
When the motion looks right, export the result. Animate downloads your animation as a GLB file, the binary form of glTF, which is the open standard for transmitting 3D content. That single file carries the mesh, the rig, and the animation clip together.
An animated GLB is broadly useful. Drop it into a web viewer for a configurator, load it in an AR scene, or bring it into a game engine through its standard glTF importer. Because the file is self-contained, you are not juggling separate geometry and animation files.
Turn a Static Model Into an Animated Asset
Rig, apply a motion, and export an animated GLB without touching a 3D tool.
Works with models you already generated. No upload needed.
Why Quad Topology and a Standard Pose Make Animation Easier
You get better animation results before you ever open Animate. Two generation choices in N4D set your model up for smooth rigging: quad topology and a standard pose.
Quad Topology Deforms More Predictably
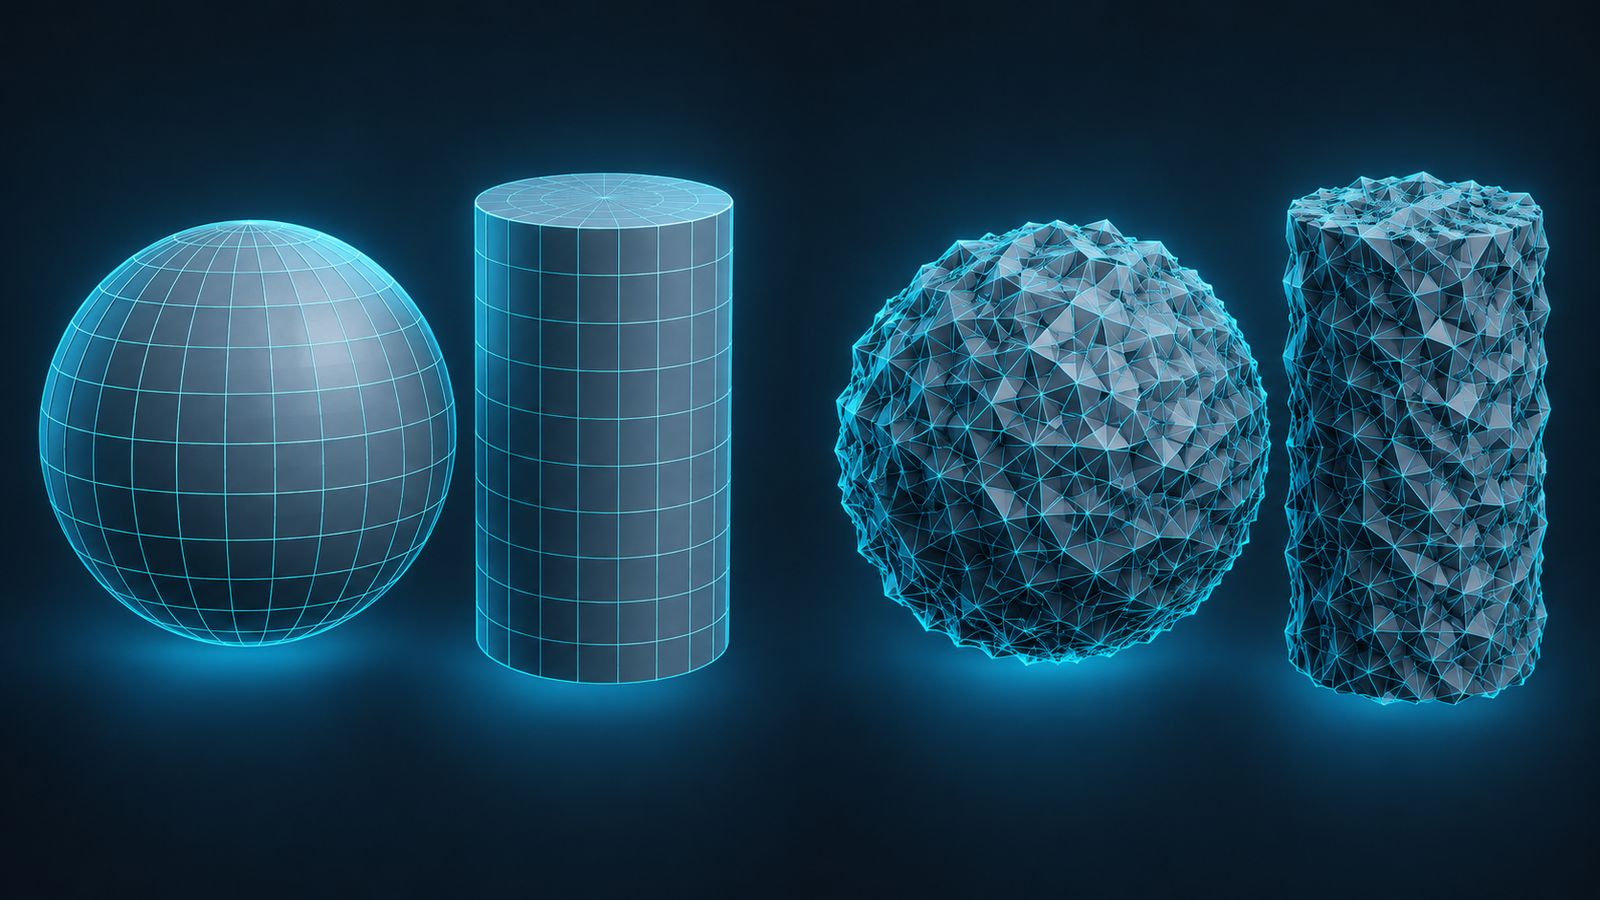
Quad topology means the mesh surface is built from four-sided faces. Quad-based meshes deform more predictably under a rig because edge loops follow the natural structure of the shape, which makes bending at joints cleaner. Triangle-based meshes preserve surface detail well, but for animation work, quads are the friendlier starting point.
A Standard Pose Gives the Rig Clear Limb Targets
A standard pose matters just as much. When you generate a humanoid in Text to 3D or Image to 3D, you can request an A-Pose or T-Pose from the Pose parameter before generation. In these poses the arms are spread clear of the torso, so a rig has no ambiguity about where each limb starts and ends. Characters generated this way rig more reliably than ones frozen mid-crouch with limbs tucked against the body.
Set both at generation time: choose Quad topology and request a standard pose for any character you plan to animate later. It costs nothing extra and removes most rigging failures before they happen. An old man 3D model makes the difference obvious, since facial and jaw deformation shows up as soon as the animation plays.
AI Animation vs Manual Rigging: Where Neural4D Fits
The Manual Path Demands Rigging Skill
Compare the AI path against the traditional one. Manual animation in Blender or Maya means modeling, rigging, weighting, and keyframing by hand, and rigging alone is a craft that takes serious time to learn. Doing it properly on a production character can stretch into days of work for a beginner.
Neural4D Is the Fast Lane for Studio Asset Owners
Neural4D’s position in that world is not a replacement for a studio animator. It is a fast lane for the majority of people who need a moving 3D asset and do not need frame-by-frame control: a game developer prototyping a character, an ecommerce brand showing a product from all angles, a creator dropping an animated model into a scene.
If you do want to understand the manual side before choosing, our walkthrough of rigging a model in Blender shows exactly how much setup the AI route removes.
Animation-Ready Checklist
Run this checklist on any model before you open Animate. Answering all four questions honestly is the fastest way to know whether your next step is rig, remesh, or a quick regeneration.
Reading the result: three or four yes answers means you can rig now. A no on row 2 points to a remesh. A no on rows 3 or 4 is easiest to fix by regenerating the model with Quad topology and a standard pose selected, which usually beats trying to force a rig onto a poorly prepared mesh.
Limitations to Know Before You Animate
Honesty about the edges keeps expectations realistic. Neural4D Animate currently ships with these boundaries:
- Neural4D assets only. You animate models generated in your Studio, not files imported from other software.
- Preset motions only. The motion library is built in; you cannot upload custom animation clips or motion capture right now.
- GLB export only. Animated downloads come as a single GLB, so plan around that format rather than expecting FBX or USDZ.
- Rigging is a workflow step. There is no separate rigging tool, so rigging lives inside the Animate flow where it belongs.
None of these are walls for most users. If your models are generated in N4D, under 300K, and meant for web or engine use, the GLB output covers the common cases. The limitations exist because the tool is deliberately scoped, and knowing them up front is better than discovering them mid-project.
Common Questions on Animating a 3D Model With AI
Q: Can AI animate a 3D model I created outside Neural4D?
No. Animate reads from Studio Assets only, so it animates models generated inside Neural4D. External meshes carry unpredictable geometry, non-manifold edges, and baked transforms that make a rig fail or deform badly, which is why the tool does not accept them. If your project must animate an imported file, the manual rigging route in another application is the current path for that case.
Q: Why does my model show the “polycount is over 300K” message?
Neural4D favors high-fidelity output, so a detailed character or scene can easily exceed 300K polygons. The message is a guardrail, not an error: a rig deforms a manageable mesh reliably, and deforming a multi-million-polygon surface costs performance with no visible benefit in most animations. Remesh the model to a target density and the workflow proceeds. Dense source models are actually a good sign that you preserved fine detail before animating.
Q: Can I upload my own custom motions or motion-capture clips?
Not yet. Animate ships with a preset motion library, and custom uploads are outside the current scope. If you need a very specific action that no preset covers, plan the model for a tool that accepts external animation data, or retime and combine the available presets by generating a few passes and picking the closest match for your scene.
Q: Is the output a video file, or a 3D file I can use in an engine?
The Animate output is a 3D file, an animated GLB that keeps the mesh, rig, and motion data, so it stays interactive and editable. That is different from Neural4D’s text to video feature, which renders a finished MP4 clip from a text prompt. Choose Animate when you need a moving model you can place in a scene, rotate, or import into a 3D pipeline; choose video generation when you only need a playable clip.
Q: Do I need to rig my model separately before using Animate?
No. Rigging is a step inside the Animate workflow, and Neural4D does not currently ship a separate rigging tool. You select the asset, handle any remesh, and the rig step runs within the same flow that applies the motion. There is nothing to set up in advance beyond having a Studio asset under the polycount limit.
Q: What kind of models animate most reliably in Neural4D?
Humanoid and creature characters generated with Quad topology and a standard A-Pose or T-Pose tend to rig the most reliably, because clear limb separation gives the rig an unambiguous structure to read. Clean, single-surface assets under 300K polygons are the safest baseline. The most common failures come from extremely dense meshes, models with many disconnected floating parts, and poses where the arms cross the torso, all of which can be avoided at generation time.
Start Animating Your 3D Models in Neural4D
Animation stops being a specialist skill when the rig runs inside your generation tool. You select an asset you already made, remesh only when the count demands it, rig, pick a motion, and leave with an animated GLB. The whole loop stays inside Neural4D, so there is no file-format roulette and no cleanup of an imported mesh that fights the rig.
Generate a character with Quad topology and a standard pose, open the Animate workflow, and apply your first motion today. That is the practical answer to how to animate a 3D model with AI: let the model, rig, and motion live in one place, and let the tool carry the heavy step.
Your Model Is Ready to Move
From a static Studio asset to an animated GLB in one workflow.
Free plan users get weekly Power credits to start generating and animating.
Share Your Creation
Tag @Neural4D and use #Neural4D to be featured on our channel.