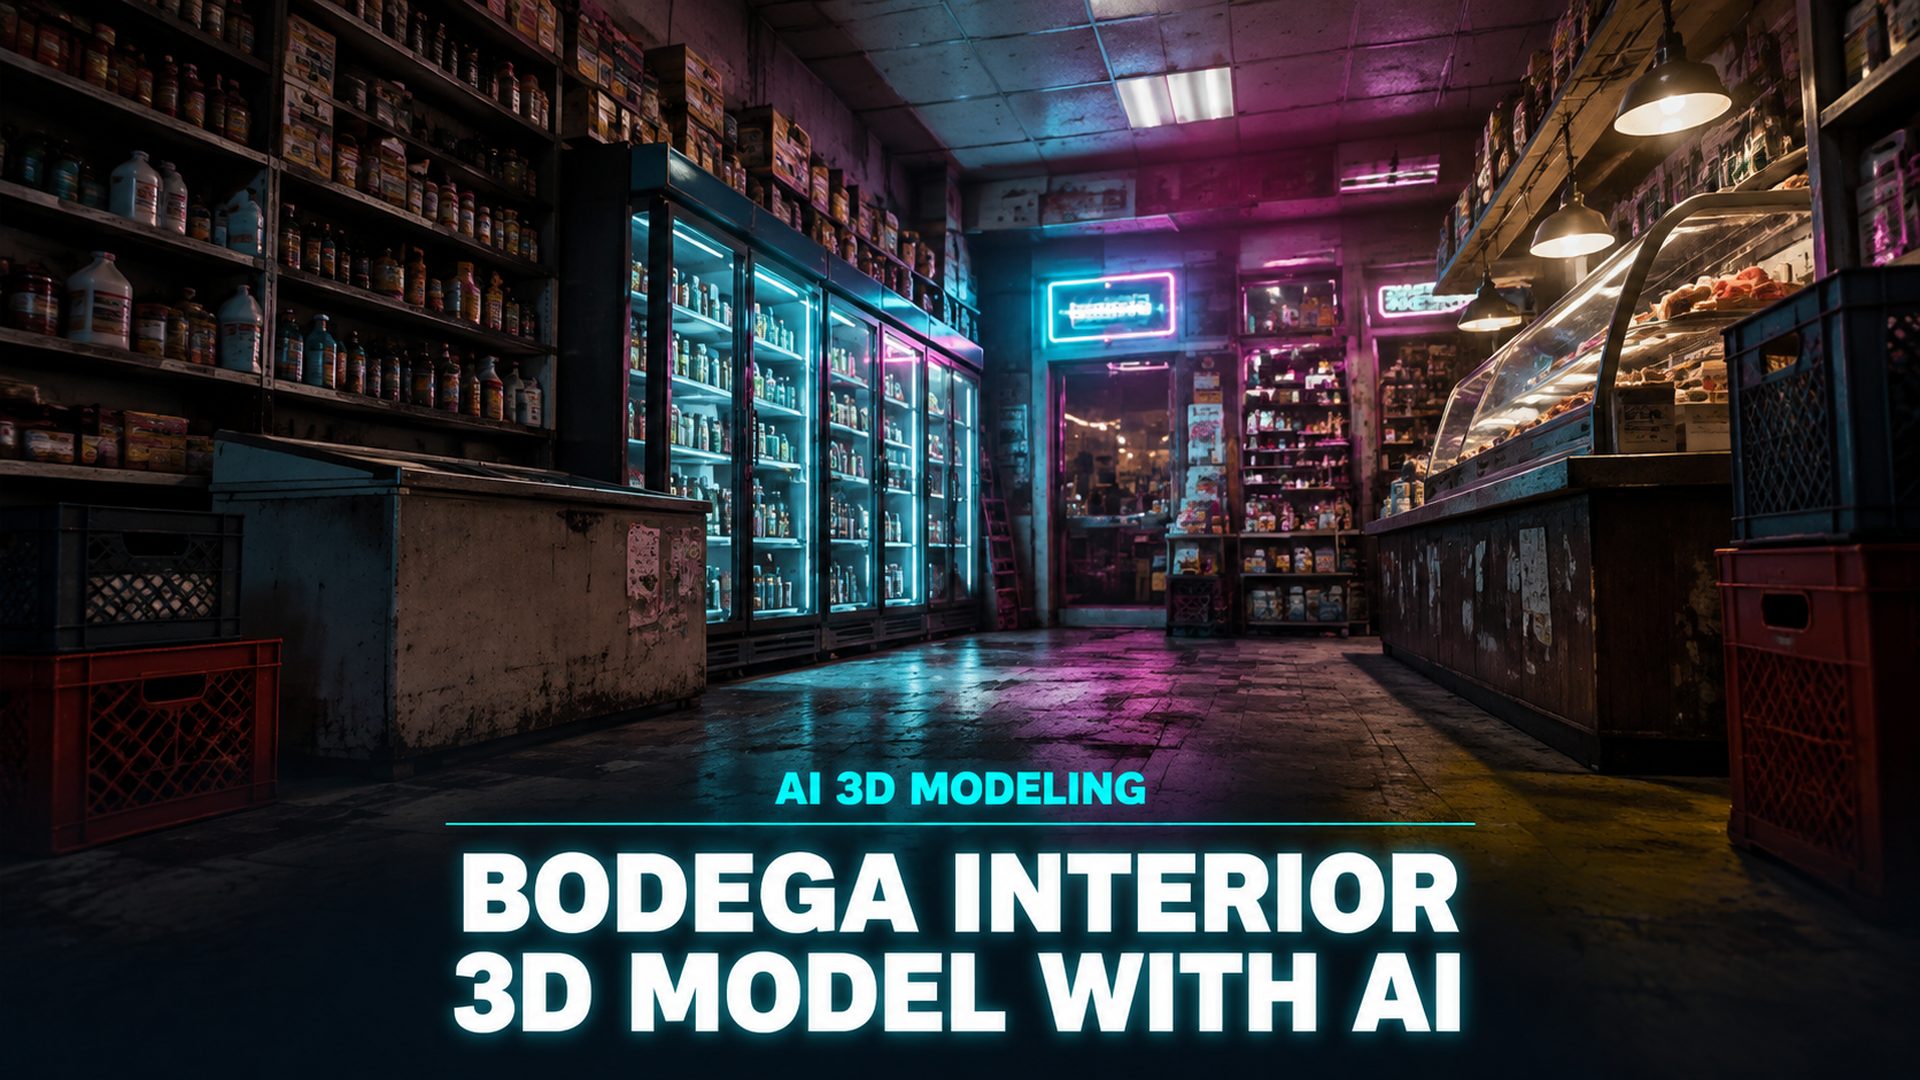
How to Create a Bodega Interior 3D Model with AI
Quick Summary
- A bodega interior 3D model is a three-dimensional recreation of a New York corner store, used in game environments, film sets, and virtual production.
- You build one by generating base geometry from reference images with AI, then assembling shelving, coolers, and counters as modular pieces before lighting and export.
- Neural4D’s Image to 3D produces watertight base meshes in about 90 seconds untextured, with PBR textures in a single pass taking 2 minutes or more, giving you game-ready retail assets without hand-modeling every shelf.
Creating a bodega interior 3D model used to mean days of blocking out shelves, coolers, and counters by hand in Blender or Maya. With Neural4D’s AI generation pipeline, you can turn reference photos into a game-ready corner store environment in a few hours, then spend your time on the details that make a bodega feel lived in.
- What Is a Bodega Interior 3D Model?
- Why AI Changes How You Build a Bodega Interior 3D Model
- How to Build a Bodega Interior 3D Model in 5 Steps
- Where Neural4D Fits in the Retail Environment Pipeline
- Common Mistakes That Make AI Bodega Interiors Look Fake
- Common Questions on Bodega Interior 3D Models
- Start Your Bodega Interior 3D Model Today
What Is a Bodega Interior 3D Model?
First, a definition. The word bodega carries two meanings, and they lead to very different assets. In Spanish, bodega originally meant wine cellar or warehouse, which is why a search for the term returns mostly wine and storage room models on marketplace sites. In New York City, a bodega is the neighborhood corner store: a compact shop squeezed into the ground floor of a brownstone or tenement, selling groceries, hot food, lottery tickets, and phone chargers from shelves that reach the ceiling.
When we talk about a bodega interior 3D model, we mean the New York corner store. It is a distinct design problem because the space is small, dense, and deeply layered: coolers line one wall, a deli counter cuts the room in half, snack racks stand in the middle, and signage stacks up near the ceiling. Recreating that density convincingly is what makes these environments hard to build with traditional tools.
Game studios and indie creators need these interiors for open-world city scenes, narrative games set in New York, and virtual production backdrops. The classic NYC setting has driven demand for recognizable urban interiors across AI 3D game assets workflows, but a genuinely detailed corner store is still rare in most asset packs.
Why AI Changes How You Build a Bodega Interior 3D Model
The traditional path is slow for a reason. A believable bodega interior needs dozens of props: drink coolers, snack gondolas, a deli counter with sneeze guards, newspaper racks, lottery machines, and a wall of backroom shelving. Modeling each piece at production quality in Blender or Maya typically takes a professional environment artist several days, and a solo creator far longer.
Asset packs shortcut that, but at a cost. Pre-made store interiors are generic by design, and they rarely match the specific cramped layout of a corner store. You end up swapping props, retopologizing the ones that do not match your scene scale, and fighting with baked lighting that was never meant for your level. The result is an environment that reads as “convenience store” instead of a specific place.
AI generation sits between the two. Instead of modeling a shelf, you photograph one, drop the photo into Image to 3D, and get clean geometry back in about 90 seconds for an untextured mesh. Repeat for the counter, the coolers, and the shelving units, then assemble the pieces. The time to a blockout drops from days to an afternoon, and the texture pipeline keeps up: when you select standard textures or full PBR maps before generation, the base mesh and texture maps are computed in a single pass, completing the textured GLB in 2 minutes or more depending on complexity.
| Approach | Time to blockout | Customization | Fit for a specific store |
|---|---|---|---|
| Neural4D Image to 3D | Hours | High, you generate each piece from your own references | Excellent, matches your reference store |
| Pre-made asset pack | Minutes to unpack | Limited, swap props within the pack | Generic, rarely matches a real layout |
| Manual modeling in Blender or Maya | Several days | Full control | Complete, but slow |
The density that makes bodegas interesting is exactly what AI handles well. Each generation pass isolates one object and reconstructs its full volume, so a photo of a cluttered counter produces geometry you can separate into the counter, the register, and the racks behind it. Compare that to a stock model where everything is welded into one mesh and you have to cut it apart to reuse pieces.
How to Build a Bodega Interior 3D Model in 5 Steps
Build a bodega interior 3D model in five passes: define the layout, generate the base geometry, assemble the fixtures, light the interior, and export to your engine. Each step builds on the last, so follow them in order and revisit the layout plan whenever a piece does not fit.
Step 1: Define the Bodega Layout and Reference Set
Before generating anything, decide what kind of corner store you are building. Bodegas vary widely: some run on fluorescent lighting with clean cold-case rows, others are dim, cluttered rooms where stock boxes sit in the aisles. The layout you choose determines every asset you will generate.
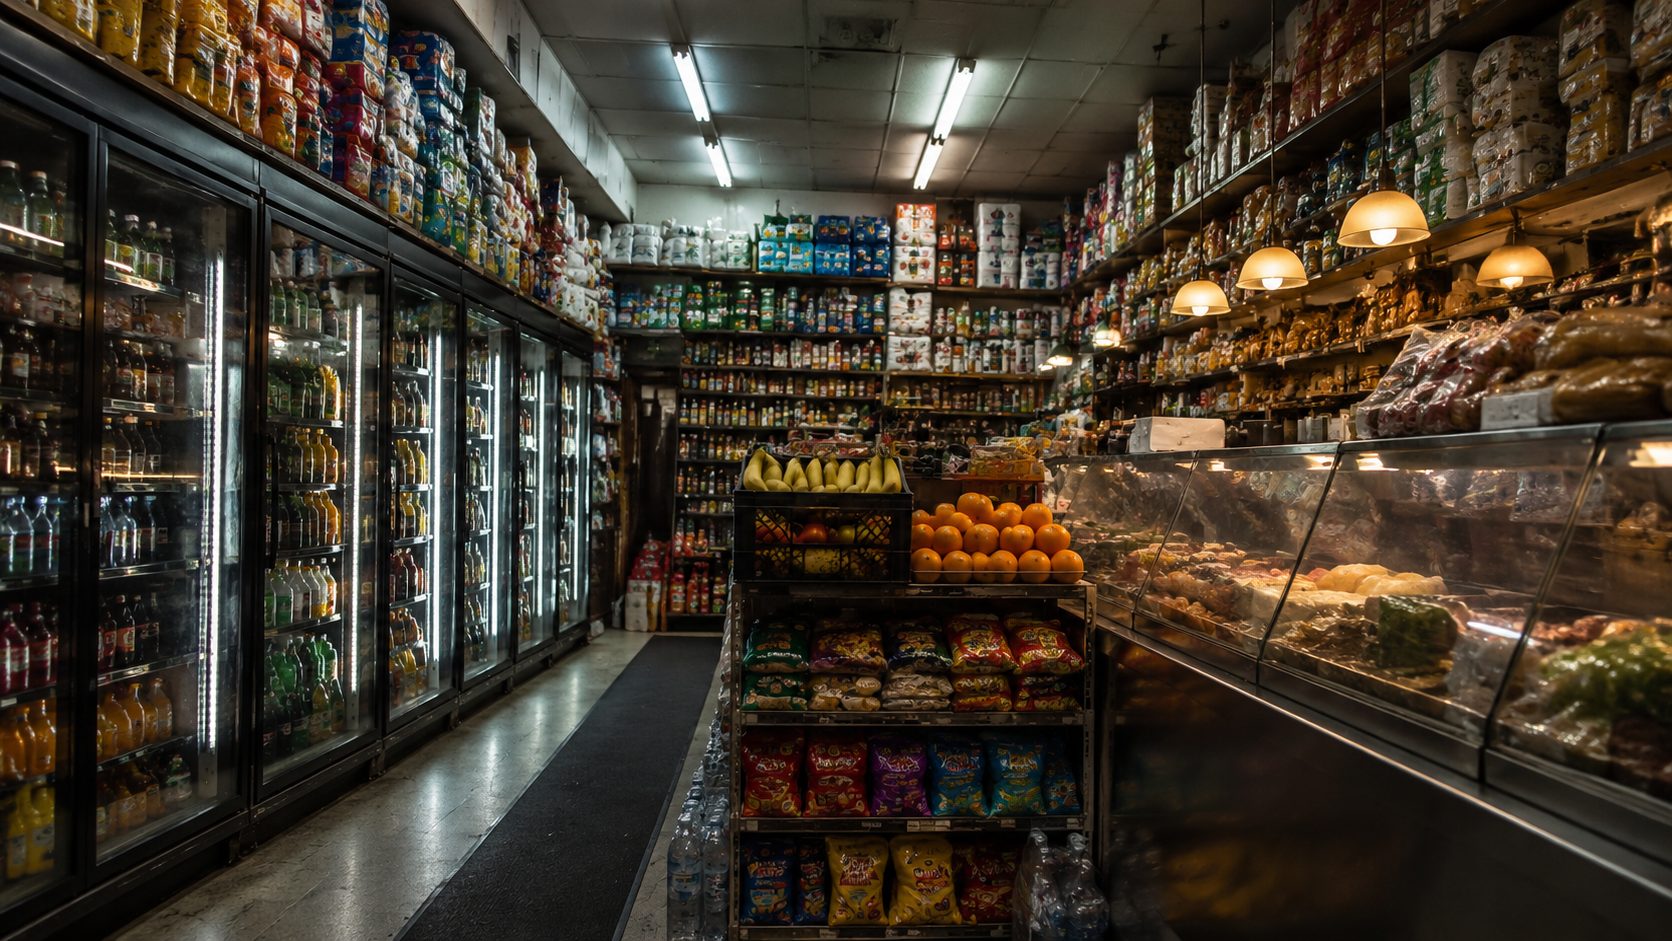
Build a reference set from real corner store photos before generating any bodega interior 3D model geometry
Start with a reference set. Collect six to ten photos of real bodega interiors, ideally from different angles so you capture the counter, the cooler wall, the floor fixtures, and the ceiling treatment separately. The BBC’s reporting on how New York runs on its roughly 7,000 corner stores describes these shops as tight, layered spaces where every surface earns its place from the counter to the back-room shelving. Use that observation as your design brief: if a prop is not doing work in the scene, cut it.
Then sketch a simple floor plan. Mark where the counter runs, where the coolers sit, where the door is, and how wide the aisles are. A bodega is small, typically under 300 square meters, so the plan keeps your scene scale honest and stops the interior from feeling like a supermarket in disguise. This floor plan is your master layout, and every generated piece should slot into it.
Reference quality matters: For Image to 3D inputs, use photos with even lighting and minimal occlusion. A single shelf photographed straight-on with nothing overlapping it produces much cleaner geometry than a wide shot of a cluttered aisle. You can always composite the pieces later.
Step 2: Generate the Base Geometry with Image to 3D
This is where the bodega interior 3D model starts to exist as geometry. Open Neural4D’s Image to 3D studio and upload your reference photos one at a time. A clean shelf photo becomes a shelf mesh, a photo of the deli counter becomes the counter base, and a cooler photo becomes the cold-case unit.
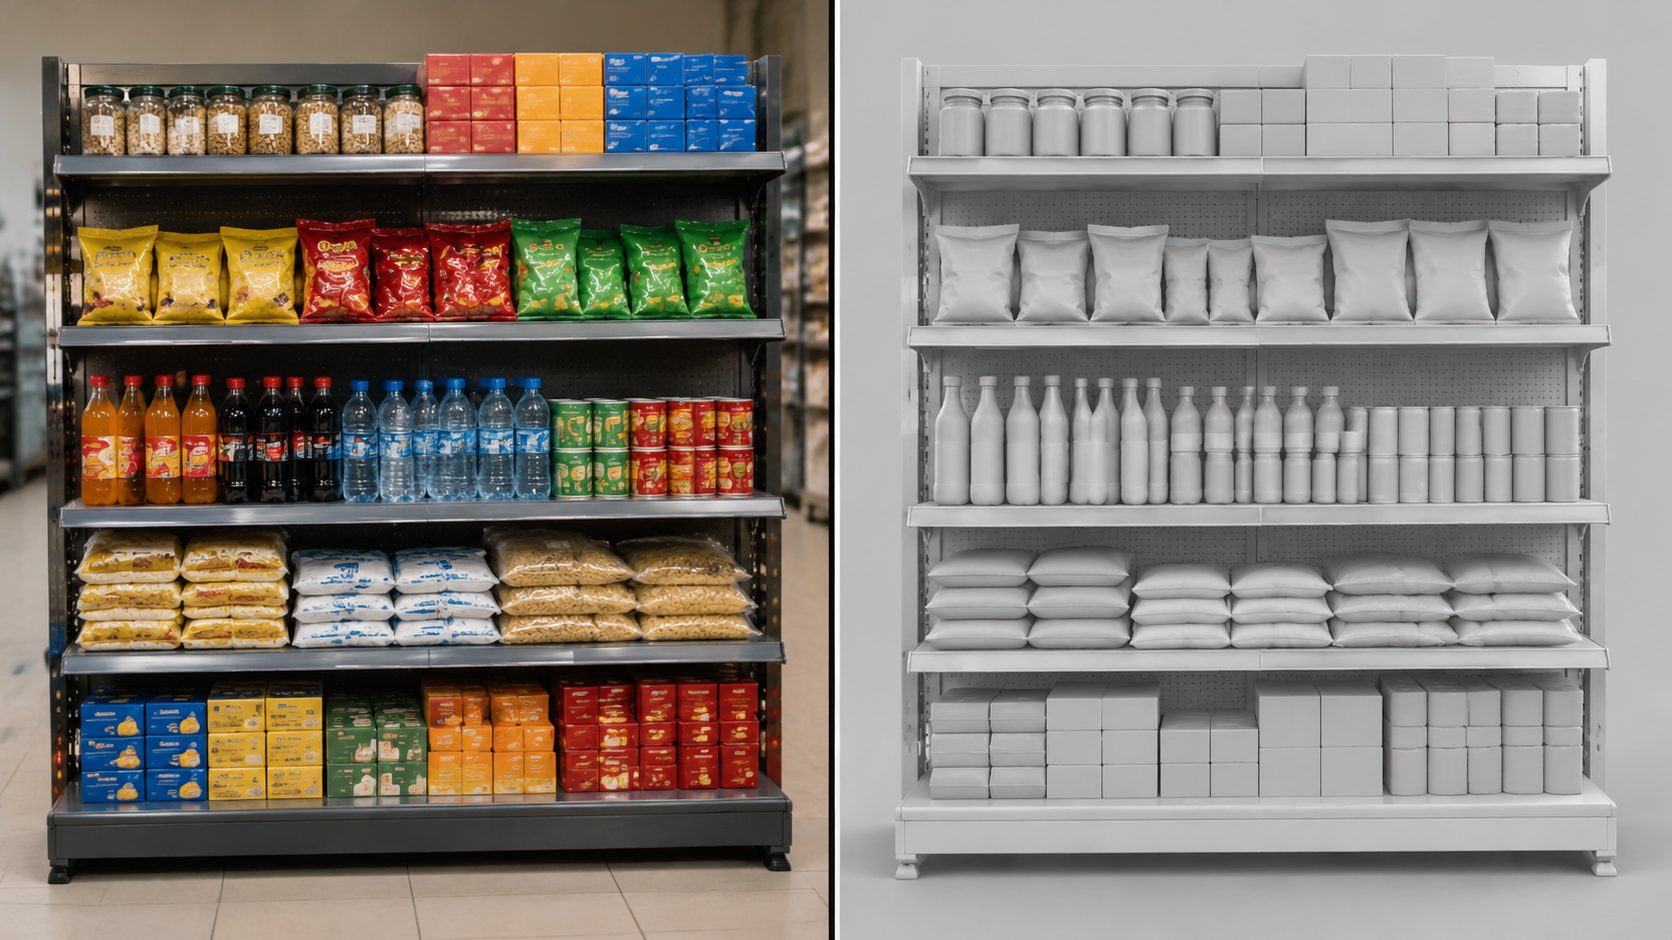
The Image to 3D workflow turns a single bodega shelf photo into a watertight base mesh
The generation loop is straightforward:
Upload and generate. Drag a reference image into the studio and hit generate. Untextured base meshes return in about 90 seconds, which is the right setting for blocking out the whole store. If the result is close but not right, use Regenerate for a fresh inference pass on the same input before moving to a new photo.
Choose texture settings before you generate. Select whether you want an untextured mesh or standard textures with full PBR maps up front. When PBR is selected, the base mesh and all texture maps are computed together in one inference pass, with no separate texture step to trigger afterward.
Review each piece in the viewport. Rotate the model and check the back faces. A single photo gives the AI one viewpoint, so confirm the side and back geometry look plausible before you assemble the scene.
For larger fixtures, generate the sections separately. A full cooler wall is too much for one pass and it returns a single fused mesh you cannot separate cleanly. Instead, generate one cooler unit, one shelf module, and one corner of the counter, then instance and arrange them in your scene. This modular approach also means consistent topology across pieces, so they fit together predictably when you assemble them.
Step 3: Assemble the Shelving, Coolers, and Counter
With the base geometry ready, you assemble the interior according to the floor plan from Step 1. Place the cooler wall first because it is the biggest single element, then the counter that divides the space, then the floor gondolas and snack racks in the middle aisle.
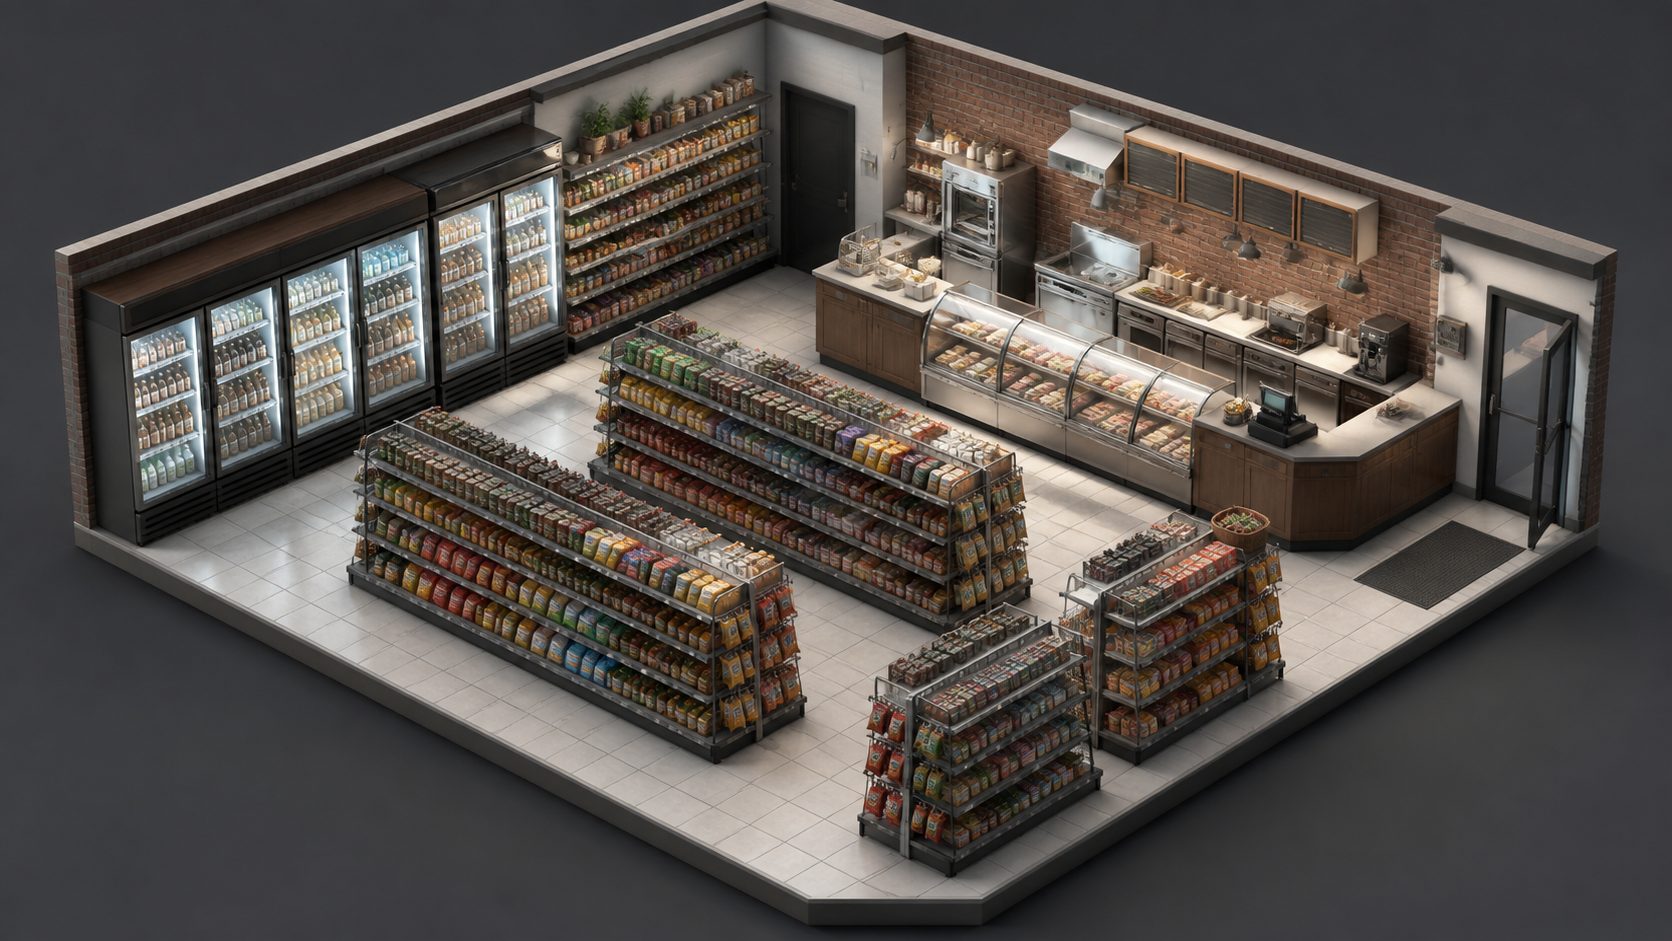
Assemble generated modules into a full bodega interior 3D model with consistent scale and PBR materials
Resize and align each piece against the floor plan. AI-generated assets often land at a slightly different scale from each other, so match the dimensions of the cooler against the shelf and adjust before you start placing props. Keep pivots at the base of each object so snapping to the floor is clean.
This is also the moment to decide how much of the store is modular versus fixed. For a game level, modular shelving that you can instance across a block of stores is worth the extra setup. For a single hero environment, weld the pieces into one scene and accept that it stays unique. The hybrid approach works best in open-world titles: build one fully dressed bodega interior as a hero asset, then reuse the bare shelving modules for every other corner store in the district.
When you need to refine a piece after assembly, Neural4D’s AI Texture tool applies new materials to the models you generated in 3D Studio, and AI Retopo cleans up geometry you want to reuse elsewhere: open the asset on the generation page and click Remesh. Both operate on N4D-generated models, not on meshes imported from other tools. The consistent manifold output from generation means these passes run without the hole-patching that older AI generators required.
Step 4: Light the Interior for Day and Night
Lighting is what sells a bodega interior 3D model. The same geometry reads completely differently under a bright morning window versus a dim night scene with the cooler glow as the only fill. Plan for both because corner store environments appear in every time of day.
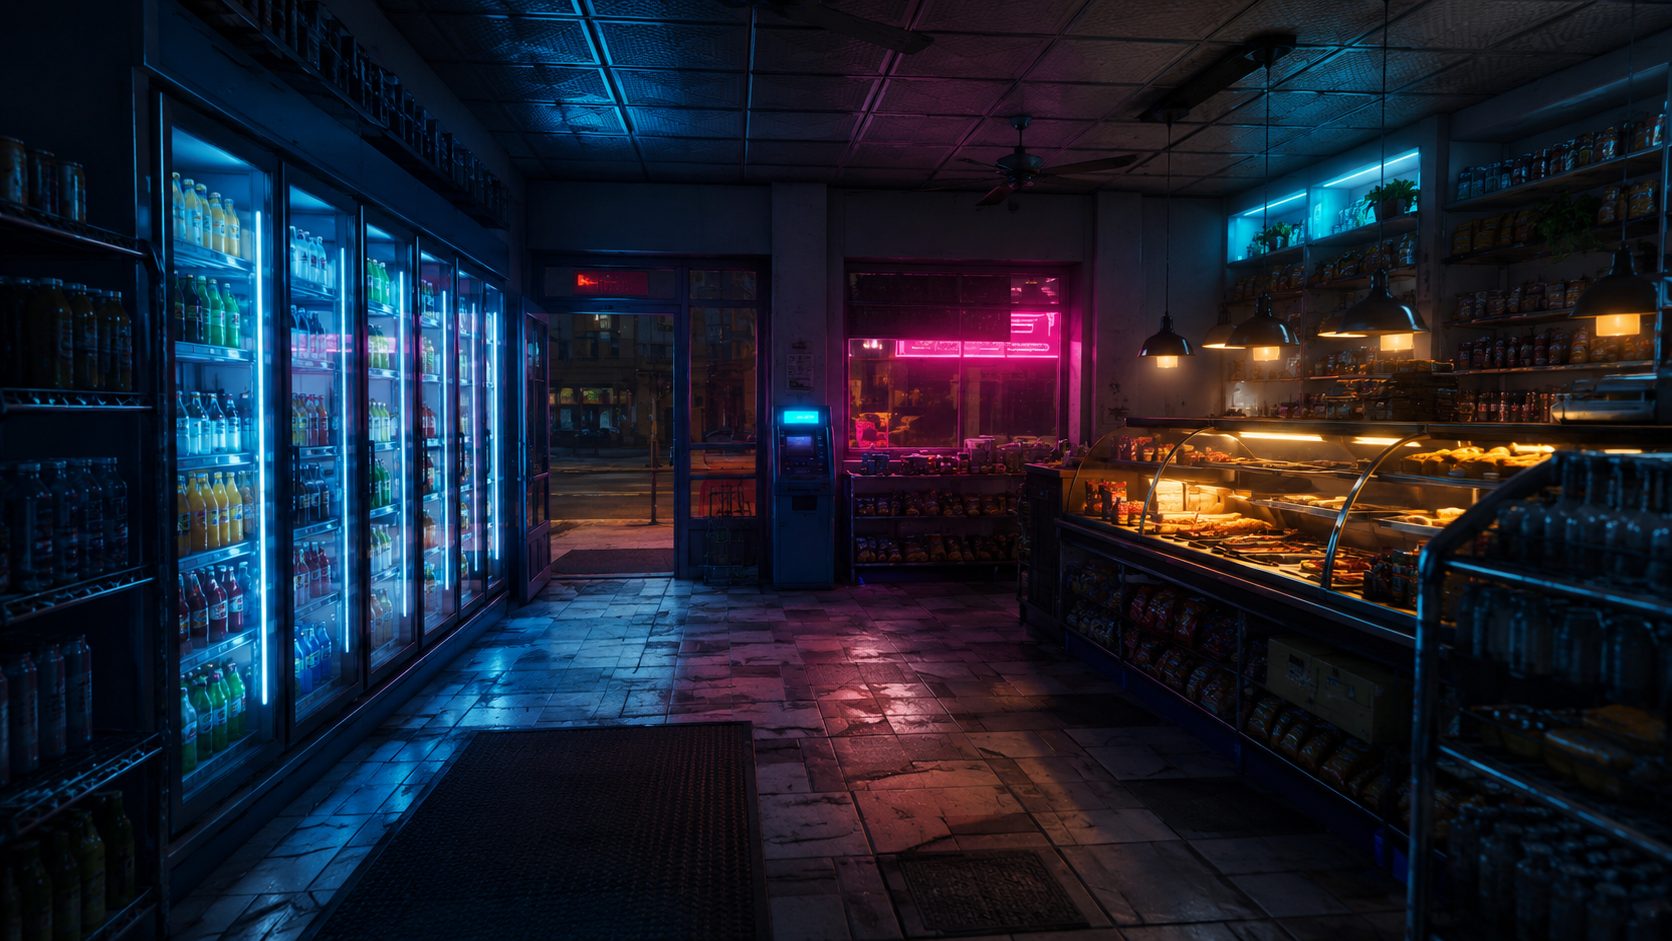
Night lighting turns the same bodega geometry into a moody, recognizable New York scene
For daytime, use a single strong directional source for the storefront window plus soft bounce from the ceiling. Real bodegas run on fluorescent tubes and mixed signage, so layer a cool white key with warm accent strips near the counter. Keep the exposure controlled so the window does not blow out the shelves in front of it.
For night scenes, the drink coolers become the primary light source. Emissive panels in the cold cases spill blue-white light across the floor, the deli counter’s heat lamps add a warm wedge, and neon signage bounces color off the ceiling. If your engine supports it, bake this lighting for static geometry and keep only the emissives and signage dynamic.
Because Neural4D generates PBR texture maps with separate albedo, normal, roughness, and metallic channels, the surfaces respond correctly under both setups. A roughened vinyl floor and the glossy cooler doors read differently in the same scene, which is what makes the interior feel real rather than flat.
Step 5: Export and Import into Your Engine
Once the scene is assembled and lit, export and import it into your target engine. Neural4D exports GLB, FBX, OBJ, and STL, so the models drop directly into Unity, Unreal Engine 5, Blender, or any DCC tool without a conversion step.
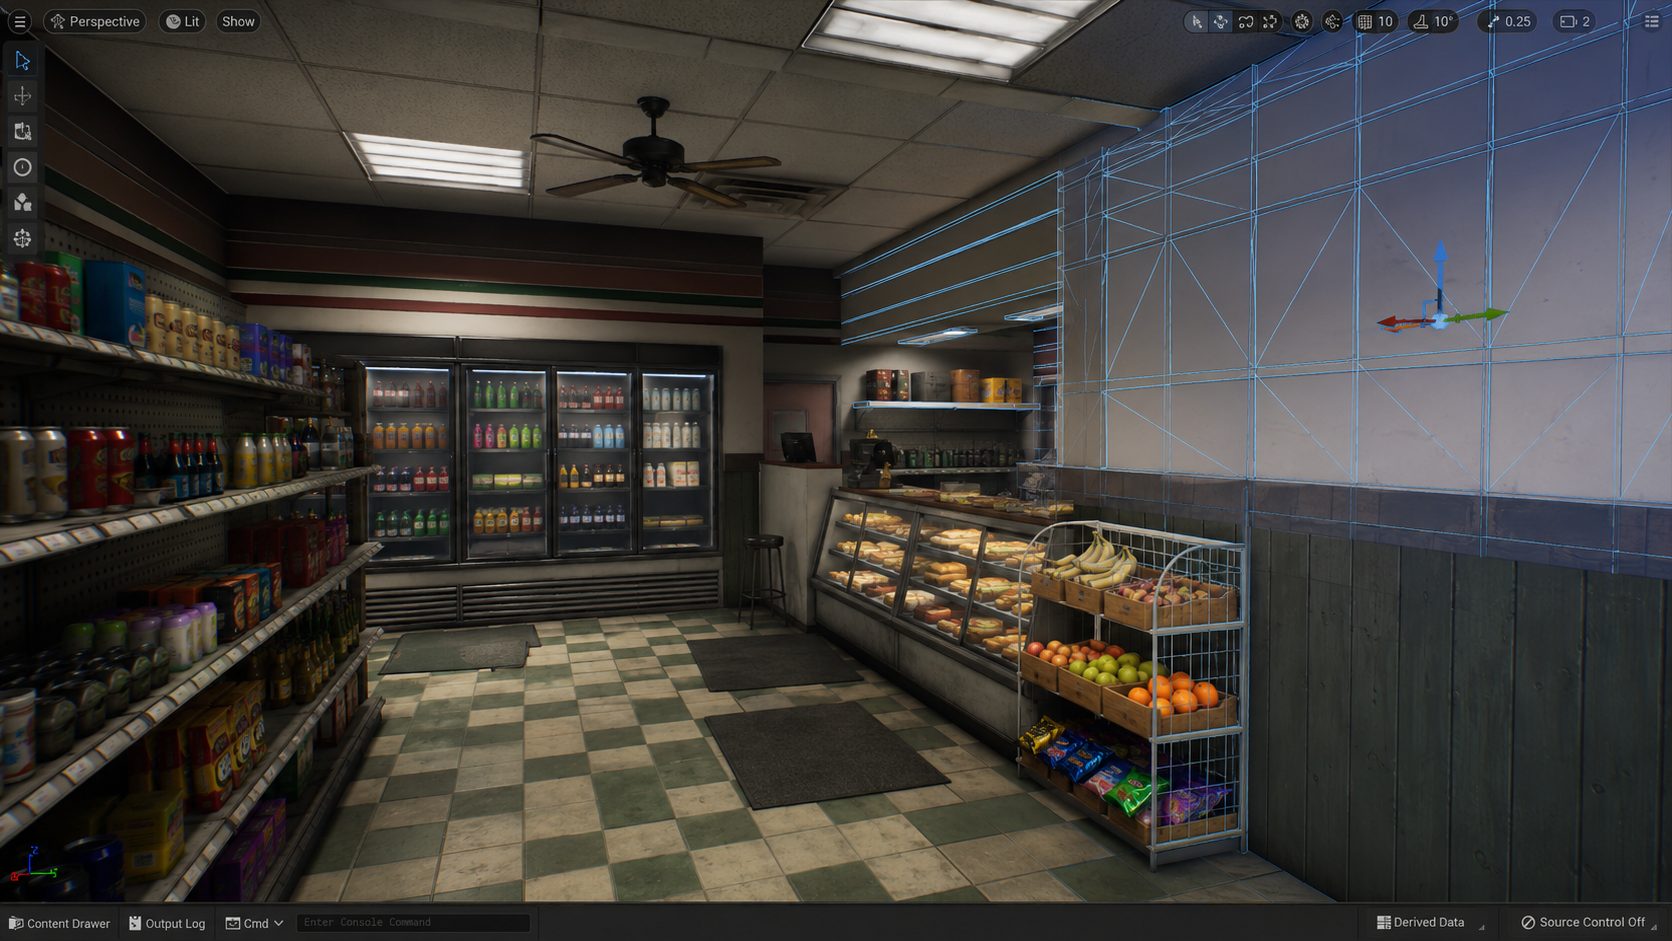
The finished bodega interior 3D model imports into the engine with clean topology and texture maps intact
The GLB export carries the embedded PBR maps, which map directly onto the material system in most engines with minimal adjustment. If you are shipping a larger environment, review the polygon count on your hero pieces and generate LODs for the instanced shelving. The base mesh topology is clean enough that automatic LOD generation in Unity and Unreal produces good results without a manual retopology pass.
For scenes built in Blender first, export to FBX and check the axis and scale conventions when you import to your engine. For creating 3D models for Unreal Engine 5, the GLB path is the shortest because textures and transforms come along in one file.
Block Out Your Bodega in an Afternoon
Generate the base geometry for every shelf, cooler, and counter in your scene with Neural4D.
Free plan includes 50 Power per week to test your first assets
Where Neural4D Fits in the Retail Environment Pipeline
Neural4D is not a replacement for environment artists. It is the fast path to base geometry that artists then dress into a finished scene. For a bodega interior 3D model, that means the tool does the repetitive work: shelf units, cooler cases, counters, and crates that would otherwise eat days of manual modeling. You keep the creative decisions, layout, lighting, storytelling, and prop placement.
The architecture behind the generation matters for this use case. The Direct3D-S2 engine processes the full volumetric space of an input image rather than estimating depth from a flat projection, which is why the output is a watertight mesh with clean topology instead of the triangle soup that earlier AI 3D tools produced. For a retail environment you will import into a game engine, that means the mesh passes standard import validation checks without manual hole patching.
The same pipeline scales across your whole project. A shelf you generate for the bodega works in a deli, a pharmacy, or any other small retail space, and the consistent topology across generations means your AI 3D for architecture and environment assets stay compatible. For teams that need a repeatable storefront system, this consistency is the difference between a one-off prop and a reusable kit.
Common Mistakes That Make AI Bodega Interiors Look Fake
AI-generated retail interiors fail in predictable ways, and most of them are avoidable with a few adjustments.
Generating the whole store in one pass. One image of a full interior produces a single fused mesh with no separation between fixtures. Generate objects individually and assemble them, otherwise you cannot reuse or animate anything.
Skipping scale matching. A cooler generated from a wide photo can come back twice the size of the shelf generated from a close-up. Set a reference dimension in the scene and scale every piece against it before placing props.
Over-trusting the texture pass. PBR maps from a single pass are a strong starting point, not the final surface. Stained tile, worn shelving edges, and signage layers are what make a corner store feel lived in. Plan for a pass of texture detail work on top of the generated maps.
Lighting everything with one mood. If the scene is only lit for day or only for night, the environment reads as a set dressing rather than a place. The same geometry should survive a daytime and a night pass because real bodegas function at all hours.
Ignoring the second floor. Many bodegas have a cramped apartment above the store, reached by a narrow stairwell. Even a hint of it, a door, a stair landing, a transom window, adds enormous depth to the environment and separates a good interior from a generic shop shell.
Common Questions on Bodega Interior 3D Models
Q: How do you make a bodega interior 3D model?
You start with a reference set and a floor plan, generate each fixture separately with an Image to 3D tool, assemble the pieces in a scene at matching scale, light the interior, and export to your engine. Generating objects individually instead of in one pass is the key to a modular, reusable result.
Q: Can I use AI-generated bodega interiors in commercial games?
Yes, with paid Neural4D subscription plans, generated assets carry full commercial use rights. Free plan outputs are marked Trial and intended for testing only. Check the terms for your plan before shipping a commercial title.
Q: What file formats work best for game-ready retail environments?
GLB is the shortest path into Unity and Unreal because it carries embedded PBR maps and transforms in one file. FBX is the safer choice when you need to pass through Blender for further work first, and OBJ works for geometry-only pipelines.
Q: How is a bodega different from a convenience store in 3D design?
A bodega is denser and more layered than a typical convenience store. It is a small, tight shop where the counter, cooler wall, and signage stack into every inch of the space, and it is often squeezed into the ground floor of a residential building. Design it as a specific, lived-in place rather than a generic shop shell.
Q: Why do AI-generated retail interiors look plastic and how do I fix it?
Generated PBR maps tend to come out too clean, and uniform lighting hides the surface detail. Fix it by adding worn textures, stained floors, signage layers, and varied light sources that the clean base maps are missing.
Q: Can I recreate a real NYC bodega with AI without legal issues?
Generating a generic corner store inspired by bodega layouts is fine. Copying a specific store’s interior, branded signage, or identifiable details can raise trademark and privacy concerns, so keep real-store references as design inspiration rather than reproducing them one to one in a commercial project.
Start Your Bodega Interior 3D Model Today
Building a bodega interior 3D model no longer requires a week of manual blocking. Define the layout, generate each fixture from a reference photo, assemble and light the scene, and export straight into your engine. The pieces stay modular, the topology stays clean, and the character comes from the layout and lighting decisions only you can make.
For a broader look at how this workflow scales beyond retail, the image to 3D model feature covers the full generation pipeline, and our guide to 3D modeling for interior design walks through applying the same approach to residential and commercial spaces. If you are building city scenes, our furniture image to 3D guide shows the same modular technique applied to individual props, and the alien ship interior 3D model workflow demonstrates it for sci-fi environments.
Bring Your Corner Store to Life
Turn one shelf photo into a full game-ready interior, then dress it your way.
Exports to GLB, FBX, OBJ, and STL for Unity, Unreal, and Blender