How to Integrate a 3D Model API into My Project
Quick Summary
An image to 3D model API converts a single photograph into textured, engine-ready 3D geometry through a REST endpoint.
- A complete integration uses four calls: submit the image, poll job progress, retrieve the model URL, and convert the asset to a target format.
- The image to 3D endpoint accepts any
image/*upload up to 50 MB and returns up to four model variants per request. - Export targets cover GLB, FBX, OBJ, STL, USDZ, and BLEND, which maps to web viewers, game engines, 3D printing, and AR runtimes.
- Neural4D generates watertight manifold geometry at 2048 cubed resolution using its Direct3D-S2 architecture, published at NeurIPS 2025.
Integrating a 3D model generator into an existing codebase takes four HTTP calls and one asynchronous polling loop. This walkthrough covers how to integrate a 3D model API into my project with the documented Neural4D endpoints: authentication, request submission, progress polling, asset retrieval, and format conversion, including the input limits and error codes that decide whether the integration holds up in production.
- Part 1. What an Image to 3D API Adds to Your Project
- Part 2. Prerequisites Before the First API Call
- Part 3. How to Integrate a 3D Model API into My Project: Six Steps
- Part 4. Export Formats and How to Choose One
- Part 5. Mesh Density and Topology Controls
- Part 6. Failure Modes, Error Codes, and Retry Strategy
- Part 7. Conclusion
- Part 8. Frequently Asked Questions
Part 1. What an Image to 3D API Adds to Your Project
A 3D model API replaces the manual modeling step in a content pipeline with an HTTP request. You send a photograph, the service reconstructs geometry and texture, and your application receives a downloadable asset file. The engineering value is not the model itself. It is that asset creation becomes a queueable, retryable, versionable step that your existing job infrastructure already knows how to handle.
Three technical properties separate a production API from a demo endpoint, and all three are worth verifying before you commit to a provider.
Native geometry rather than view synthesis. Early 3D generators infer the visible surface of an object and estimate what the hidden side looks like. A volumetric approach reconstructs the object in three dimensions directly, so the result is a closed solid rather than a set of shell surfaces. Neural4D builds on Direct3D-S2, a sparse volume architecture that represents the shape as a signed distance field and diffuses it at high spatial resolution. The details are in the Direct3D-S2 paper.
Watertight manifold output. A watertight manifold is a mesh with no holes and no self-intersecting faces, where every edge is shared by exactly two faces. This property is what makes a generated asset usable for 3D printing and physics simulation without a repair pass. Meshes that fail this test produce slicer errors and unstable collision behavior.
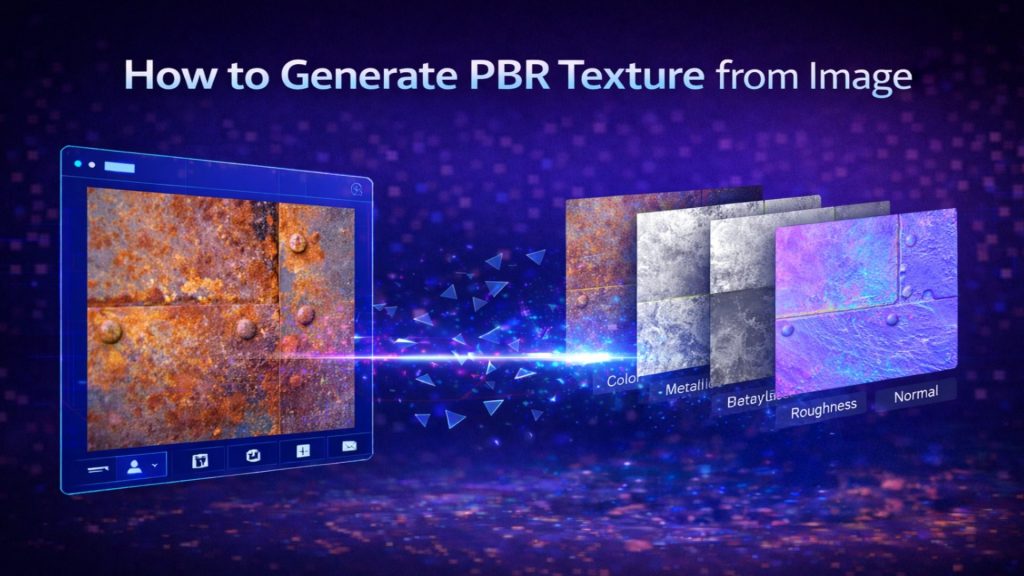
Physically based rendering materials. PBR, or physically based rendering, describes surface appearance through parameters like albedo, roughness, and metalness rather than baked-in lighting. Imported into Unreal Engine, Unity, or a web viewer, a PBR asset reacts to the scene lighting instead of carrying the lighting of the original photograph.
For teams evaluating providers, the Neural4D image to 3D generation endpoints document the full request and response contract, including the sparse volumetric parameters that control output density.
Part 2. Prerequisites Before the First API Call
Four things need to be in place before the first request returns anything useful: a token, an image that satisfies the documented limits, enough credits for the job, and an HTTP client that can send multipart form data.
Authentication
Every Neural4D call carries a bearer token in the Authorization header. You generate the token from your Neural4D account page. The API reference states the requirement plainly: the header must be formatted as Authorization: Bearer $YOUR_API_KEY. Store the token in your secret manager rather than in source control, and read it at runtime from an environment variable.
“must use an image/* content type and must not exceed 50 MB.”
Neural4D API Reference
Generate model with image, docs.neural4d.com
Input image requirements
| Requirement | Documented value |
|---|---|
| Accepted formats | JPG, JPEG, PNG, WEBP |
| Content type | image/* |
| Maximum file size | 50 MB on the image to 3D endpoint |
| Documented resolution range | 256 x 256 to 6048 x 8064 pixels |
| Models returned per request | 1 to 4, set with modelCount |
Images that exceed the size limit return an HTTP 400 with a per-field error array, not a silent failure. Validate dimensions and byte length client-side before upload so a bad batch does not consume worker time.
Credits and plan requirements
Generation consumes credits. The free tier provides 50 credits per week, which covers evaluation traffic but not a production catalog, so size the plan against your batch volume before you wire the endpoint into your project staging environment. Format conversion is a separate billable operation that consumes 10 credits per model, which matters when your pipeline converts every asset to FBX after generation.
Part 3. How to Integrate a 3D Model API into My Project: Six Steps
The sequence below is the documented request flow. Each step names the endpoint, the fields it accepts, and the value it returns to the next step.
Step 1. Obtain and store the bearer token
Generate the token from the Neural4D account page and export it as an environment variable. Nothing else in the integration changes if the token rotates, provided the value is read at request time.
export NEURAL4D_API_KEY="your_token_here"Step 2. Set the authentication header
Every endpoint in the flow uses the same header pair. Set it once in your HTTP client rather than per call.
Authorization: Bearer $NEURAL4D_API_KEY
Content-Type: application/json
Step 3. Submit the generation request
The image to 3D endpoint accepts multipart/form-data. The only required field is the image; mesh_quality defaults to high. The optional fields control variant count, texture output, and mesh density.
curl --request POST \
  --url https://alb.neural4d.com:3000/api/generateModelWithImage \
  --header "Authorization: Bearer $NEURAL4D_API_KEY" \
  --form "image=@product-photo.jpg" \
  --form "mesh_quality=high" \
  --form "modelCount=1" \
  --form "faceNum=1000000"
The response returns a uuids array with one entry per generated variant, plus pointsDeducted when the credit value is available. Persist the UUID immediately. It is the only handle to the job, and it is what every subsequent call takes as input.
{
  "type": "sys",
  "message": "Generating",
  "uuids": ["f47ac10b-58cc-4372-a567-0e02b2c3d479"],
  "uploadedImageUrl": "https://...",
  "pointsDeducted": 35
}
Step 4. Poll the job or retrieve the result
Generation is asynchronous. Two endpoints report state, and they answer different questions. queryJobProgress returns a completion percentage for a progress bar. retrieveModel returns the finished asset URL and is the call your worker loop should depend on.
import requests

BASE = "https://alb.neural4d.com:3000/api"
HEADERS = {"Authorization": f"Bearer {API_KEY}"}

progress = requests.post(
    f"{BASE}/queryJobProgress",
    headers=HEADERS,
    json={"uuid": uuid},
    timeout=30,
).json()["progress"]

result = requests.post(
    f"{BASE}/retrieveModel",
    headers=HEADERS,
    json={"uuid": uuid},
    timeout=30,
).json()

if result["codeStatus"] == 0:
    model_url = result["modelUrl"]
The codeStatus field is the control signal. A value of 1 means the job is still generating, 0 means complete, and the negative values identify the specific failure described in Part 6. Treat 1 as a poll-again signal and every negative value as terminal for that UUID.
Poll on a fixed interval with a bounded attempt count. A 90 second base mesh job does not need a one second poll loop, and a tight loop against a metered API wastes rate limit budget that a retry needs later.

One photograph travels through four calls: submit the image, poll the progress loop, receive the generated model, then download the asset.
Step 5. Download the asset
When codeStatus returns 0, modelUrl holds a signed download link to the generated model, and imageUrl holds a preview render. Stream the file to your own object storage rather than linking the signed URL from your frontend. Signed links expire, and a catalog that depends on them breaks silently when they do.
with requests.get(model_url, stream=True, timeout=300) as response:
    response.raise_for_status()
    with open(f"{uuid}.glb", "wb") as handle:
        for chunk in response.iter_content(chunk_size=1024 * 256):
            handle.write(chunk)
Step 6. Convert to the target format
The default output is GLB. When your runtime needs FBX, OBJ, STL, USDZ, or BLEND, call the conversion endpoint with the same UUID. This operation consumes 10 credits per model and returns its own status field, statusType, which uses the same 0 and -1 convention as the retrieval call.
converted = requests.post(
    f"{BASE}/convertToFormat",
    headers=HEADERS,
    json={"uuid": uuid, "modelType": "fbx", "modelSize": 2},
    timeout=120,
).json()

if converted["statusType"] == 0:
    fbx_url = converted["modelUrl"]
Conversion is a separate call rather than a request parameter, which is useful in practice. You generate once, store the GLB as the canonical asset, and derive engine-specific formats on demand instead of paying to store five copies of the same model.
For pipelines that process more than a few hundred assets, generate in batches and treat each UUID as an independent unit of work. The Python batch generation workflow covers queueing and concurrency at that scale, and driving asset generation from Claude Code covers the agent-assisted variant of the same pipeline.
Test the Output Before You Commit to the Integration
Upload one product photograph and inspect the mesh density, texture quality, and export formats your pipeline receives.
Generate a 3D Model from an Image
Free users get 50 credits per week. No credit card required.
Part 4. Export Formats and How to Choose One
Format choice is a pipeline decision, not a preference. Each target below maps to a specific runtime constraint.
| Format | Choose it when | Typical target |
|---|---|---|
| GLB | You need geometry, materials, and textures in one self-contained binary file | Web viewers, Three.js, model-viewer, AR Quick Look fallback |
| FBX | Your artists will edit, rig, or animate the asset further | Unreal Engine, Unity, Maya, Blender interchange |
| OBJ | You need a widely readable mesh with a separate material file | Legacy DCC tools, quad topology handoff |
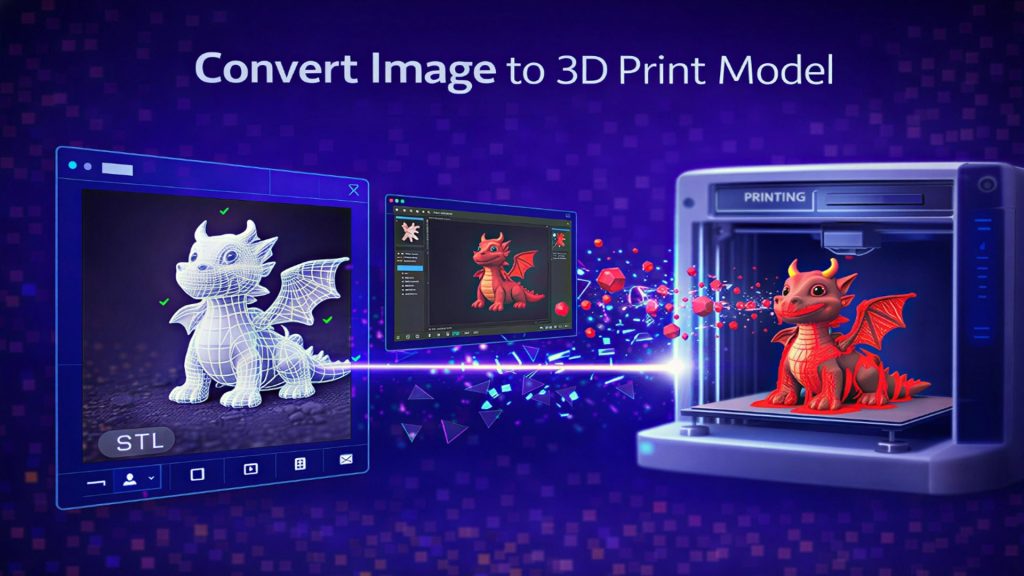
| STL | The asset is destined for additive manufacturing | Slicers and 3D printing |
| USDZ | You are shipping augmented reality on Apple platforms | iOS and iPadOS AR Quick Look |
| BLEND | Your team works inside Blender and wants native scene files | Blender production files |
GLB is the right default for a web pipeline because the glTF specification bundles the mesh, the material definitions, and the texture images into a single file that a browser fetches in one request. The format is maintained as an open standard by the Khronos Group, which publishes the glTF specification. For scene assembly that mixes generated assets with authored ones, OpenUSD provides the composition layer, documented at openusd.org.

One generated asset branches into six export targets. The canonical GLB is stored once, and each runtime-specific format is derived from it on demand.
Part 5. Mesh Density and Topology Controls
Mesh density is the parameter that most often decides whether a generated asset ships or gets discarded. A dense mesh looks correct in a thumbnail and destroys frame rate on a mobile device.
Quality tiers and face count
The endpoint exposes density through two fields that work together. mesh_quality selects the tier, and faceNum sets the target face count inside that tier’s band.
| mesh_quality | faceNum range | Default | Fit |
|---|---|---|---|
standard |
100,000 to 500,000 | 500,000 | Real-time and mobile budgets |
high |
500,000 to 1,000,000 | 1,000,000 | Hero assets and close-up rendering |
extra_high |
500,000 to 1,000,000 | 1,000,000 | Maximum geometric fidelity |
The response echoes the normalized configuration in generationConfig.faceNum, including the default, min, max, and the value that was applied. Log that block. When an asset arrives denser than expected, the echoed value tells you whether your request was adjusted or your input was misread.
Topology: quad versus triangle
Quad topology builds a mesh from four-sided faces. Triangle topology builds it from three-sided faces. Quads deform predictably under animation and are the preferred starting point for assets that will be rigged; triangles preserve fine surface detail at the same face count. For printed output where the mesh is never animated, triangles are the more efficient choice.
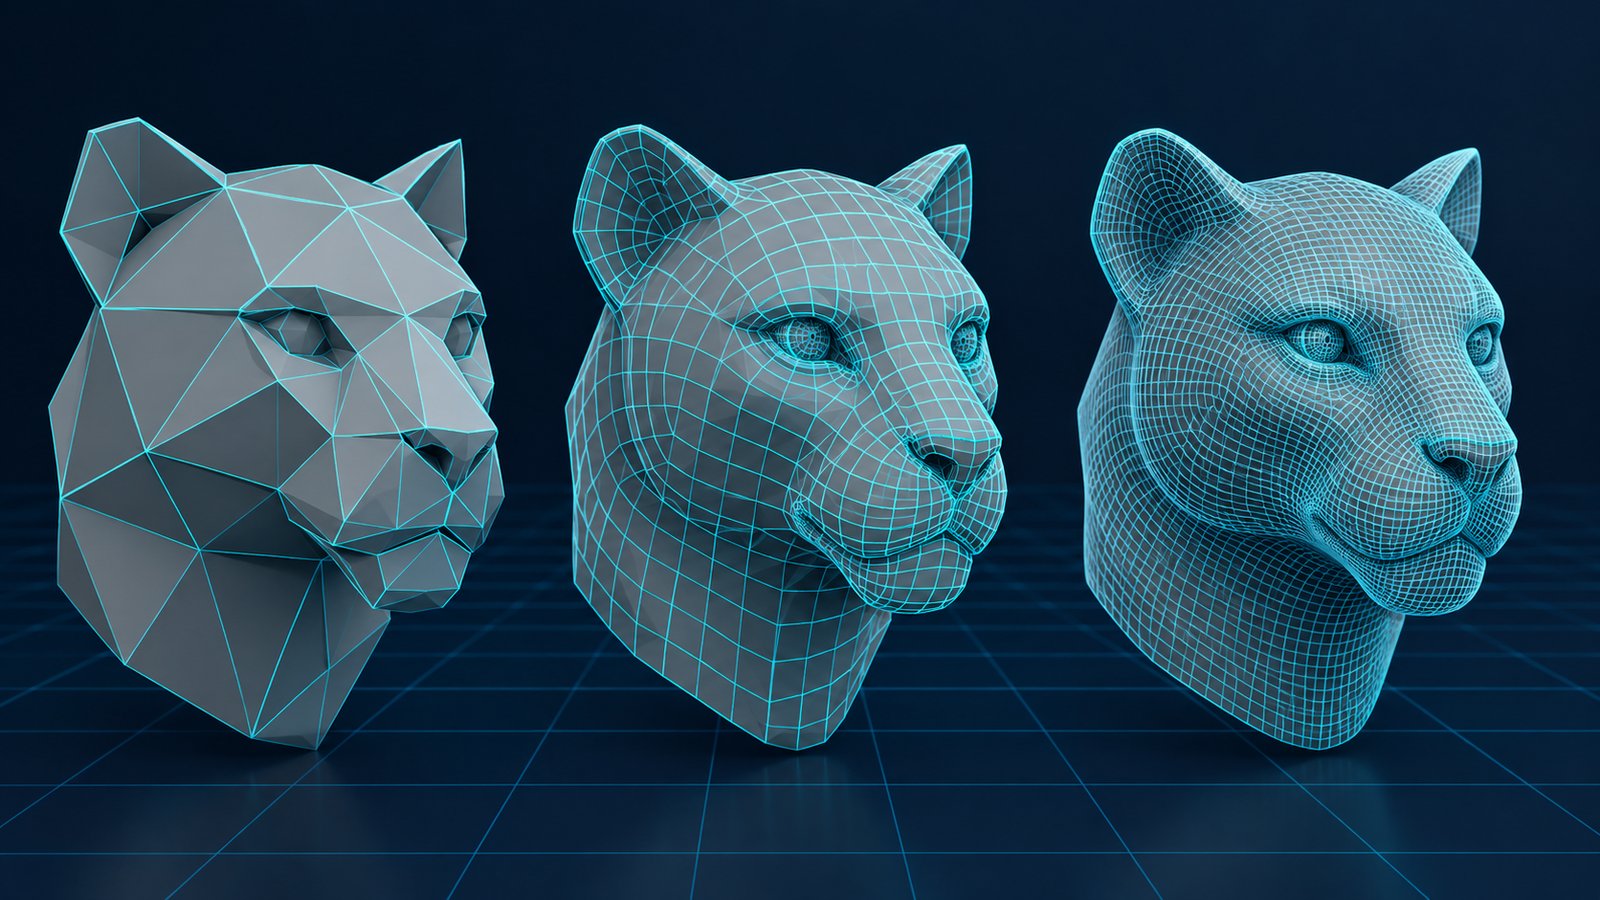
The same model at three density tiers. The faceted low-poly tier suits real-time budgets, the quad tier rigs cleanly, and the dense tier is for hero assets.
Texture and mesh-only modes
Two flags change what the job produces. onlyGenerateMesh skips texture and PBR generation and returns untextured geometry, which is what you want when a downstream process applies its own materials. disablePbr turns off the PBR texture pass while keeping the base texture. Both reduce job time and credit cost, and both are worth using during integration testing when you are validating the request contract rather than the visual output.
Generation time
Plan for two different numbers. An untextured base mesh returns in roughly 90 seconds. PBR texture generation runs as a separate pass, so a full textured GLB takes two minutes or more. Size your HTTP timeouts and your queue visibility timeout against the higher figure, not the lower one.
Part 6. Failure Modes, Error Codes, and Retry Strategy
Integrating an endpoint is only as reliable as its failure handling. These are the documented states a production pipeline encounters, and the correct response to each.
Job-level status codes
| Field | Value | Meaning | Correct response |
|---|---|---|---|
codeStatus |
0 |
Generation complete | Read modelUrl and download |
1 |
Still generating | Poll again after the interval | |
-1 |
Token invalid or expired | Refresh credentials, then retry the job | |
-2 |
UUID does not exist | Terminal. Do not retry with this UUID | |
-3 |
Generation failed | Resubmit the job with a corrected input image |
HTTP-level errors
| Status | Cause | Correct response |
|---|---|---|
| 400 | Invalid parameter or unreadable image file | Read the errors array and fix the named field |
| 401 | Authentication failed | Regenerate the token |
| 402 | Account, IP, or credit restriction | Check plan status and remaining credits |
| 429 | Rate limit exceeded | Back off and retry with jitter |
| 500 | Generation or internal service unavailable | Retry the request; the job did not start |
Content moderation rejections
A rejected image returns HTTP 200 with a limitType field rather than an error status. The documented values are 3 and 4. Because the transport succeeded, a naive client treats moderation rejection as a completed job and writes an empty asset record. Branch on the presence of limitType before you read uuids.
Retry strategy
Separate retryable failures from terminal ones. HTTP 429 and 500 are retryable with exponential backoff and jitter. codeStatus -1 is retryable after a credential refresh. codeStatus -2 and -3 and every moderation rejection are terminal for that job and require a new request with different input.
Cap total attempts per asset and route exhausted jobs to a dead letter queue with the UUID, the original image reference, and the last status code attached. Without that record, a failed catalog item is indistinguishable from one that was never submitted.
Part 7. Conclusion
The integration surface is small: one upload call, one polling loop, one retrieval call, and one conversion call. What determines success in production is everything around those four calls. Validate the image against the documented limits before upload. Log the echoed generationConfig so density surprises are explainable. Branch on limitType so moderation rejections never become empty asset records. Size timeouts against the full textured output rather than the base mesh, and separate retryable status codes from terminal ones so your dead letter queue stays meaningful.
Handled that way, how to integrate a 3D model API into my project stops being a one-time task and becomes a durable step in your content pipeline, one that scales from a pilot batch to a full product catalog without changing shape.
Move from a Prototype Call to a Production Pipeline
Generate assets at scale with concurrent jobs, batch processing, and export formats that drop straight into your engine.
Free users get 50 credits per week. No credit card required.
Part 8. Frequently Asked Questions
The endpoint accepts JPG, JPEG, PNG, and WEBP uploads with an image/* content type, up to 50 MB. The documented resolution range runs from 256 x 256 to 6048 x 8064 pixels. Validate both values client-side, because an oversized file returns HTTP 400 with a per-field error array rather than a partial success.
The modelCount field controls this and accepts values from 1 to 4. Each variant gets its own UUID in the response, so a request for four variants creates four independent jobs to poll and retrieve. Set modelCount to 1 while you validate the integration contract, then raise it when you want multiple interpretations of the same photograph.
Yes. Format conversion is a separate billable operation that consumes 10 credits per model and calls a different endpoint than generation. It accepts GLB, FBX, OBJ, STL, USDZ, and BLEND as targets. Store the GLB as your canonical asset and convert on demand so you pay the conversion cost once per derived format instead of storing every variant.
Set mesh_quality to standard for real-time budgets and pass a faceNum within the 100,000 to 500,000 band. Higher tiers allow up to 1,000,000 faces. The response echoes the applied value in generationConfig.faceNum, so log it to confirm the density your pipeline actually received.
The retrieval call returns codeStatus -3 for a generation failure, -2 when the UUID does not exist, and -1 when the token is invalid or expired. Only -1 is recoverable without a new job. Resubmit -3 with a corrected image, and treat -2 as terminal. Every failed asset should land in a dead letter queue with its UUID and last status code attached.
Yes. The image to 3D endpoints authenticate with a bearer token, and the free tier includes 50 credits per week, which is enough to run the full request flow end to end before you commit. That allowance will not sustain a production catalog, and format conversion consumes additional credits on top of generation. Evaluate on the free tier, then move to a paid plan when you start running regular batches.
Related reading: the text to 3D API integration guide covers the same request flow for prompt-driven generation, and building production-ready AI 3D game assets covers how generated models fit into a game content pipeline.
Full endpoint documentation, including every parameter and error code referenced above, is maintained at docs.neural4d.com.