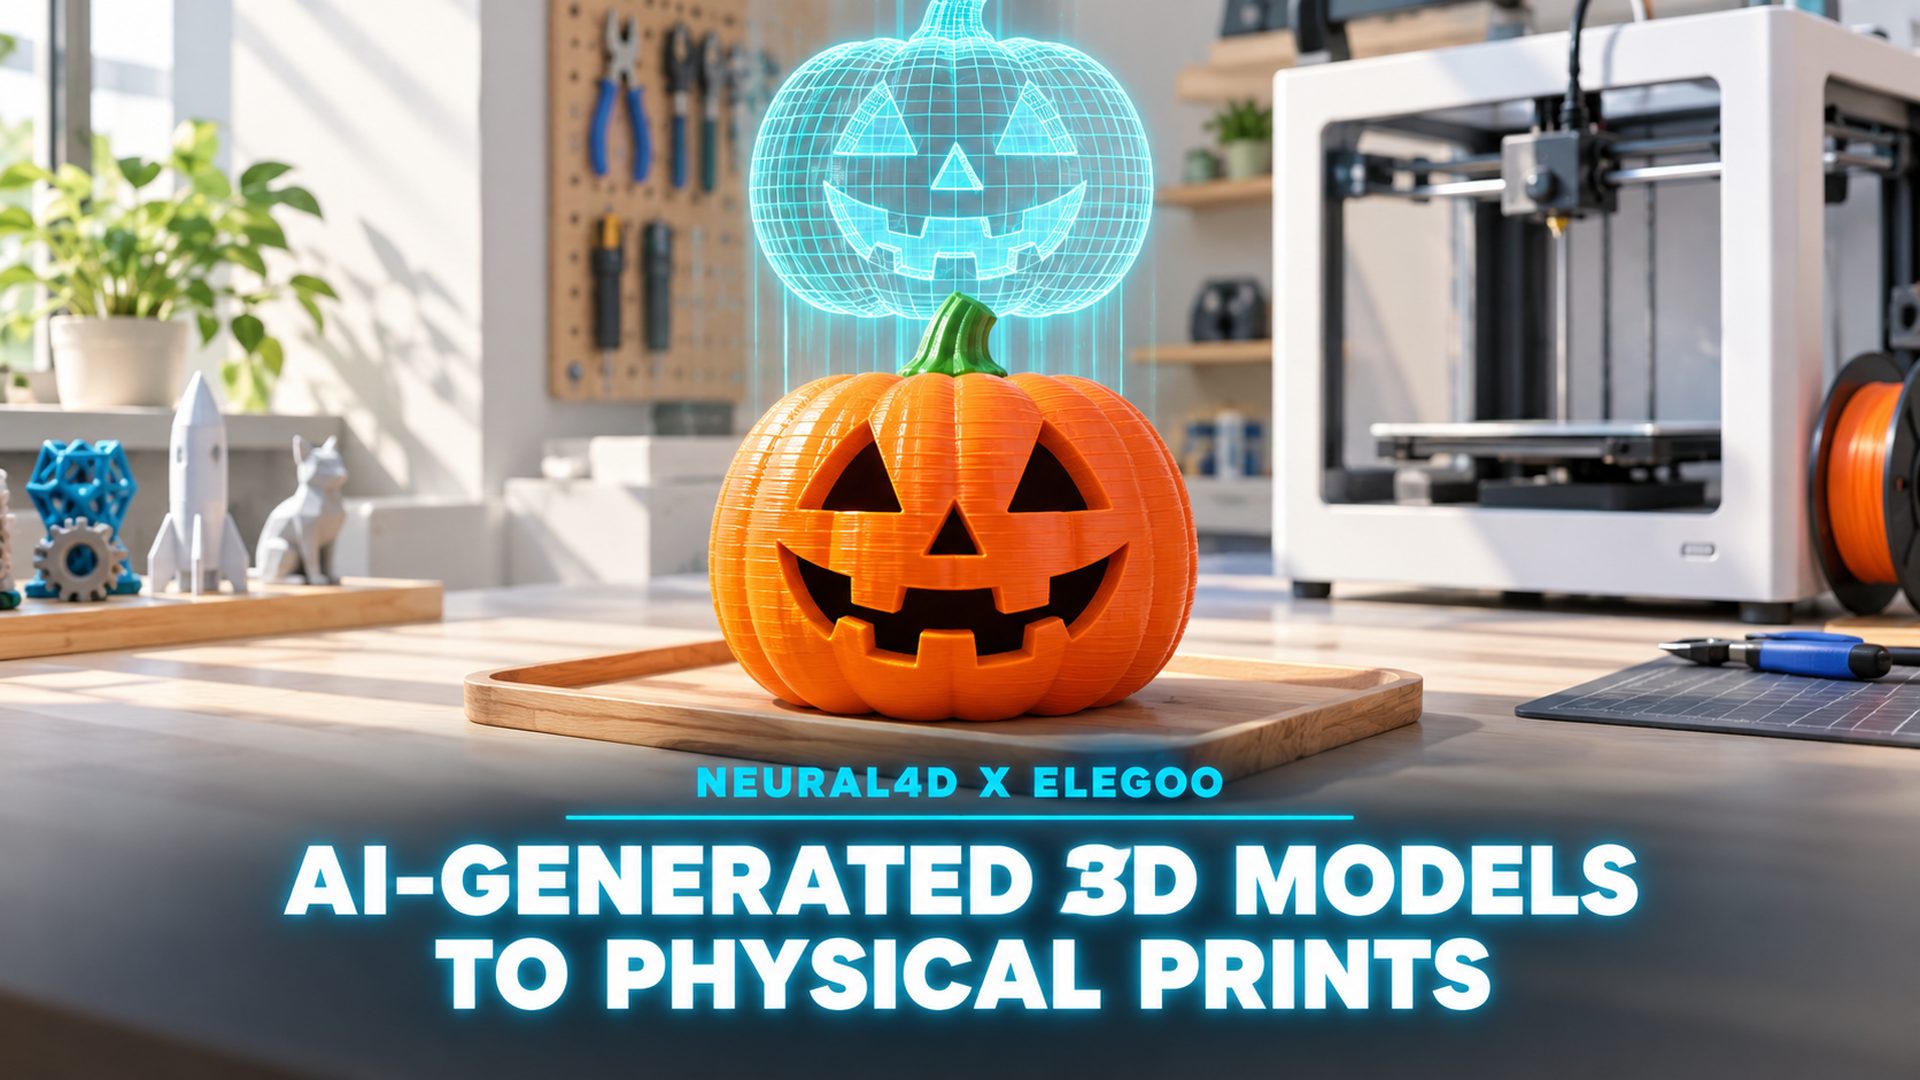
Neural4D × ELEGOO: From AI-Generated 3D Models to Physical Prints
Quick Summary
- AI-generated 3D models can become physical objects through model export, slicing, and printing.
- STL provides a straightforward single-color route, while 3MF supports our prepared multicolor workflow.
- N4D (Neural4D) creates the model from an image and offers Multicolor to prepare printable color regions.
- ElegooSlicer prepares the print job for the ELEGOO Centauri Carbon 2 Combo, which supports up to four colors.
This guide shows how to 3D print AI-generated models through our N4D and ELEGOO pumpkin project, from an image to the finished physical objects. Generate your model with N4D Image to 3D, then take either the STL route for a single filament color or the optional Multicolor and 3MF route for separate color regions.
From a Digital Pumpkin to a Physical Print
Five small pumpkins sit on a wooden tray, each with an orange body, dark facial features, and a green stem. They began as a digital model in N4D and became physical prints on an ELEGOO Centauri Carbon 2 Combo.
For this collaboration, ELEGOO provided N4D with the printer, an ElegooSlicer operating guide, and filament. That support gave us a practical way to bring our image-based 3D creation workflow into a physical display project.
The pumpkin makes the process easy to follow. Its rounded shape shows how the generated geometry translates into a printed surface. Its face and stem give us distinct areas to assign to different filaments. The software screenshots and printing photographs document those stages, from color preparation to the completed objects.
There are three jobs along the way: N4D creates the digital asset, ElegooSlicer prepares the machine instructions, and the printer builds the object. You make the decisions that connect them, including scale, orientation, and filament assignment.
Step 1. Create the Model with N4D Image to 3D
Start with an image whose subject is easy to distinguish from its background. A clearly visible silhouette and unobstructed features give you a useful starting point for a decorative model. For a pumpkin, the body, face, and stem are the features to inspect once the model has been generated.

Use N4D Image to 3D to generate the model, then rotate it in the viewer. Check the underside as well as the front. Look for a usable base, connected features, and a shape that still makes sense from the sides and back.
A model that looks good on screen still needs a print check. Small protrusions, thin sections, and unsupported details deserve attention at the intended physical size. The model viewer shows the design; the slicer preview will show how that design becomes layers.
At this point, a model generated in N4D can enter the printing workflow. If you want one filament color, export an STL and continue in ElegooSlicer. You do not need to use Multicolor to make a single-color physical print.
Step 2. How to 3D Print AI-Generated Models: Choose Your Route
Choose the export around the result you want. The same pumpkin shape could become an all-orange print or a version with separate colors for its body, face, and stem.
| Your goal | N4D preparation | Export | In ElegooSlicer |
|---|---|---|---|
| One filament color | Generate with Image to 3D | STL | Assign one filament, slice, and print |
| Separate printable colors | Generate a textured model, then use optional Multicolor | 3MF | Check the regions, assign filaments, slice, and print |
Export STL for a Single-Color Print
In our import test, the STL opened in ElegooSlicer and could be assigned a filament color. The slicer treated that version as one object for this workflow, rather than retaining the separately adjustable color regions of our prepared 3MF.
STL is a practical choice when one filament color is enough. An orange spool can produce the entire pumpkin in orange; the shape remains the point of the print. This route also suits a first shape check before spending time on a multicolor version. For more on this export path, see our image to STL workflow.
Use Optional Multicolor and Export 3MF
N4D subscribers can use Multicolor when they want separate printable color regions. Start with a textured model in your N4D assets, prepare its palette, and export the colored result as 3MF. The N4D Multicolor feature describes how the tool identifies regions and prepares the color scheme.
For this project, keep the scheme within four printable colors, matching the Centauri Carbon 2 Combo. Our finished pumpkin uses three filament colors: orange for the body, black for the facial details, and green for the stem.
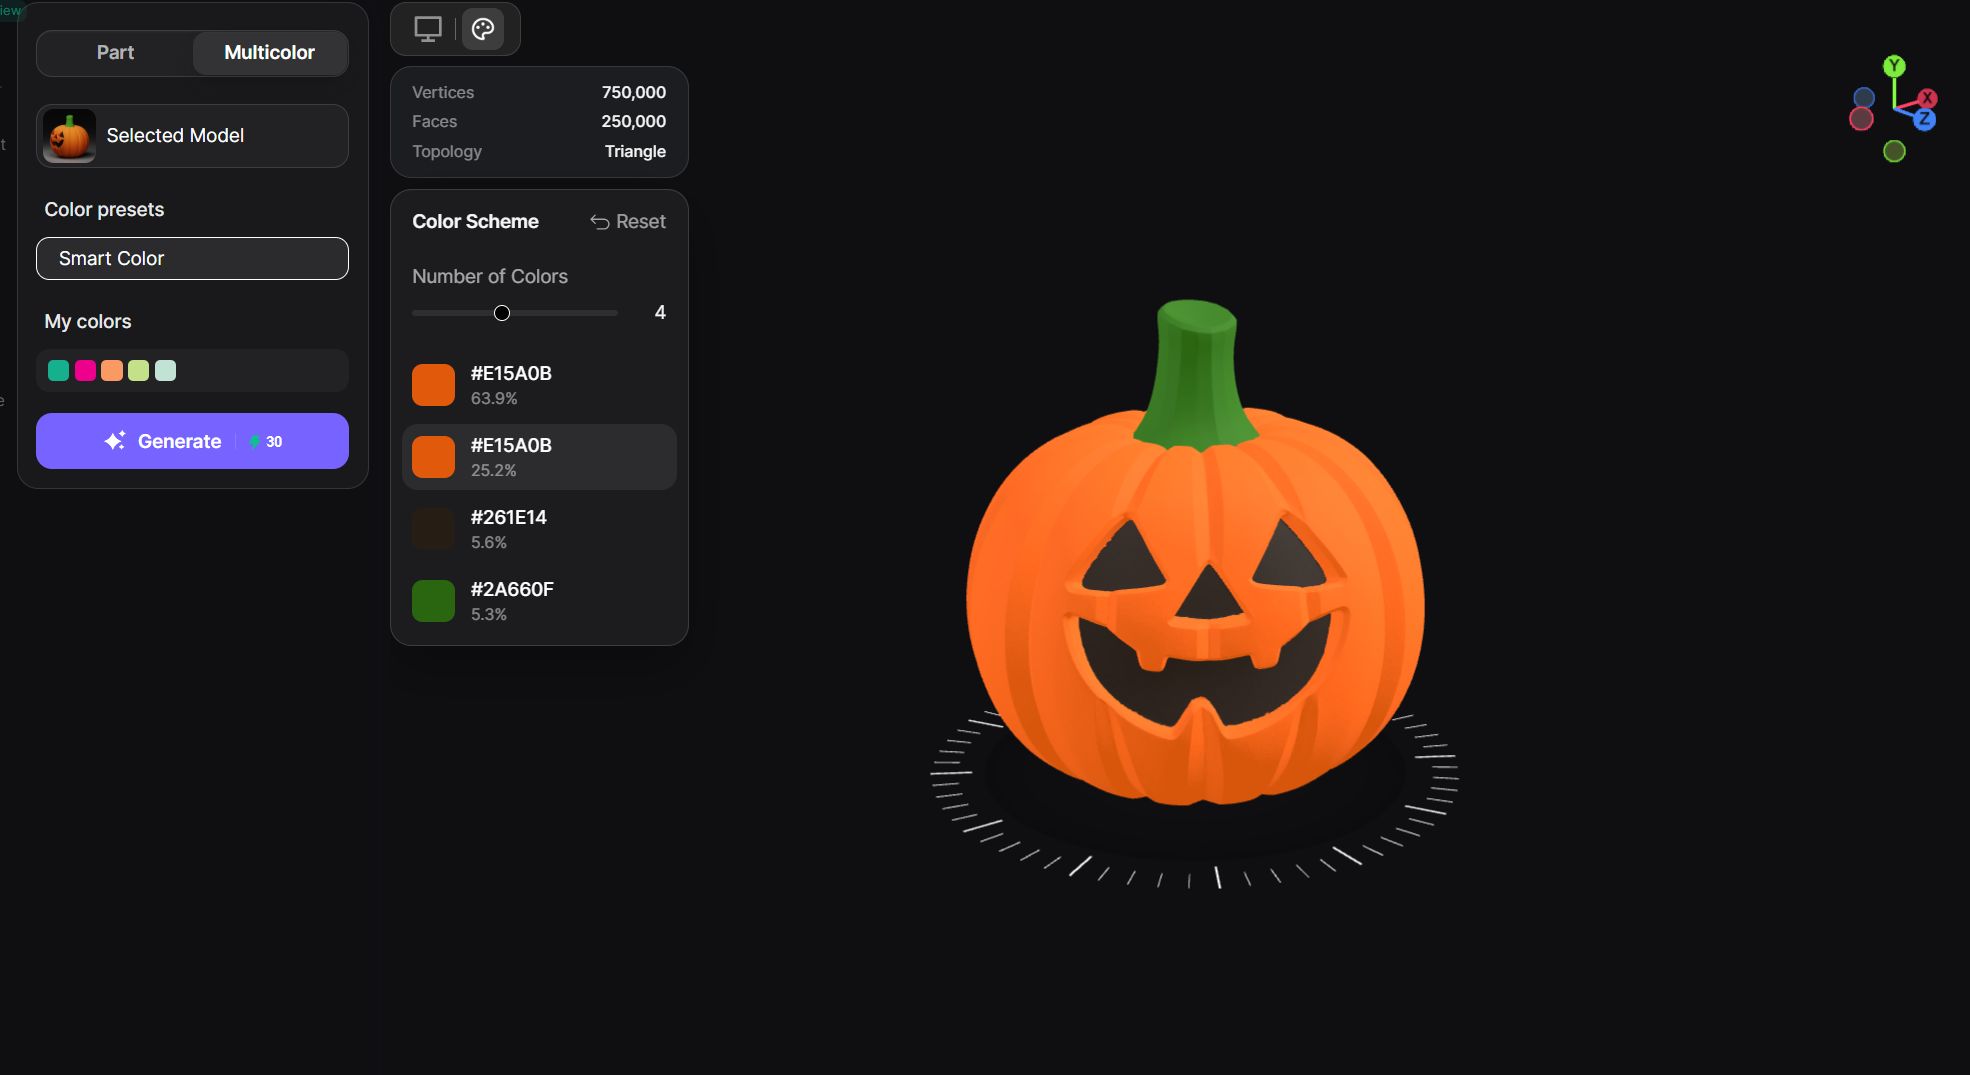
The N4D screenshot shows four palette entries, with two entries sharing the same orange value. Four entries therefore do not mean four distinct filament colors in the finished object. Plan the physical palette around the colors you intend to load and assign.
In our test, the prepared 3MF retained existing regions that could be adjusted separately in ElegooSlicer. That gave us the control needed for the multicolor pumpkin. Check the imported file before printing, since the contents of a 3MF and the way a slicer interprets them matter as much as the extension. The 3MF core specification defines how that package is structured, which is why a single file can carry more than the mesh alone.
Start with an image you want to print
Create your model with N4D, then choose the export that fits your physical design.
Single-color printing does not require Multicolor.
Step 3. Set Up the ELEGOO Centauri Carbon 2 Combo
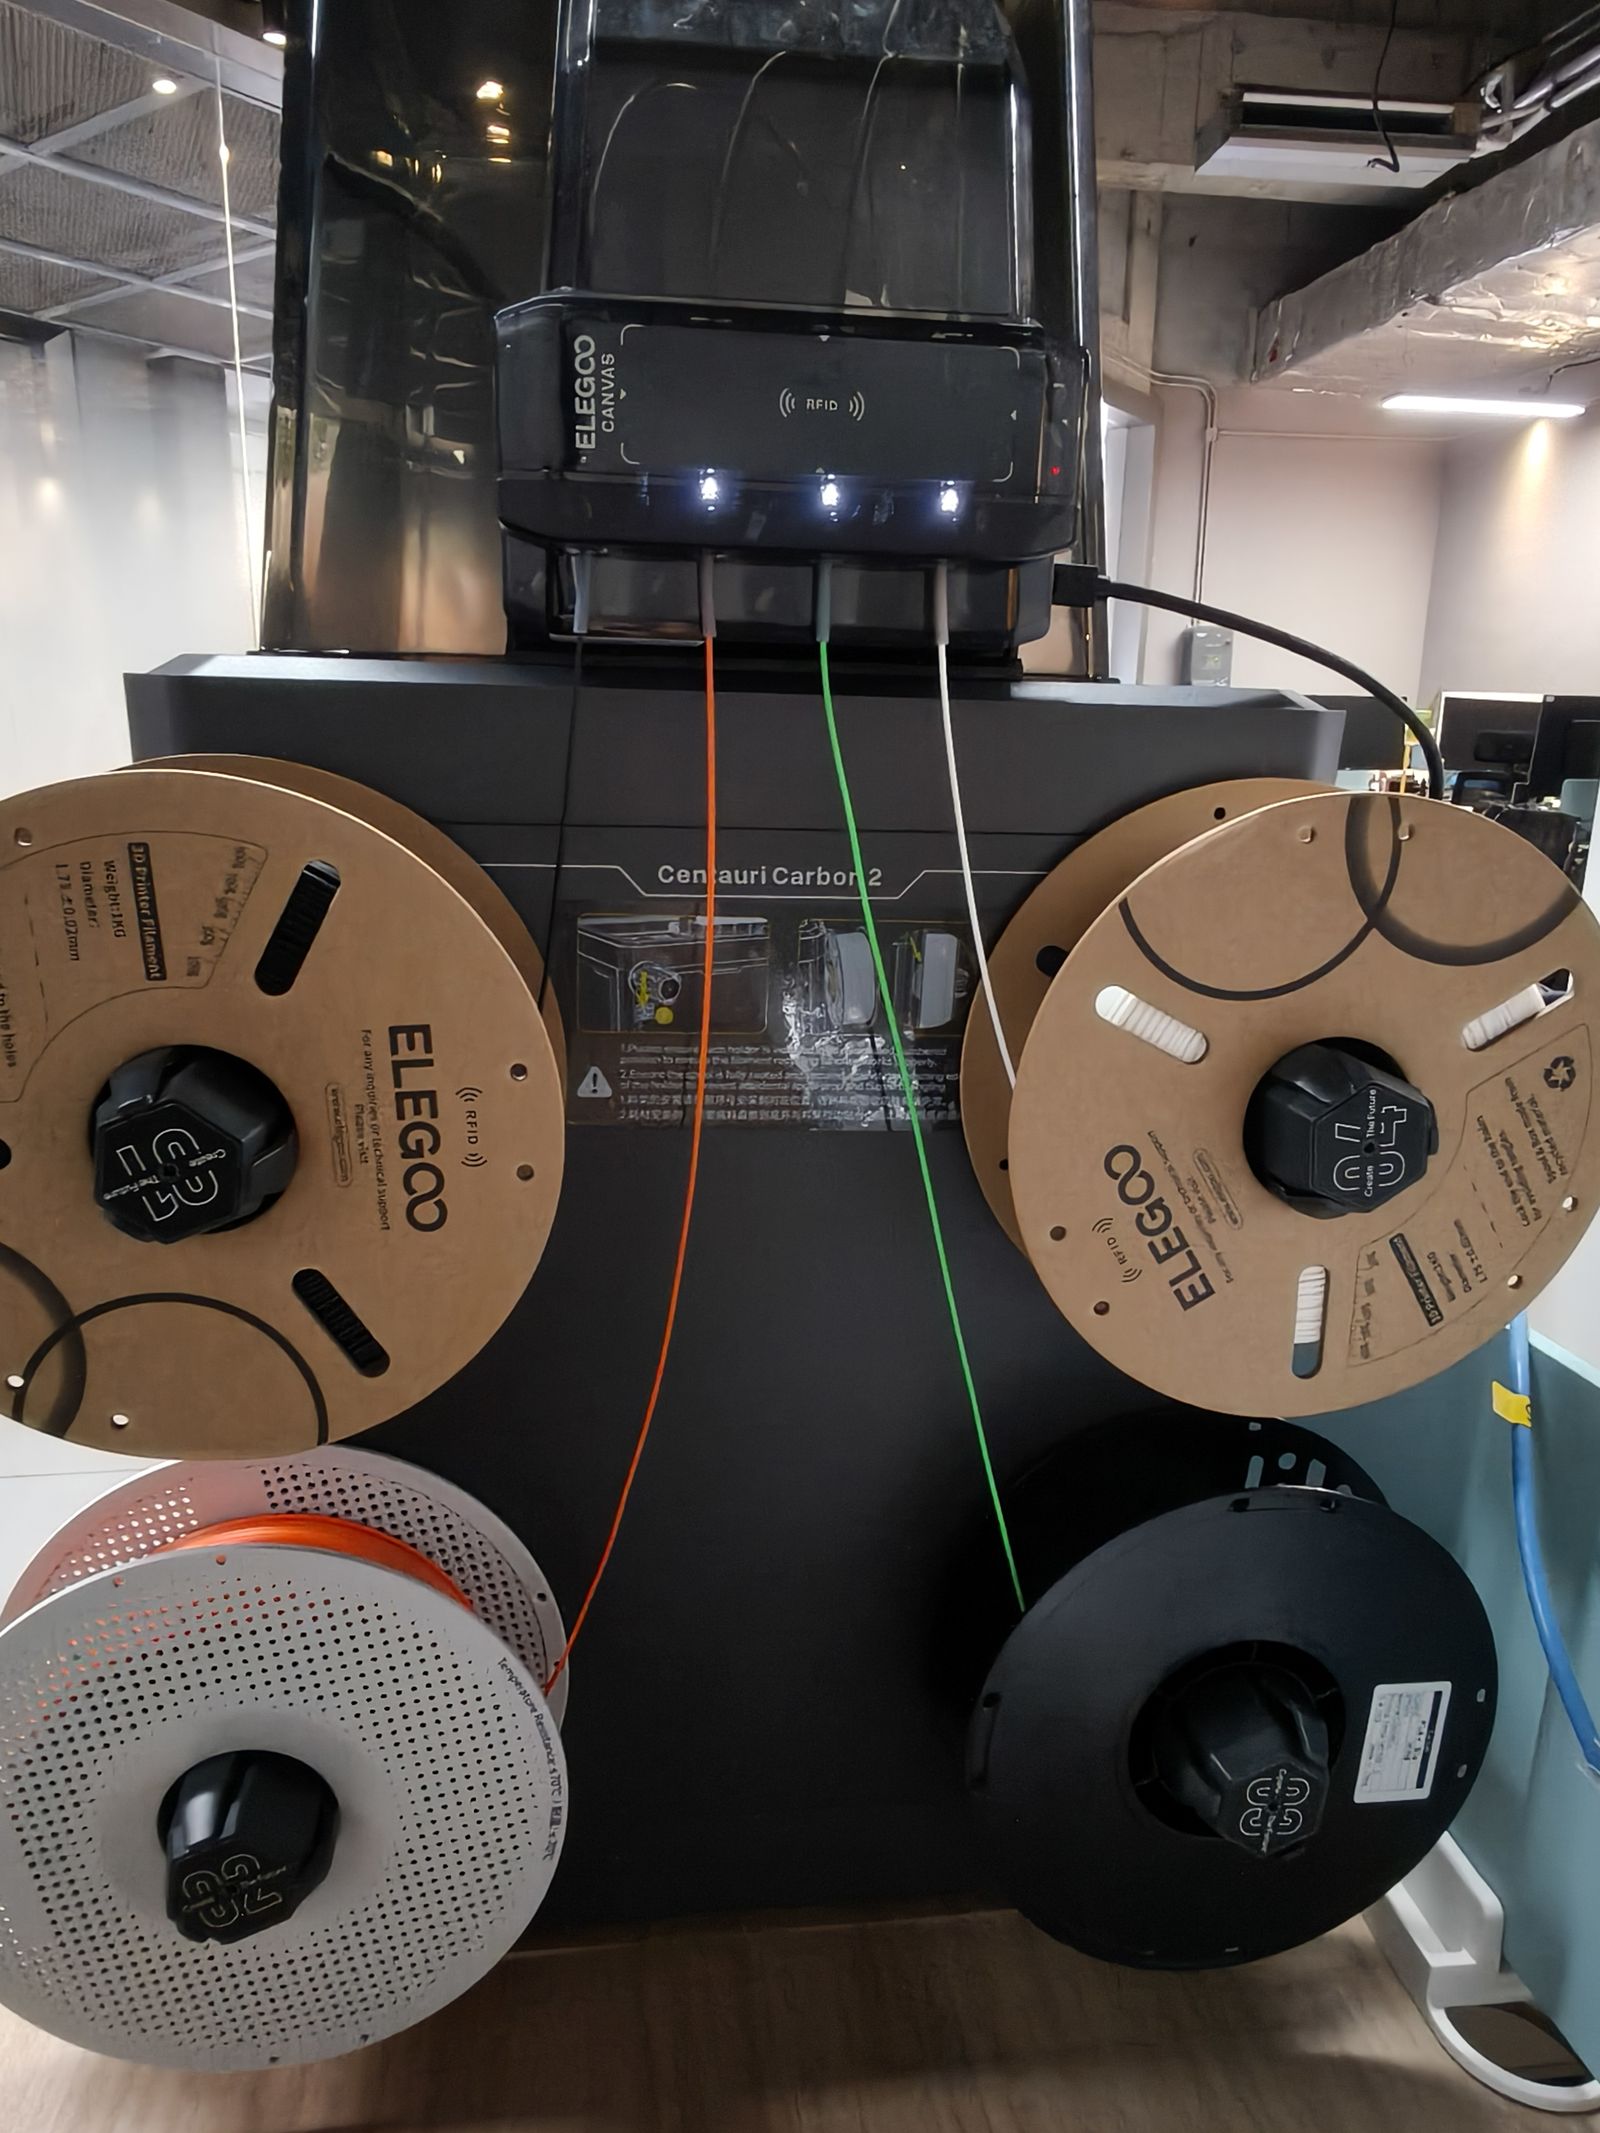
Set up the Centauri Carbon 2 Combo before you slice. The printer supports up to four colors through its CANVAS system, so our three-color design fits within that limit and demonstrates the multicolor route without using every available color position.
The official Centauri Carbon 2 Combo page lists automatic calibration and bed leveling. Those hardware features sit alongside the decisions made in the slicer, where the model's size, placement, and filament mapping are prepared for the job.
Using ELEGOO RFID Filament
For simpler setup, we recommend compatible ELEGOO RFID-tagged filament. ELEGOO states that the system recognizes these filaments and activates recommended settings for their material type and color. This can reduce manual configuration; it is a convenience recommendation, not a requirement to use ELEGOO filament exclusively.
ELEGOO supplied filament for our project. The setup photograph shows the CANVAS unit and loaded spools, including visible ELEGOO RFID markings on the upper paper spools.
Step 4. Prepare and Slice the Model in ElegooSlicer
Install and Connect ElegooSlicer
Before your first print, download ElegooSlicer from the official ELEGOO Download Center. On that page, open the 3D Printers (Slicing Softwares) section in the left sidebar, then find the ElegooSlicer block and choose the version for your operating system. Install it, register or sign in, and add your printer from the Device page, following ELEGOO's setup instructions.
Once the printer is connected, routine jobs begin with opening the model. The operating guide supplied by ELEGOO covers external STL and 3MF files, so the model source in this workflow is your N4D export.
Import and Check the Filaments
Open the exported file in ElegooSlicer. Select the appropriate printer profile and check the model's size, orientation, and position on the plate. Confirm the bed and filament settings against the hardware and material you are actually using.
For STL, assign the filament intended for the whole model. For the multicolor 3MF, inspect the available regions and their assignments, then map them to your loaded filaments. A displayed color is not a substitute for confirming the physical spool.
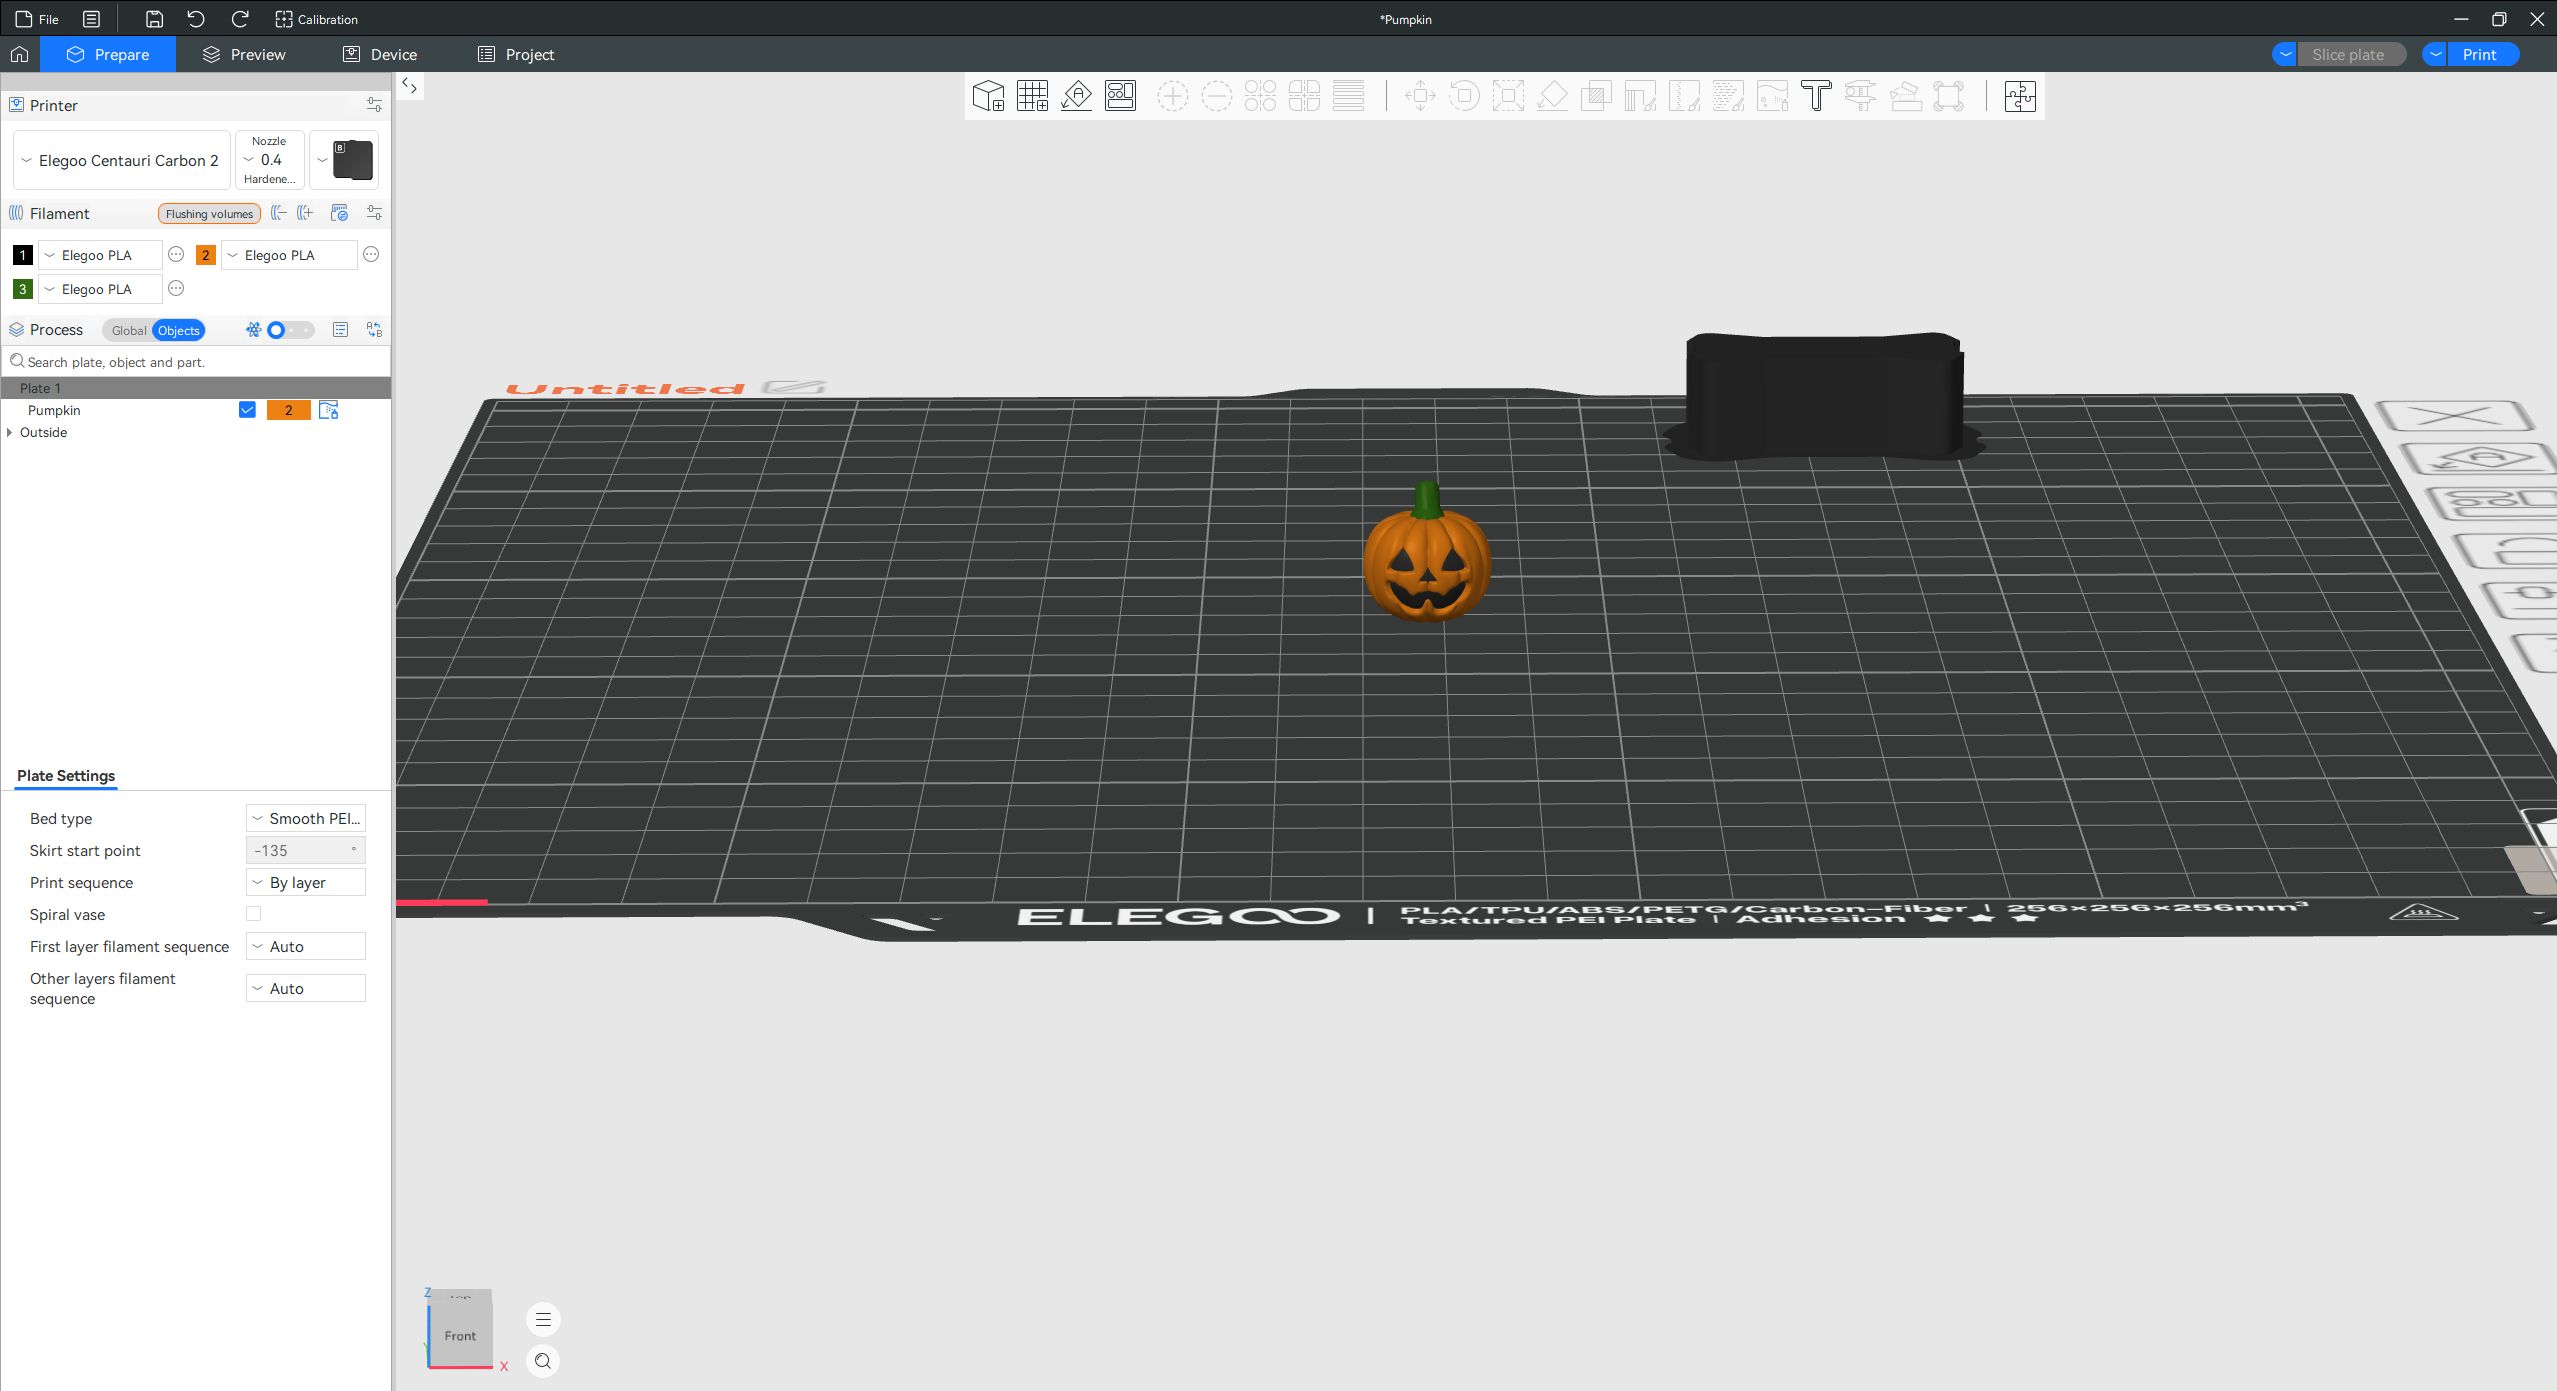
Our import screenshot shows the pumpkin and three configured filament colors. It illustrates the single-model preparation stage. The later printing photographs show a five-pumpkin batch.
Slice and Inspect the Preview
Select Slice and wait for processing to finish. Review the layers before sending the job. Check that the stem and face remain present, that the base contacts the plate, and that the intended colors appear in the right areas. Review any supports and the additional structures included in the sliced job.
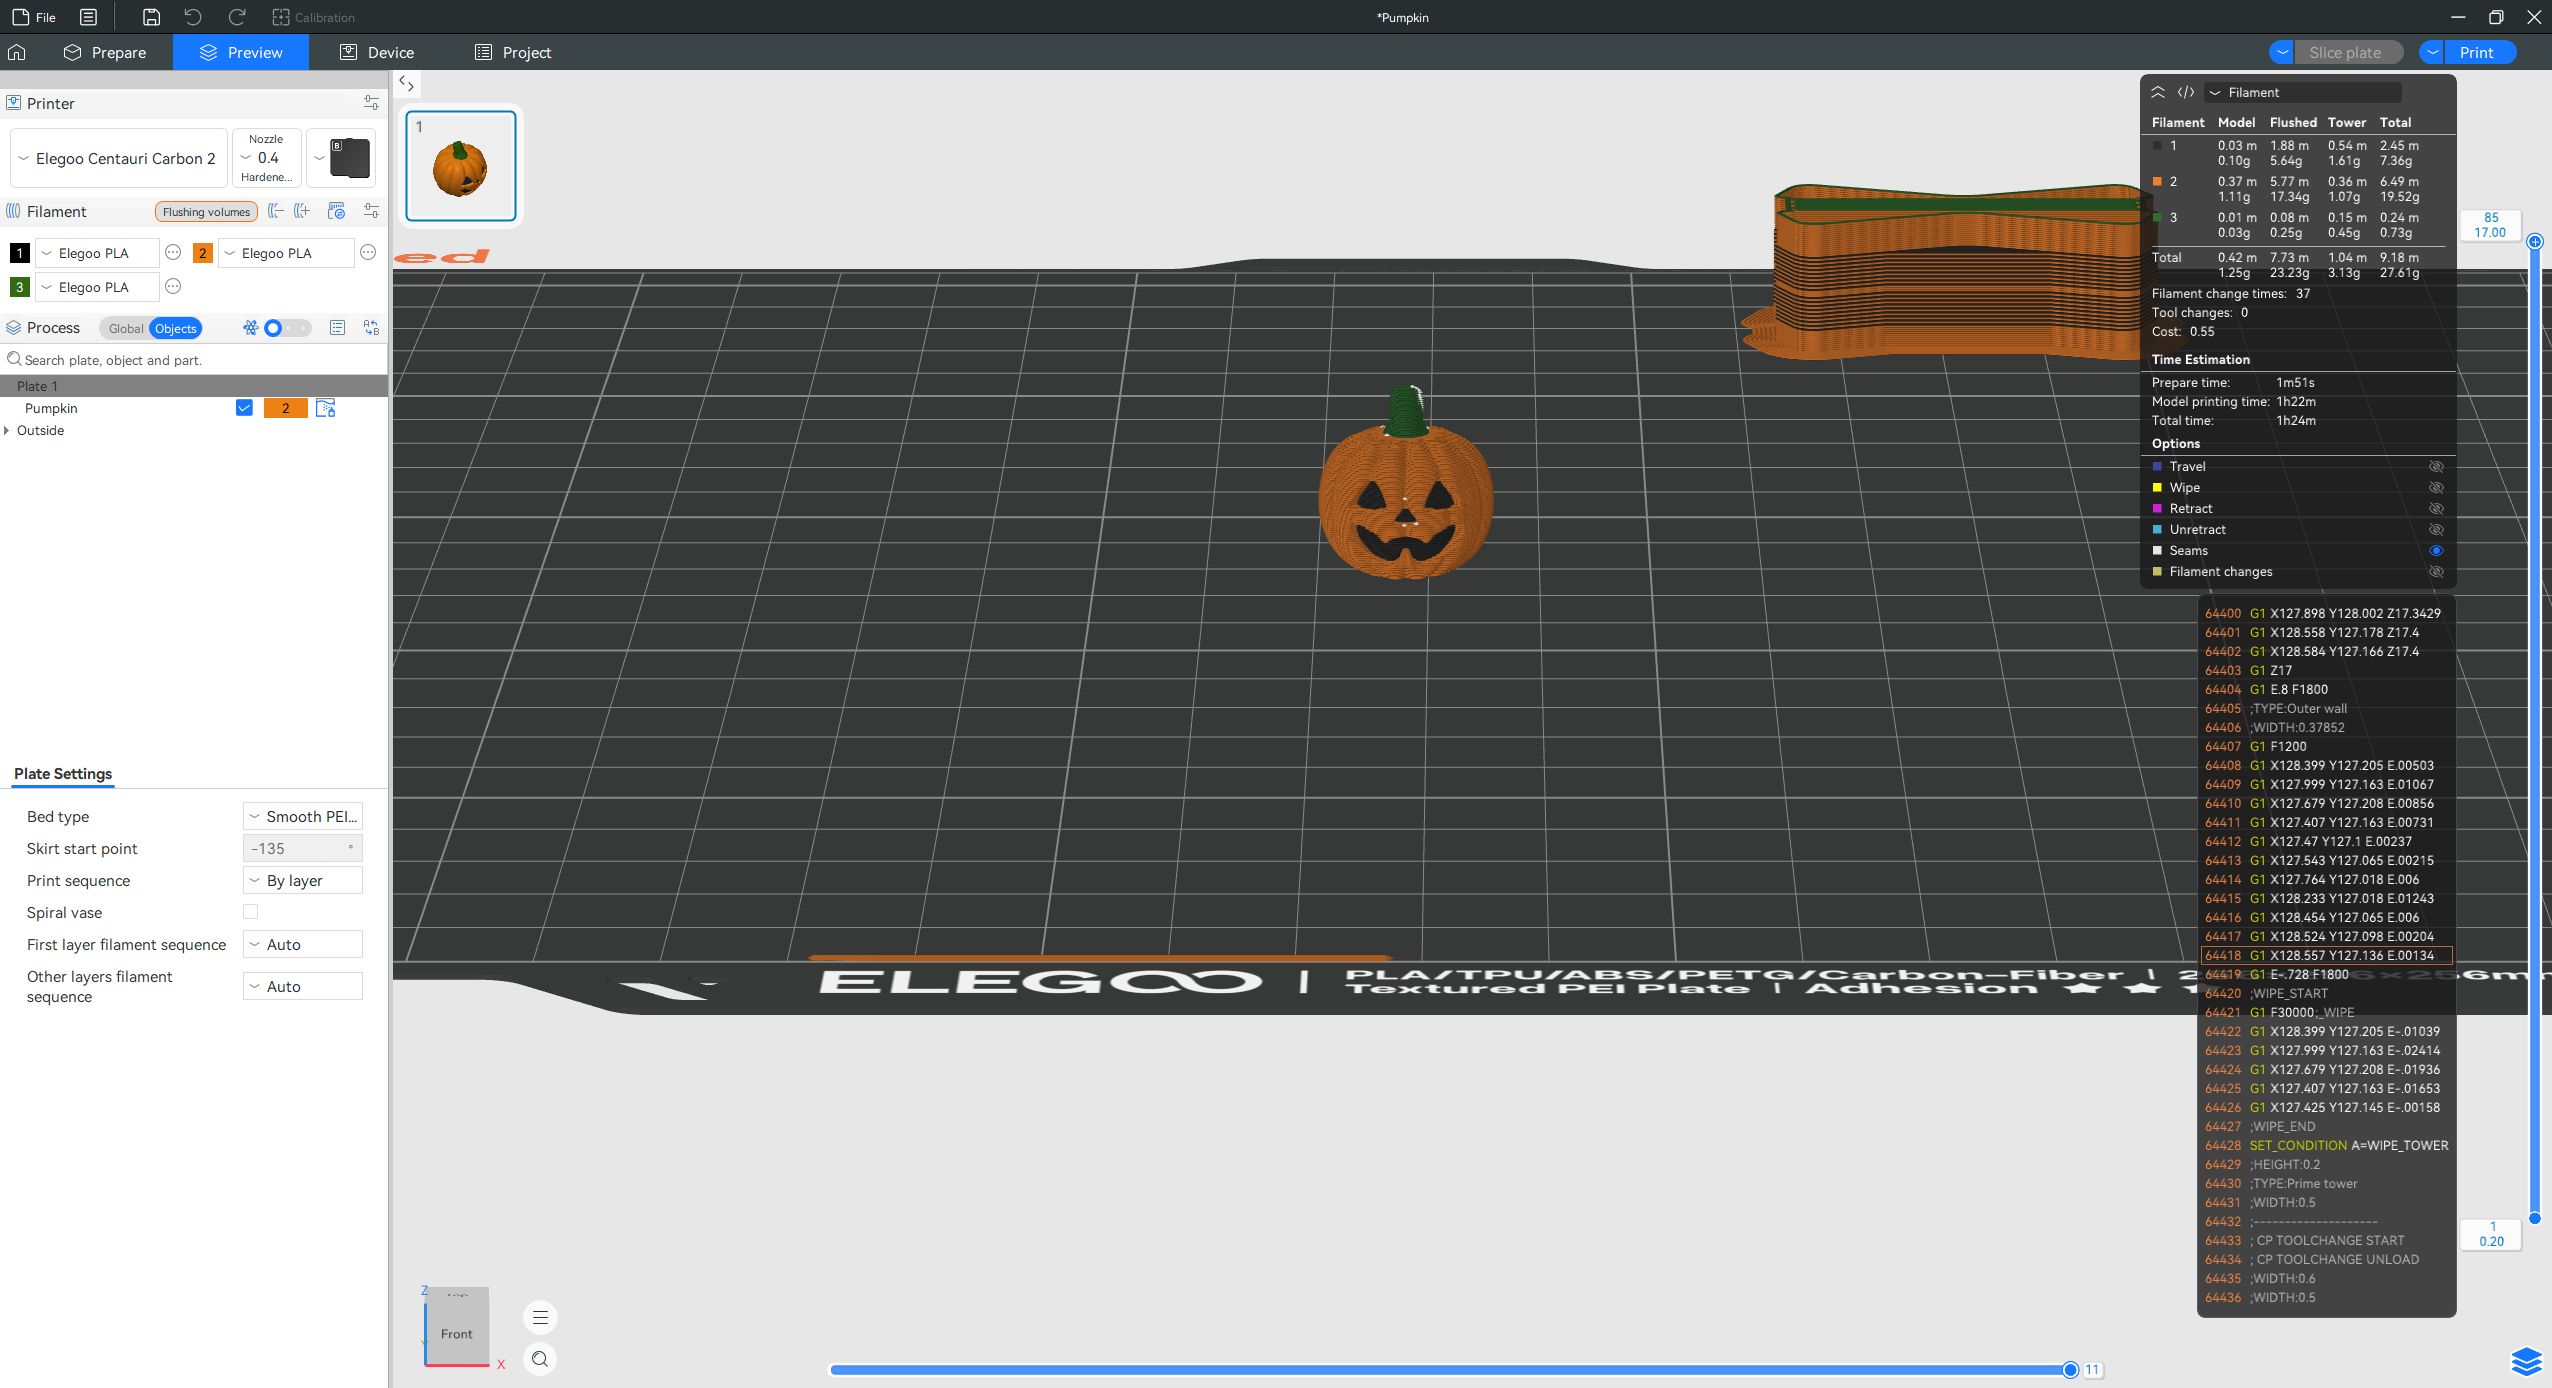
The preview screenshot includes small white seam indicators. They are display markers in this view, not a fourth white filament assigned to the pumpkin. The rectangular structure behind the model is separate from the pumpkin and should be included when reviewing the job's material estimate.
Treat the slicer's time and material figures as estimates for the plate currently being sliced. Changing the number of copies or the layout changes the job. The single-model preview shown here is not a measurement of our completed five-object batch.
Send the Job to the Printer
Following ELEGOO's guide, select Print or Print Plate after slicing, confirm the filament selection, and start the print. Check the early layers and watch the model develop as the job progresses.
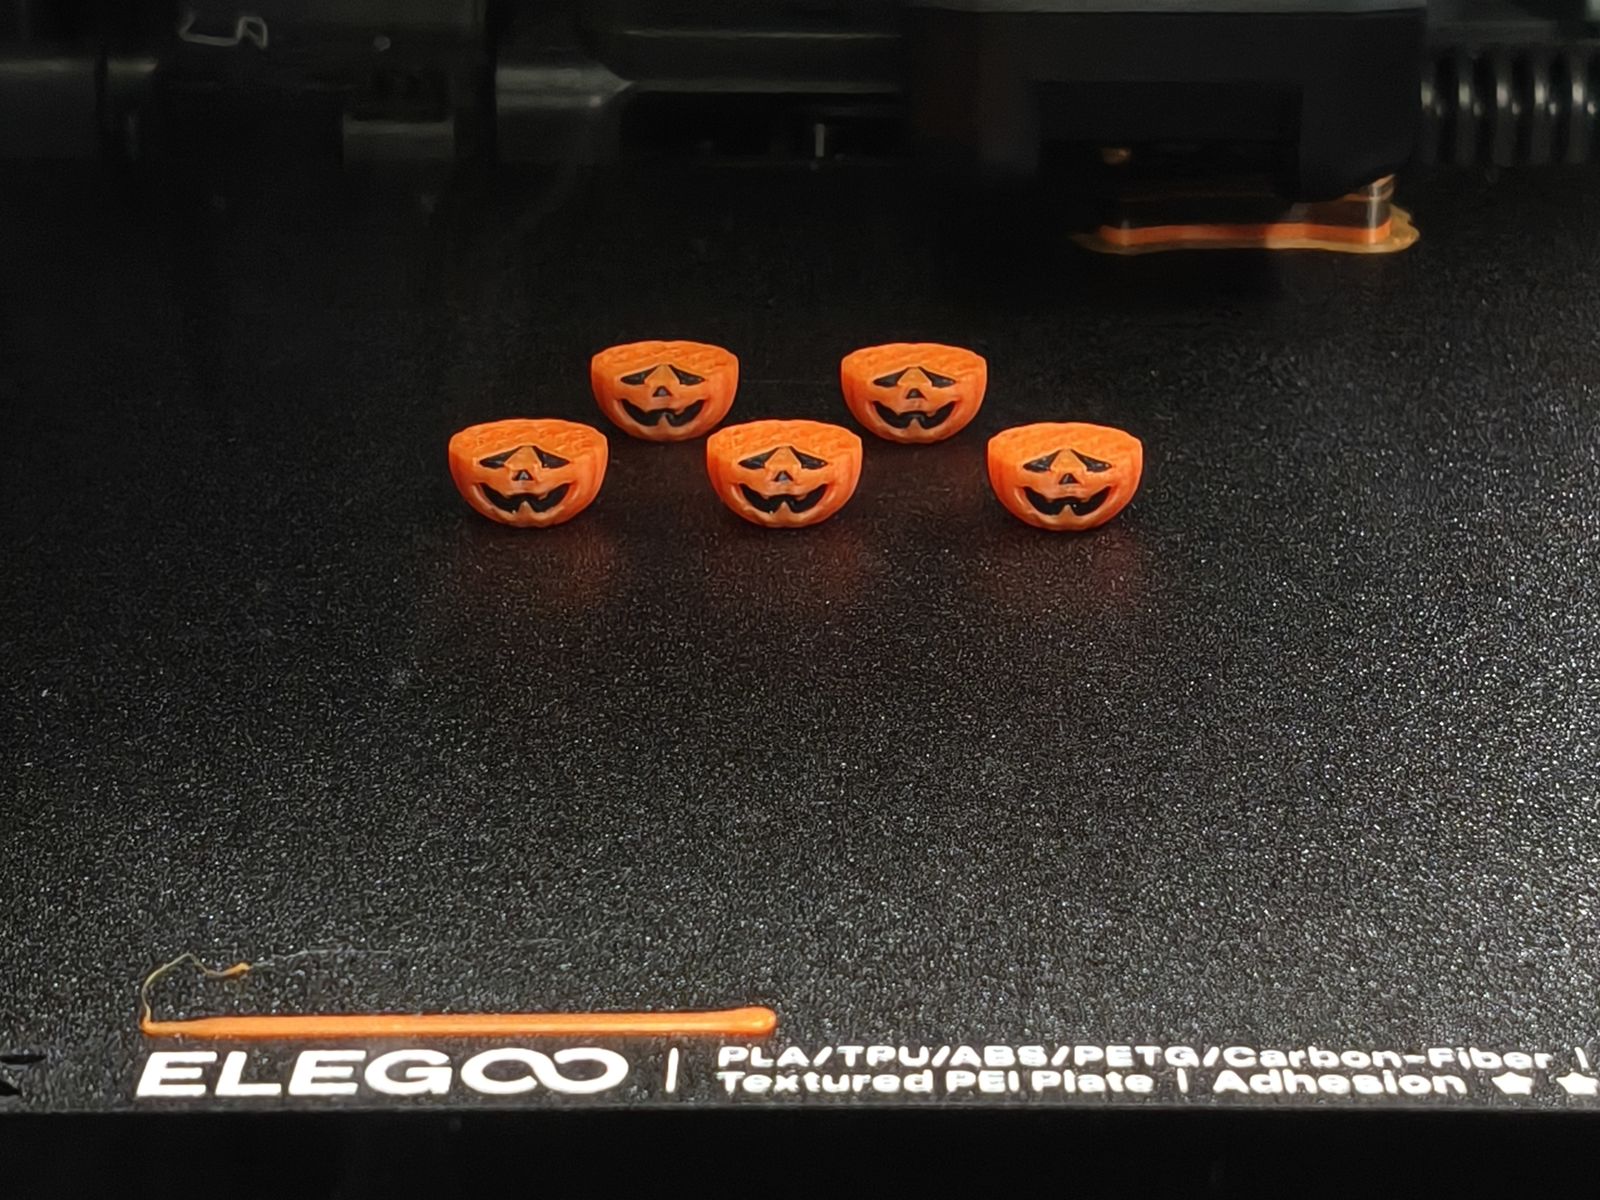
In the process photograph, the orange bodies and dark faces are already visible while the upper portions are still being built. It captures a stage of the print, rather than the finished height or final appearance.
From the Build Plate to the Finished Pumpkins
The completed build-plate photograph shows all five pumpkins with their green stems in place. The wooden-tray photograph then makes the final objects easier to inspect outside the printer.
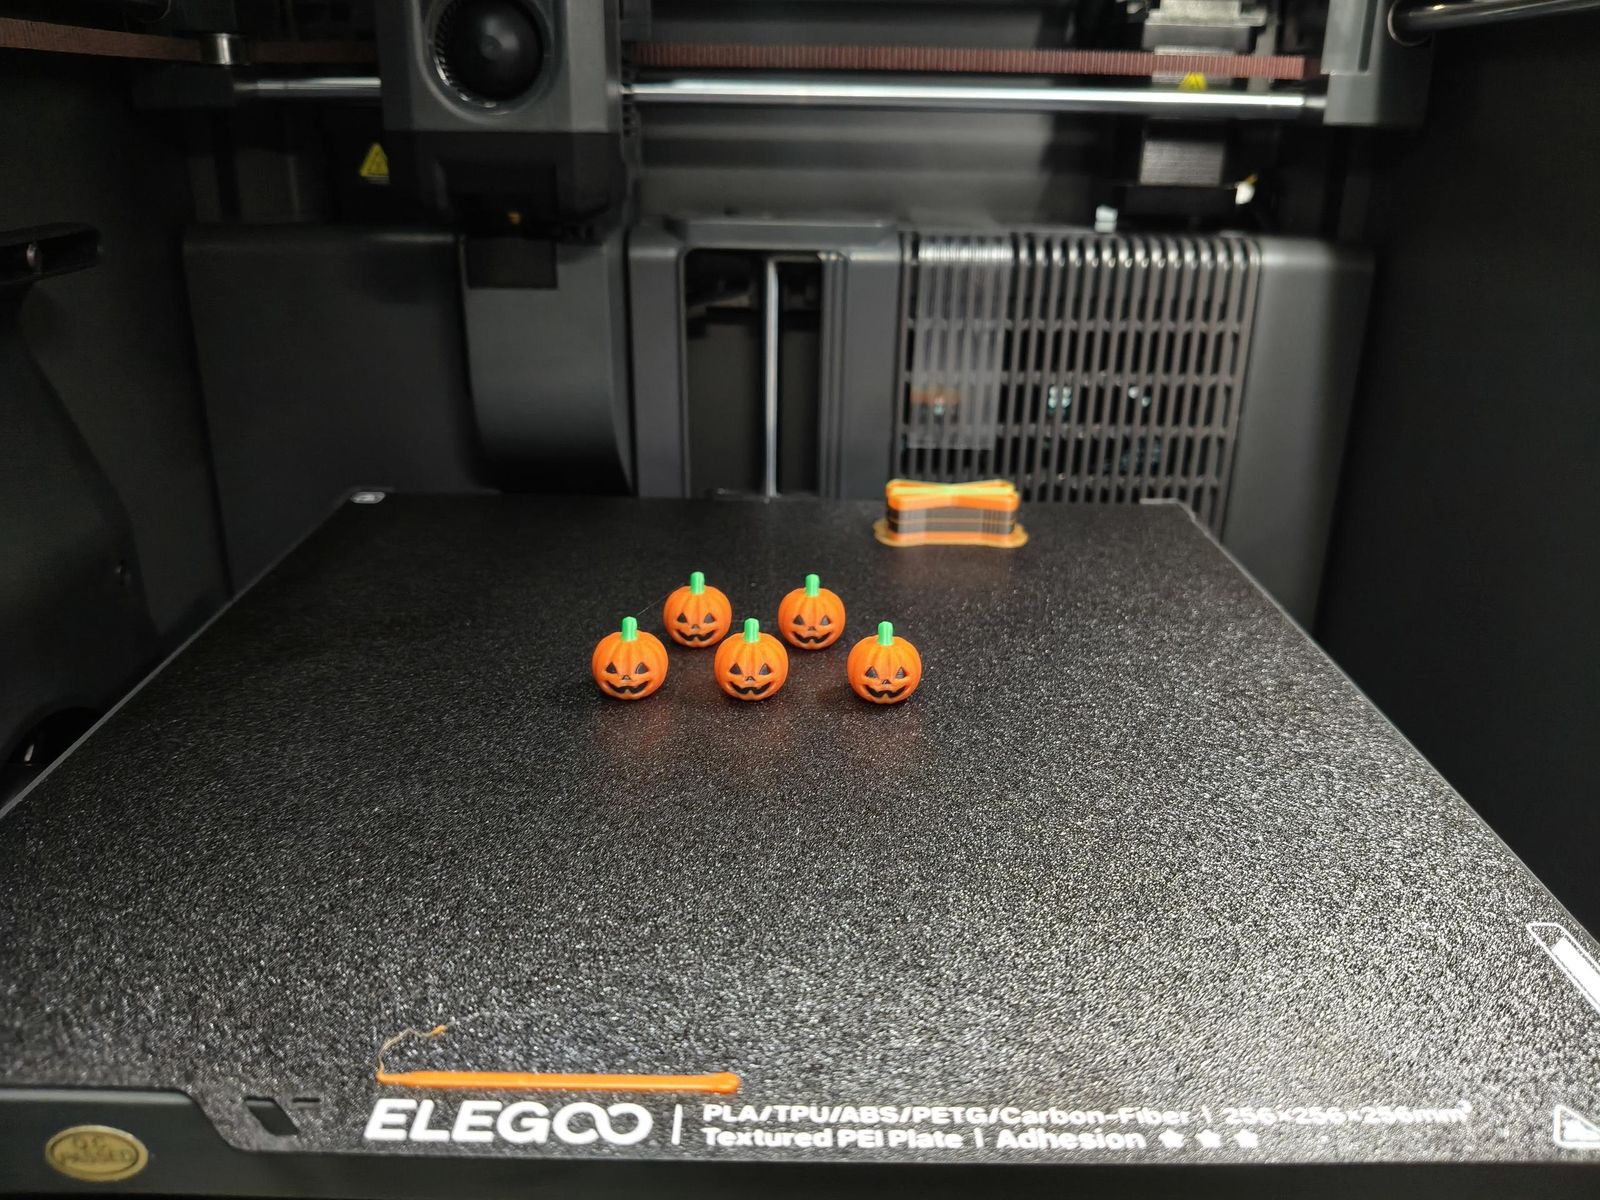
| Case detail | Documented result |
|---|---|
| Model | Pumpkin generated with N4D |
| Multicolor export | 3MF |
| Slicing software | ElegooSlicer |
| Printer | ELEGOO Centauri Carbon 2 Combo |
| Physical colors | Orange, black, and green |
| Completed objects shown | Five pumpkins |
| Partnership support | Printer, operating guide, and filament supplied by ELEGOO |
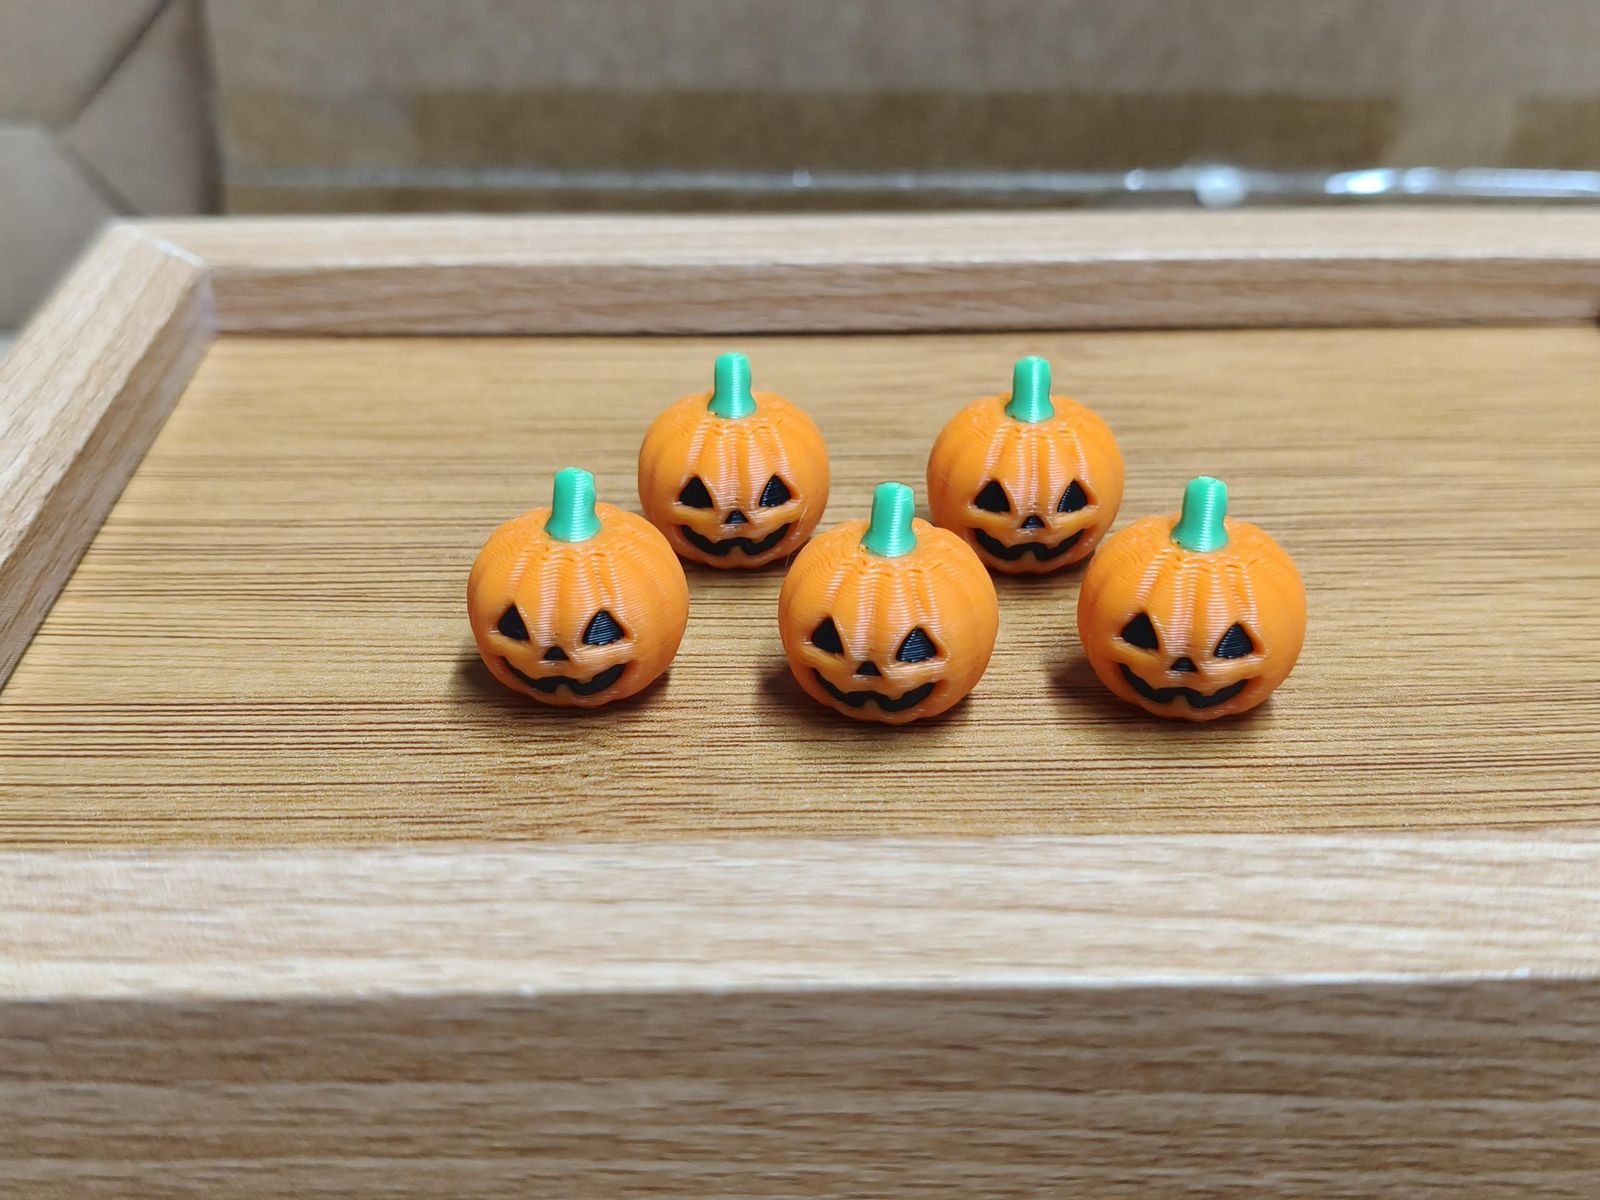
The finished prints preserve the pumpkin's recognizable silhouette, facial pattern, and separate stem color. The real surfaces also show visible layer lines. Those details help set an accurate expectation for this physical result rather than presenting a render as a photograph.
Compare the digital model and print by looking at shape, feature visibility, and placement of the color areas. Screen lighting and filament appearance differ, so a matching digital palette does not establish an exact physical color match.
The complete sequence is now visible: a prepared digital model, an imported file, a sliced preview, a print in progress, and finished objects. The result gives the collaboration something concrete to demonstrate and visitors something they can examine from every side.
What Else Can You Make with This Workflow?
The same sequence can support original character figures, small decorative props, and physical studies of product concepts. Choose an object whose main features will remain readable at the size you want to print.
For a character, focus on the silhouette and details that make it recognizable. For a display prop, consider how it will stand. For a product concept, use the print to inspect the form and proportions, then carry out the separate dimensional work needed for any fitted or functional parts.
Start with the simplest version that answers your design question. A single-color print can reveal whether the proportions work. Multicolor becomes useful when the separation of visual features is part of the intended result. N4D's print preparation and export guidance provides further context for that handoff.
Common Questions About Printing AI-Generated 3D Models
What should I check if a small feature disappears after slicing?
Inspect that area in the layer preview and compare it with the unsliced geometry. Try a larger scale or revise the feature so it has enough printable thickness, then slice again. Increasing visual texture detail alone will not add physical geometry to the missing feature.
Can I reuse the same sliced file on a different printer?
Prepare a new job with the target printer's profile. Keep the model export for reuse, but do not assume machine instructions prepared for one printer are suitable for another. Recheck dimensions, bed settings, and filament assignments before slicing.
What should I do if the 3MF imports with unexpected settings?
Review the active printer, bed, and filament profiles before printing. A 3MF may carry more than model geometry, so inspect which settings were imported and use the profiles appropriate for your machine. Save a separate project copy after checking the configuration.
Why is multicolor material use higher than the model alone?
Color changes can require flushing material and additional printed structures. Review the slicer's breakdown for the complete job, including those portions, rather than using the model-only weight as the amount of filament to load.
Bring Your Next Model into the Physical World
N4D and ELEGOO contribute successive parts of the creative process: an image becomes a digital model, and that model becomes a physical object after preparation in ElegooSlicer. Our pumpkins show the outcome in three filament colors, from the first visible layers to the finished display.
Choose STL when one color serves your design. Choose optional Multicolor and 3MF when separate color regions matter, keeping the palette within the printer's four-color capacity. Your next set of AI-generated 3D models can begin with an image and a clear idea of what you want to hold in your hands.
Make your next idea something you can hold
Begin with N4D Image to 3D and prepare your model for an ELEGOO print.
Optional Multicolor is available to N4D subscribers.