How to Fix Bad Topology in AI 3D Models: A Blender Retopology Guide
Quick Summary
- AI generated meshes fail downstream because their topology is surface reconstruction output, not modeled geometry: triangle soup, no edge flow, non manifold edges, and holes are the standard failure set.
- Diagnose before you edit: enable Statistics, run Select All by Trait, check Non Manifold and Face Orientation, then use the 3D Print Toolbox audit to build a concrete repair list.
- Retopologize with a Shrinkwrap target plus Poly Build for full control, or lean on QuadriFlow, ZRemesher, Quad Remesher, and Instant Meshes for automatic results.
- Retopology destroys UV maps, so keep the original high-poly mesh as a bake source and rebake diffuse, normal, and roughness onto the new mesh.
- Neural4D generates watertight quad or triangle meshes with clean topology from the start, so the heavy retopology step is often already done before a file reaches Blender.
AI 3D models import into Blender as dense triangle soup: thousands of unorganized faces with no edge flow, scattered holes, and non manifold edges. A proper blender retopology workflow rebuilds that mess into clean quad-dominant topology that animates, renders, and prints without errors. Start with a diagnostic pass, clean the structural damage, then rebuild the mesh and bake the surface detail back onto it.
Contents
- Part 1: Why AI 3D Models Have Bad Topology
- Part 2: Diagnose the Topology Before You Edit
- Part 3: Clean Structural Errors First
- Part 4: Blender Retopology for Clean Edge FlowHOT
- Part 5: Restore UVs and Textures After Retopology
- Part 6: Topology by Use Case and Validation
- Part 7: Choosing a Cleaner Starting Point
- Part 8: Common Questions on Blender Retopology for AI Models
- Stop Retopologizing Bad AI Meshes
Part 1: Why AI 3D Models Have Bad Topology
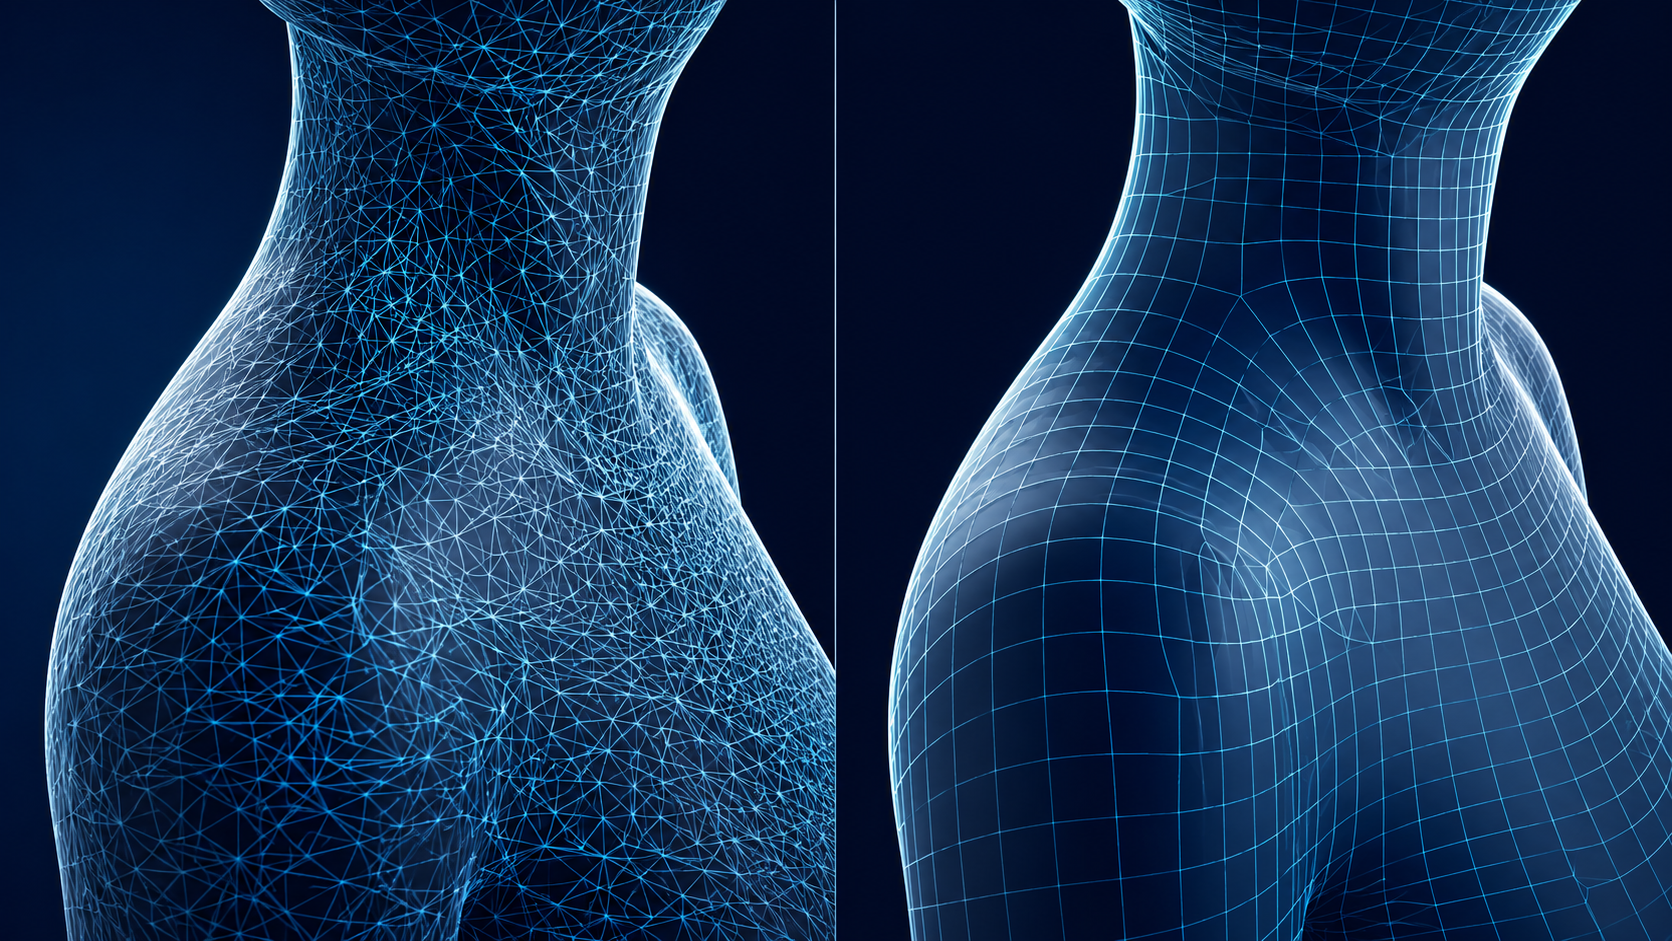
AI 3D generators do not build models the way a modeler does. A human artist lays out edge loops with intent, placing extra loops where a knee bends or a cheek curves, so the mesh deforms predictably. An AI generator predicts a surface that looks right from the reference views, then converts that prediction into polygons. The result is geometry with no plan behind it: dense triangle soup where a hand should have clean finger loops, N-gons on flat panels, and poles scattered through deformation zones.
The root cause is mesh extraction. Generators such as Meshy and Tripo reconstruct an implicit field, a mathematical description of the surface, and then extract polygons from it with algorithms like marching cubes or Poisson surface reconstruction. Those algorithms produce uniform triangulated output that minimizes surface error, with zero awareness of joints, creases, or future deformation. If you need a refresher on what retopology is, the short version is that it replaces unorganized geometry with deliberately placed edge loops, and it is the only reliable cure for this kind of output.
The bad habits also reproduce from training data. AI models learn largely from photogrammetry and scanned objects, which are themselves triangle soup, so the generator internalizes that style. One prompt yields a character whose surface is made of 50,000 to 80,000 triangles with no logical structure between them. None of this matters in the viewport, where a shaded model looks fine. It all surfaces the moment the mesh has to deform, subdivide, or slice.
| Problem | What It Looks Like | Why It Breaks Your Pipeline |
|---|---|---|
| Triangle soup | Uniform dense triangles, no visible flow | Deforms badly and wastes vertex budget |
| N-gons | Faces with 5 or more vertices on flat areas | Subdivision artifacts and UV stretching |
| Poles and star points | 5 or more edges meeting at one vertex | Pinch points when the mesh deforms |
| Broken edge flow | Loops that dead-end or curve randomly | Creasing and unpredictable deformation |
| Non manifold geometry | Edges shared by 3+ faces, internal faces | Engines and slicers reject the file |
| Holes | Missing faces on the surface | Non watertight shell, normals leak |
| Floating fragments | Detached islands inside the volume | Non manifold errors and stray shading |
Part 2: Diagnose the Topology Before You Edit
Editing a mesh you have not measured is guesswork, and skipped diagnosis is the main reason a blender retopology pass goes wrong. The diagnostic pass turns vague dread into a specific repair list, and it gives you a baseline number you can use to confirm the mesh is actually fixed later. Changes made to a broken mesh compound problems downstream, so the order is fixed: import, audit, then repair.
Enable the Statistics Overlay
In the viewport header, open the dropdown next to the shading mode buttons and enable Statistics. Blender now shows the vertex, edge, face, and triangle count in the top-left corner. A typical medium-complexity AI model lands between 15,000 and 80,000 triangles. Write the number down. If the mesh later has to hit a game budget of 10,000 triangles, you now know the scale of the reduction ahead of you.
Select All by Trait, Non Manifold
Enter Edit Mode (Tab), press A to select everything, then use Select > All by Trait > Non Manifold. Blender highlights every vertex and edge that breaks manifold rules, the shared edges, internal faces, and boundary edges that will cause import failures. This is your primary red flag list.
Check Face Orientation and Mesh Analysis
Turn on the Face Orientation overlay from the viewport header. Correct faces render blue, inverted faces render red, so a red interior or red patch tells you where normals flipped. Then add the Mesh Analysis overlay from the same menu and set it to Sharp edges to visualize where the triangulation cut across what should be smooth surfaces. Both overlays are quick to read and give you a complete damage map in under a minute.
🔍 Diagnostic cheat sheet
- Poly count: viewport header dropdown > Statistics
- Non manifold edges: Edit Mode > Select > All by Trait > Non Manifold
- Inverted normals: viewport header > Face Orientation overlay
- Sharp edges: viewport header > Mesh Analysis overlay
- Watertight audit: N panel > 3D Print tab > Check All
Run the 3D Print Toolbox Audit
Enable the 3D Print Toolbox add-on in Preferences (it ships with Blender, it just needs activation). In the sidebar under the 3D Print tab, click Check All. The add-on reports non manifold edges, zero-area faces, zero-length edges, and intersecting faces. A non manifold count above zero means the mesh is not watertight, and that number is your target to drive to zero before any retopology work starts.
| Symptom | How to Detect It | Blender Tool |
|---|---|---|
| Non manifold edges | Select All by Trait, or 3D Print Check All | Make Manifold |
| Inverted normals | Face Orientation overlay shows red | Shift+N Recalculate Outside |
| Duplicate vertices | Vertex count far above expected | Merge by Distance |
| Boundary holes | Non Manifold select, Boundaries | Fill Holes, F to fill faces |
| Zero-area / degenerate faces | 3D Print Check All report | Merge by Distance, delete loose |
Part 3: Clean Structural Errors First
Diagnosis done, now close the mesh. A closed manifold surface is the required input for every blender retopology method in Part 4, because a Shrinkwrap target with holes will pull your new geometry through the gaps. Run these operations in sequence; each one depends on the one before it.
Merge by Distance
In Edit Mode, select all (A), press M and choose Merge by Distance. Watch the info bar for the number of removed vertices. On a Meshy model this typically eliminates 3,000 to 10,000 duplicates that are invisible in the viewport but break downstream tools.
Delete Loose and Fill Holes
Still in Edit Mode, run Mesh > Clean Up > Delete Loose to remove floating vertices and disconnected edges, then Mesh > Clean Up > Fill Holes with a small Max Sides value to patch the open boundaries left by low-confidence surface regions.
Recalculate Normals
Select all faces, press Shift+N (or Alt+N > Recalculate Outside) to flip inverted normals outward consistently. Tripo output benefits the most here, since the generator sometimes builds correct-looking geometry from the front while the back-facing normals point inward.
Make Manifold
In the 3D Print Toolbox, click Make Manifold to auto-repair the remaining non manifold issues: it fills small holes, removes interior faces, and fixes edges shared by more than two faces. Re-run Check All. When non manifold edges read zero, the mesh is closed and ready for blender retopology. If your specific model still has stuck geometry, the AI 3D model mesh cleanup guide walks through each repair operation with troubleshooting, including custom split normals on Meshy exports.
Part 4: Blender Retopology for Clean Edge Flow
With a closed, manifold mesh in the scene, you can rebuild its topology. Blender retopology means drawing a new mesh over the old one, either by hand with a Shrinkwrap target, or with an automatic tool that generates quad-dominant output. The rebuilt mesh carries the same silhouette as the AI original, but with edge loops placed where deformation and shading actually need them.
Manual Retopology with Shrinkwrap and Poly Build
Add a new mesh object (Shift+A > Mesh > Plane or Circle), enter Edit Mode, and delete all but one vertex. Give the new object a Shrinkwrap modifier with the cleaned AI mesh as the target, mode Nearest Surface Point. Every vertex you place now snaps to the surface of the original. Use the Poly Build tool from the toolbar to draw faces, starting from the silhouette and working inward, and keep loops flowing around the shape rather than across it.
Edge Loop Placement Rules
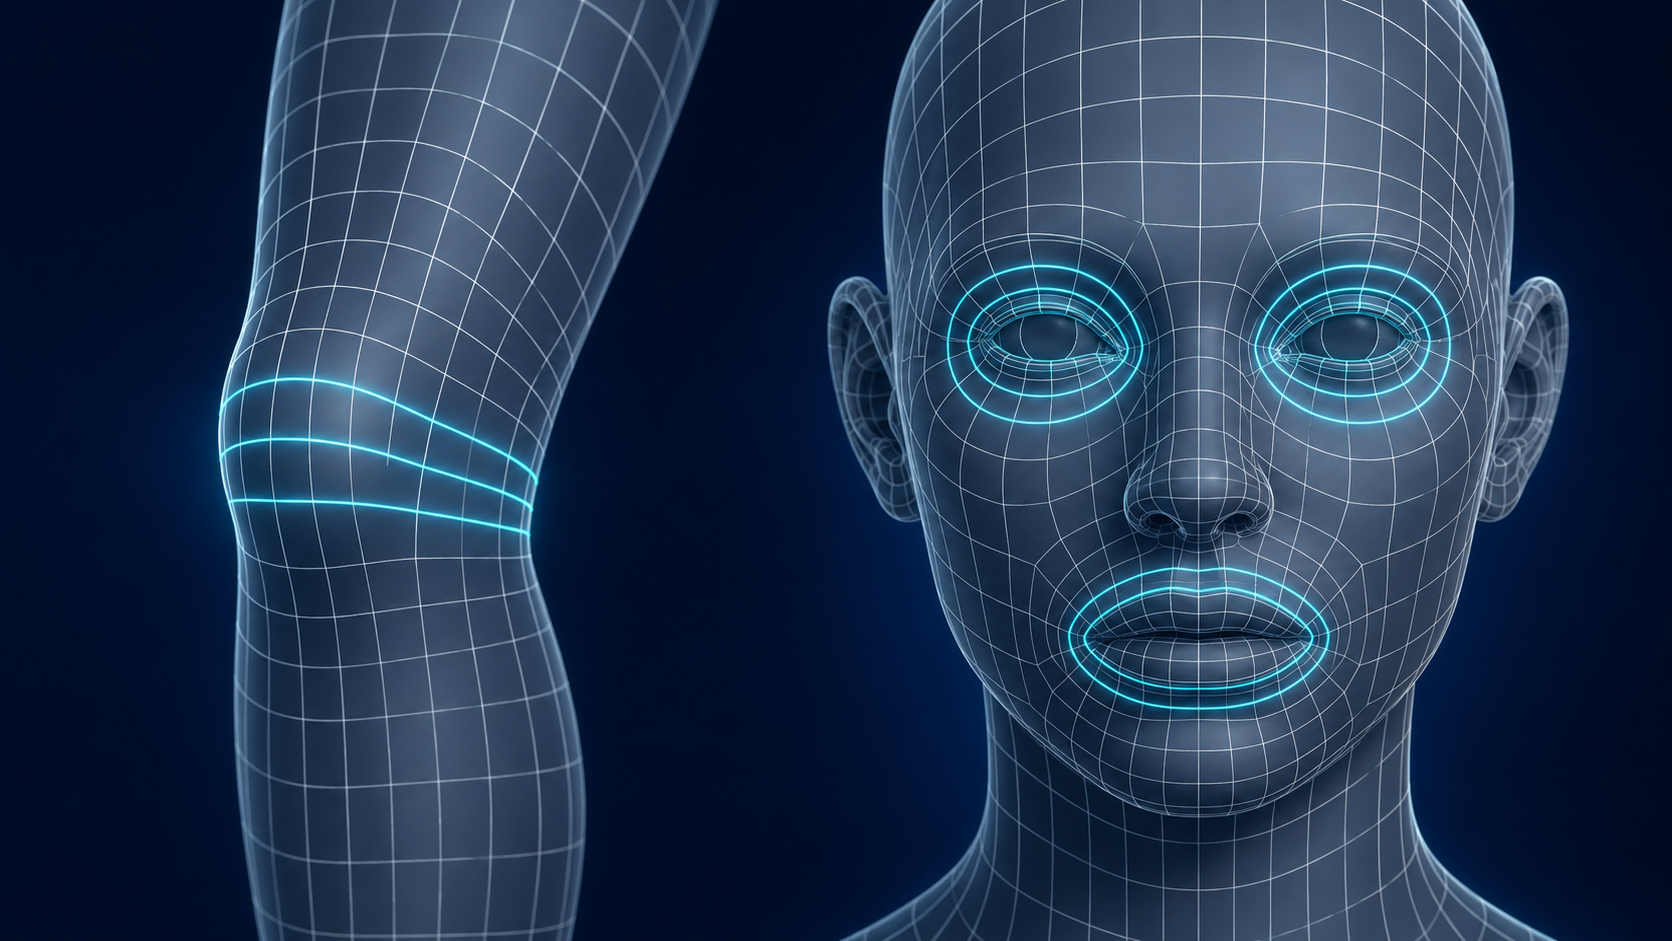
Where you place loops matters more than the tool you use, and it is the difference between a blender retopology that survives animation and one that pinches at the first pose. Three or more parallel loops at each joint give a knee or elbow room to bend smoothly. Concentric loops around the eyes and mouth keep facial expressions clean. Poles, points where five or more edges meet, belong in flat static areas and never in the middle of a bending region, because that is exactly where they pinch.
- Joints (knees, elbows, shoulders): 3 or more parallel loops
- Face: concentric loops around the eyes and mouth
- Poles: only in flat, low-deformation zones
- Creases and hard edges: align loops to the crease line
Automatic Retopology Tools
If drawing polygons by hand is too slow for the asset, automatic tools rebuild topology from the closed mesh in seconds. Blender ships with QuadriFlow (Mesh > Remesh > QuadriFlow, or the Remesh modifier in Quad mode), which generates a clean quad mesh at a target count. ZBrush’s ZRemesher does the same with adaptive density, concentrating polygons where the surface is detailed. Quad Remesher (Exoside) and Instant Meshes are the paid and free standalone options that many production pipelines standardize on. For a lighter touch that keeps your existing loops, you can also just remesh a 3D model in place, but uniform remeshing preserves the silhouette at the cost of landmark-specific edge flow.
| Method | Skill Level | Best For | Output |
|---|---|---|---|
| Poly Build + Shrinkwrap | Manual, precise | Characters, hero assets | Full control |
| RetopoFlow | Intermediate | Organic and hard surface | Clean loops with guides |
| BSurfaces | Intermediate | Fast organic sketching | Strips and grids |
| QuadriFlow (built-in) | Automatic | Quick cleanup, props | Uniform quads at target count |
| ZRemesher | Automatic | Sculpt transfer | Adaptive density quads |
| Quad Remesher | Automatic | Production pipelines | Feature-aware quads |
| Instant Meshes | Automatic | Free quick retopo | Uniform quad and tri mix |
The exact sequence of snapping, drawing, and cleaning you follow here follows Blender’s own definition of the technique: the official manual describes retopology as creating new topology over an existing mesh, which is precisely what this section does (Blender manual, retopology).
Part 5: Restore UVs and Textures After Retopology
Here is the part most fix guides skip: every blender retopology pass destroys the UV map. The original AI mesh carried UVs and baked textures, and the moment you build a new mesh on top of it, that data is gone. The good news is the AI mesh still holds all the surface detail, so keep it in the scene as a bake source instead of deleting it.
Unwrap the New Mesh
Select the retopologized mesh, enter Edit Mode, select all, and press U to unwrap. Smart UV Project gets you a usable layout in one click for most assets, and a manual unwrap is worth it when edge flow is clean enough to give you straight seams. For a deeper walkthrough of islands, seams, and packing, see the UV unwrapping guide.
Bake Diffuse, Normal, and Roughness
Set the new low-poly mesh as the active object, hold Shift and add the original high-poly AI mesh to the selection, then switch to the Bake settings in the Render Properties panel. Choose the bake type you need: Diffuse, Normal, and Roughness cover the standard PBR set. With Selected to Active enabled, detail transfers from the high-poly source onto the low-poly mesh’s UV islands. Watch for the maximum ray distance value; if it is too small, seams and gaps appear in the baked maps.
Build a material with the baked maps plugged into the Principled BSDF node, and the retopologized mesh now looks exactly like the AI original but deforms and subdivides like a production asset.
Skip Hours of Manual Retopology
Neural4D generates watertight quad or triangle meshes with the topology you choose, so the heavy rebuild step is already done before a file reaches Blender.
50 free Power credits every week. No credit card required.
Part 6: Topology by Use Case and Validation
Retopology is not a single target; the correct density and loop structure depend on where the asset is going. A model bound for a game engine, an animation rig, a slicer, and a PBR render each need a different mesh budget. The polycount targets below assume a full blender retopology pass, or a generator that hands you clean topology to begin with.
| Use Case | Target Count | Best Topology | Export Format |
|---|---|---|---|
| Game real-time | 5,000-50,000 triangles | Triangles with LODs | GLB, FBX |
| Animation and rigging | 5,000-20,000 quads | Quad dominant, clean loops | FBX |
| 3D printing | No upper cap | Watertight closed shell | STL |
| High-detail PBR | 50,000-200,000+ | Triangles or quads | GLB, OBJ |
Match the Topology to the Use Case
Game assets favor triangles because engines rasterize triangles directly, and the LOD chain keeps draw calls cheap; polygon count targets for each platform break down those budgets in detail. Animation favors quad-dominant meshes because clean loops deform predictably when a rig is driving them, and a quad-dominant mesh is exactly what you want before you prepare 3D models for rigging. 3D printing is the exception: a slicer cares only about a closed, manifold shell, so watertight matters far more than edge flow, and the repair STL files guide covers the closed-shell requirement in depth.
Validate Before Export
After retopology, re-run every diagnostic from Part 2. Non manifold edges must be back at zero, the Face Orientation overlay should show all blue, and the statistics overlay should confirm the polycount target. Add a Subdivision Surface modifier on top and check the smoothed result for pinch points or lumpy areas, then remove the modifier or leave it applied depending on your target. Finally, apply all transforms (Ctrl+A > Apply All Transforms) so the mesh exports at the size the viewport shows.
💡 How clean topology changes the pipeline
- Retopologized AI model: 2-6 hours for a hand-built character, then reusable for rigging, LODs, and shading
- Cleaned AI model without retopology: usable for static renders and prints, but fails on any deformation
- Clean-from-start generation: the retopology pass collapses into a scale check and a polycount confirmation
Part 7: Choosing a Cleaner Starting Point
The fastest blender retopology is the one you never do. AI generators differ sharply in how much of this workflow their output forces on you, because topology quality is decided at generation time, not in Blender. Surface reconstruction tools prioritize a good-looking silhouette and hand you the repair bill afterward. Volumetric generators compute a closed volume first, so the mesh arrives structured.
| Factor | Neural4D | Meshy | Tripo |
|---|---|---|---|
| Base mesh quality | Watertight, clean topology by construction | Dense triangle soup, heavy vertex overlap | Cleaner silhouette, inverted normals and fragments |
| Typical repair before use | Minimal | 20-45 minutes cleanup | 20-30 minutes cleanup |
| Topology choice at generation | Quad 10K-100K or triangle 500K-1M | Triangle only | Triangle only |
| Retopology pass needed | Usually none | Yes | Usually yes |
| Export formats | OBJ, FBX, GLB, USDZ, STL, BLEND | GLB, FBX, OBJ | GLB, FBX, OBJ |
Neural4D’s Direct3D-S2 architecture computes a mathematically closed volume at 2048 cubed resolution, so the output satisfies the watertight 3D models condition by construction rather than by post-processing repair. You choose quad or triangle topology and a polycount range before generation, which means the mesh arrives with a structure you actually want. And because Neural4D AI retopology runs on the models Neural4D itself generates, the retopology step can be handled in the product before export, not after, so a studio generating dozens of assets stops paying the cleanup tax on every single one.
Part 8: Common Questions on Blender Retopology for AI Models
Q: How long does it take to retopologize an AI 3D model?
It depends entirely on method and asset. A simple prop with automatic tools such as QuadriFlow or ZRemesher takes 2-10 minutes including the cleanup pass. A hand-built character retopology with Poly Build typically runs 2-6 hours for a competent artist, and 1-2 hours with RetopoFlow because the tool places loops faster. For a game-ready hero asset, budget one to three days when you include UV unwrapping and baking.
Q: Can I fix bad topology without retopologizing?
Partially. Decimate reduces the triangle count but keeps the existing flow, so it is right for static props and wrong for anything that deforms. Remesh (Voxel or QuadriFlow) rebuilds uniform topology but ignores landmarks, so a face loses its eye and mouth loops. If the asset needs to animate, deform, or subdivide cleanly, there is no shortcut around a proper retopology pass. For static, non-deforming assets, Decimate plus the cleanup steps in Part 3 is usually enough.
Q: What is the best Blender retopology add-on?
RetopoFlow is the most complete paid option, with dedicated tools for loops, strips, and contours. BSurfaces is a strong free alternative that builds topology from sketch strokes. On the automatic side, QuadriFlow is built into Blender at zero cost, ZRemesher wins on adaptive density when you are transferring a sculpt, and Quad Remesher is the production favorite for consistent quad grids. Choose by asset: characters favor manual tools, while props and environments can lean on automatic ones.
Q: Why does my AI 3D model have holes and flipped normals?
Both come from surface reconstruction. When the algorithm has low confidence about part of the geometry, it stops generating faces and leaves a hole, and the interior of a concavity often gets generated pointing the wrong way, which shows up as flipped normals. Fill Holes and Recalculate Outside handle most cases, and Make Manifold closes the rest. Run the 3D Print Toolbox Check All after each repair to confirm the count dropped to zero.
Q: Do I need to retopologize AI models for 3D printing?
No. Slicers care about a closed, watertight, manifold shell, not about edge flow or quad distribution. A triangle soup model prints perfectly if it is manifold, so run the 3D Print Toolbox Check All, repair to zero non manifold edges, and you can skip retopology entirely. Only retopologize for print when you also need the model for animation, or when a huge organic mesh needs a lower file size for your slicer.
Q: Is it better to retopologize an AI model or generate a new one?
Retopology preserves the exact silhouette, proportions, and detail you already approved, at the cost of two to six hours of manual work. Generating a new model is nearly free on time but changes the asset, and if the generator is the reason the topology is bad, the replacement will be bad in a new way. A faster path is choosing a generator that produces clean topology from the start, so the question never comes up.
Stop Retopologizing Bad AI Meshes
A clean blender retopology workflow turns the worst AI output into a production asset, and the skill is worth having in any 3D pipeline. Diagnose the damage, close the mesh, rebuild the edge flow, then bake the detail back. But you can also stop paying the cost upstream. If your generator hands you a closed, well-structured mesh to begin with, the hours of drawing loops disappear. Generate with Neural4D, import a watertight quad or triangle mesh with the topology you asked for, and spend your Blender time on the parts of the asset that actually matter.
Stop Retopologizing Bad AI Meshes
Generate a watertight, topology-clean mesh from the start with Neural4D. No triangle soup, no hours of loop drawing.
50 free Power credits every week. No credit card required.