

Floor Plan to 3D: How to Convert with AI in Minutes
Quick Summary
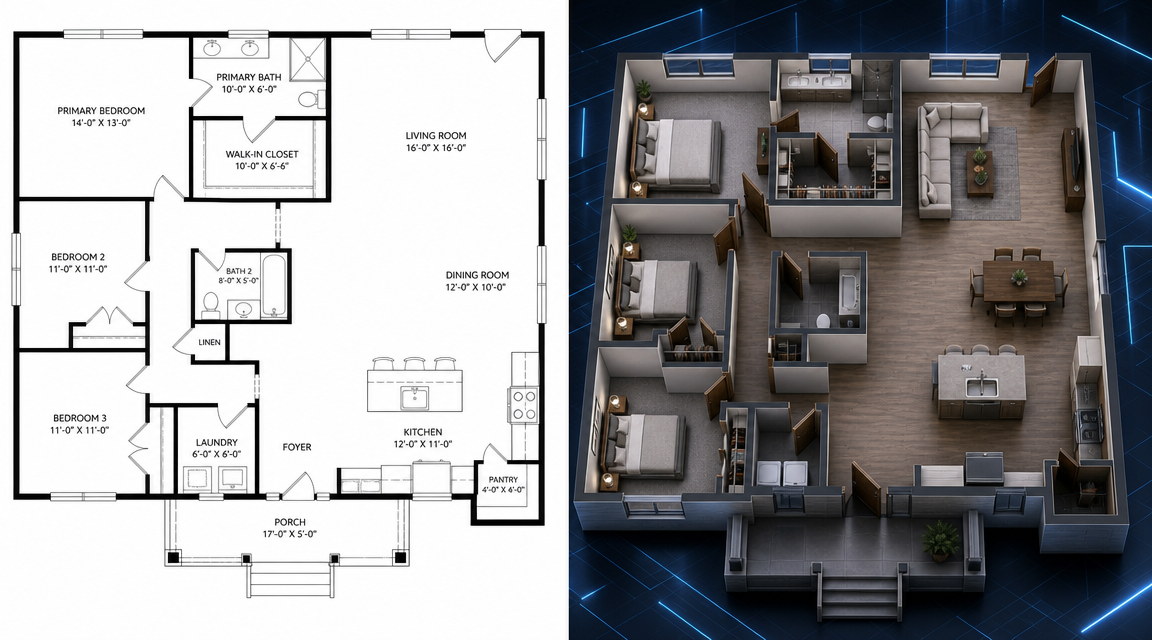
Floor plan to 3D conversion turns a flat 2D drawing into a meshed, textured 3D model that a render engine, game engine, or 3D printer can open.
- Manual conversion in Blender or 3ds Max runs two to five days for a single residential plan.
- AI conversion produces a watertight base mesh from a floor plan image in roughly 90 seconds.
- Neural4D’s Direct3D-S2 architecture builds the mesh volumetrically and returns clean topology with PBR textures in about 2 minutes.
- The model exports to .glb, .fbx, .obj, .usdz, .stl, and .blend for any downstream pipeline.
- Neural4D-2o refines geometry and materials through natural language instructions after generation.
Floor plan to 3D conversion is the step that turns a measured drawing into an asset a client can walk through, a game engine can render, or a printer can slice. Neural4D’s Image to 3D engine reads a plan image, builds the walls volumetrically, and returns a watertight mesh with PBR textures in about 2 minutes. This guide covers image preparation, the one dimension that sets your scale, accuracy you can expect from each input type, verification before export, and the format decision for your pipeline.
- Part 1: Why Traditional Floor Plan to 3D Workflows Are Broken
- Part 2: What You Need Before You Start (Inputs and Tools)HOT
- Part 3: Upload Your Floor Plan and Generate the Base Mesh
- Part 4: Add PBR Textures and Refine with Neural4D-2o
- Part 5: From Floor Plan to 3D Model to Render
- Part 6: Frequently Asked Questions on Floor Plan to 3D Conversion
- Part 7: Start Your Floor Plan to 3D Workflow Today
Part 1: Why Traditional Floor Plan to 3D Workflows Are Broken
The standard floor plan to 3D pipeline means importing a 2D drawing into Blender or 3ds Max, tracing every wall by hand, cutting door and window openings, assigning PBR materials room by room, and configuring a lighting rig before a single render can run. A professional doing this carefully spends two to five days on a modest residential floor plan.
For architects presenting to clients, that timeline is a liability. By the time the 3D visualization is ready, feedback has already changed the layout twice. For freelancers quoting rapid turnaround, five days of modeling work per project never pencils out.
“Work that was taking ten people three months is now taking one person two hours.”
Martha Tsigkari
Foster + Partners, speaking at The Architecture Foundation event “Architecture in the Age of Artificial Intelligence”
A 2025 Bluebeam survey of more than 1,000 AEC professionals found that 27 percent already apply AI to automation and decision making, and that 68 percent of adopters saved at least $50,000. Those gains do not come from replacing design software. They come from deleting the manual steps between a finished design and something a client can actually see.
AI competitors like Meshy and Tripo promise speed, but their outputs on architectural shapes frequently contain non-manifold edges, disconnected faces, and distorted wall corners. A floor plan with 12 rooms might import into Unreal Engine with 3 to 7 open mesh boundaries that need patching before any physics or rendering pass can run. You trade modeling time for cleanup time.
The real blocker is not software complexity. It is that every wall, material, and room boundary requires a human decision in traditional workflows. Remove that bottleneck with architecture-aware AI and the pipeline compresses from days to minutes. That is the shift Neural4D’s Direct3D-S2 architecture makes possible.
Market Data: Mordor Intelligence values the global 3D rendering market at $5.23 billion in 2026 and projects $13.92 billion by 2031, a 21.63% CAGR. Architectural visualization is the largest single segment at 41.90% of revenue.
Part 2: What You Need Before You Start (Inputs and Tools)
The One Dimension That Sets Your Scale
A 3D model generated from an image is proportionally correct but metrically undefined. Nothing in a raster image tells the engine whether a wall is 6 meters long or 60. Every reliable workflow solves this the same way: supply one real world measurement, and the whole model inherits a true scale from it.
Choose a dimension you already know and apply it to the longest wall visible in the plan. Longer spans absorb pixel measurement error better than short ones. If you have no tape measurement, a standard interior door is 0.9 m wide, and that figure is accurate enough to calibrate a residential plan.
After generation, measure that same wall in the 3D model. Divide the real measurement by the model measurement and you have the uniform scale factor to apply in your DCC tool. Every wall, opening, and fixture scales with it, so one verified dimension corrects the entire model.
Neural4D accepts the same calibration as a natural language instruction through Neural4D-2o. Telling the model “set the total floor plan width to 12 meters” applies a real world scale inside the browser, which removes the manual scale factor step for teams that never leave the tool.
Three Input Types, Three Levels of Fidelity
Floor plan images are not one input class. The source file decides how much dimensional information survives into the mesh, so prepare the image according to where it came from.
| Input type | How to prepare it | What the mesh inherits |
|---|---|---|
| Vector CAD export (PDF from AutoCAD, Revit, ArchiCAD) | Export to PDF, then render a PNG at 300 to 600 DPI | Sharp wall edges and printed dimensions. Highest dimensional fidelity once calibrated. |
| Scanned or printed plan (paper drawing, listing PDF) | Scan at 300 DPI minimum, level the page, raise contrast | Dependable wall layout. Mask dimension text where it crosses structural lines. |
| Phone photo | Shoot directly overhead, fill the frame, avoid shadows | Usable proportions. Lens distortion costs precision, so treat the result as a visual asset rather than a measured one. |
Conversion services that publish accuracy figures for their own output cluster around the same pattern: vector CAD input lands in the 90 percent range, scanned plans near 80 percent, and marketing floor plans lifted from property listings fall below 30 percent. Those figures describe how much dimensional information the source image carries, not how well a generator reads it.
For DWG and DXF files specifically, Neural4D reads raster images rather than CAD vector data. Exporting the CAD file to PDF and rendering a high resolution PNG preserves more of the original precision than screenshotting the drawing at screen resolution.
Input Image Requirements
Neural4D’s Image to 3D engine takes a standard photo or scan. You do not need a CAD file, a DWG, or a vector PDF. A high-contrast JPEG or PNG of your floor plan is enough. For best results:
- Minimum resolution: 1024 x 1024 pixels. Higher is better. A 4K scan produces cleaner edge detection.
- Walls should read as distinct thick lines. Thin pencil-sketch layouts lose wall geometry in the mesh pass.
- Straight-on overhead angle, not a photo taken at an angle from across a desk.
- Remove text annotations if they overlap structural elements. Labels on open floor area are fine.
If your original is a PDF, export a PNG at 300 DPI or higher before uploading. Most PDF viewers, including Preview on Mac and Adobe Acrobat, have a built-in export-to-image function. You do not need any conversion software.
Common Input Problems and How to Fix Them
Three input issues account for most failed or degraded floor plan to 3D generations:
- Low-contrast walls: If wall lines blend into the background, the mesh pass misses boundaries and generates open rooms. Fix: increase contrast in any photo editor before uploading. Aim for near-black lines on a near-white field.
- Angled photo: A floor plan photographed at 15 to 20 degrees introduces perspective distortion that warps room proportions in the output mesh. Fix: photograph directly overhead, or use a document scanner app with perspective correction.
- Overlapping text annotations: Dimension labels drawn across wall segments confuse edge detection. Fix: mask or erase text that touches structural lines before uploading.
Wall Thickness and Opening Dimensions
AI generation reproduces wall and opening proportions from the drawing, but checking them against standard dimensions catches scale errors before they compound downstream. The conventions below are what a residential plan is normally drawn to:
- Interior partition walls: 100 to 150 mm
- Exterior walls: 200 to 300 mm
- Interior door openings: roughly 2.1 m tall
- Window sill height: 0.9 m above floor level
- Ceiling height: 2.4 to 3 m in residential construction
A model whose walls read at 40 mm, or whose doors read at 1.2 m, has a scale problem rather than a geometry problem, and the calibration step above fixes it.
What Neural4D Handles Automatically
Once the image is uploaded, Neural4D’s image to 3D pipelines handle wall extrusion, room boundary classification, door and window opening placement, mesh closure into a watertight output, and initial UV unwrapping. None of those steps require manual input.
For teams producing architectural assets at volume, the Image to 3D feature page documents batch input options and API access for pipeline integration.
Turn Your Floor Plan Into a 3D Model in Minutes
No modeling skills required. Upload your floor plan image and get a watertight, export-ready mesh from Neural4D’s Direct3D-S2 engine.
Convert Your Floor Plan Now → Free
Free users get 50 credits per week. No credit card required.
Part 3: Upload Your Floor Plan and Generate the Base Mesh
Step 1: Upload to Neural4D Image to 3D
Navigate to the Image to 3D studio and upload your prepared floor plan image. The upload interface accepts JPG, PNG, and WebP. Select your generation settings before clicking Generate. The model type, untextured base mesh or textured output with PBR maps, is configured upfront rather than as a separate post-generation step.
If you want only the structural geometry to texture manually in Blender later, select the base mesh option. If you want a production-ready asset with Albedo, Normal, Roughness, and Metallic maps baked in, select the PBR texture option at this stage.
Step 2: What Happens During Generation
Neural4D’s Direct3D-S2 architecture processes the floor plan volumetrically instead of estimating depth from a flat projection. The engine reads wall edges, identifies room topology, infers ceiling height from structural context, and builds the mesh volume from the inside out. That is why the output is watertight: there are no open mesh faces for a slicer or game engine to choke on.
- Base mesh (untextured): approximately 90 seconds
- Full PBR texture pass: additional computation required; total generation time about 2 minutes
The textured pass is not a bottleneck. It is the entire production pipeline, and it replaces what used to be a render farm queue plus a manual artist pass. The textured, watertight GLB is the deliverable. For a broader look at what a robust image to 3D pipeline involves end to end, the step-by-step guide on converting any image to a 3D model covers the technical detail.

Accuracy You Should Expect from Each Input Type
Neural4D generates proportionally accurate geometry from the image you provide. Wall ratios, room adjacencies, and relative door and window positions hold at high fidelity. What the model does not carry on its own is a real world scale, and the gap between those two statements is where most disappointment with AI floor plan conversion originates.
Practical accuracy follows the input table in Part 2. A vector CAD export printed at 300 DPI yields a mesh that holds printed dimensions closely once calibrated. A clean scan yields dependable room layout. A plan photographed at an angle, or lifted from a property listing, yields a model suited to visualization and staging rather than anything that will be measured.
Where the output does not belong: construction documentation, permit submissions, structural engineering, and any deliverable where a two percent dimensional error becomes a liability. Neural4D does not replace Revit or AutoCAD for those workflows, and treating a generated mesh as a survey is the fastest way to misuse it.
Verifying the Model Before Export
Four checks catch almost every generation defect, and they take under five minutes:
- Wall count. Count the wall runs in the source plan, then count them in the mesh. A missing run usually means two rooms merged during the topology pass.
- Door openings. Confirm every door reads as an opening rather than a solid panel. An unopened doorway is the most common geometry error and it blocks any later walkthrough or game engine navigation.
- Window faces. Check that windows sit on the correct exterior wall. A window placed on an interior wall signals confused boundary classification, and that region needs regenerating.
- One known dimension. Re-measure the calibration wall from Part 2. If it is off, apply the uniform scale factor rather than editing individual walls.
If two or more checks fail, regenerate from a higher contrast input instead of patching the mesh. The fix is almost always in the input image, not the geometry.
Multi-Floor Plans: One Story Per Image
Neural4D generates one building level per upload. A plan containing a basement, ground floor, and upper floor needs three separate generations, because the model cannot infer vertical stacking from a single flat drawing. No consumer AI converter solves this in one pass.
The workflow that works: generate each story from its own floor plan image, calibrate every level against the same known dimension so the scales match, then stack and align the levels in Blender, Maya, or your DCC tool using the exported .blend or .fbx files. Neural4D-2o adjusts ceiling and floor heights per level before export, which is what lets the stories line up after a merge.
Keep a shared vertical reference while stacking. The most common multi-floor failure is not geometry at all, it is a stairwell opening misaligned between two levels.
Part 4: Add PBR Textures and Refine with Neural4D-2o
PBR Textures in a Single Pass
When you select the textured output option at upload time, Neural4D generates the base mesh and the PBR maps together. You receive:
- Albedo (Base Color) map
- Normal map for surface microdetail
- Roughness map for material finish variation
- Metallic map for surface type classification
These maps follow standard PBR workflows and drop directly into Unreal Engine’s material system, Unity’s Universal Render Pipeline, or any Blender Principled BSDF shader. No remapping, no baking, no post-processing required. If you want a different material set or per-room textures, Neural4D’s AI Texture tool generates and applies matching materials from a reference image or a text prompt for meshes created inside 3D Studio. The AI texture generation workflow covers when a targeted material pass beats re-generating the whole model.
Refining with Neural4D-2o
Not every floor plan generates perfectly on the first pass. Unusual wall angles, large open-plan spaces, and complex stairwell geometries sometimes produce mesh sections that need adjustment. Neural4D-2o addresses this through natural language instructions rather than manual vertex editing.
After generation completes, you type commands such as “increase the ceiling height to 3 meters,” “widen the corridor between rooms 2 and 3,” or “add an archway opening in the east wall,” and the model regenerates with the adjustment applied. No 3D modeling software knowledge required. The conversation loop replaces what used to be a retopology session in Blender. Each edit consumes 30 Credits, and editing applies to models generated in the current Neural4D-2o session.
For context on how AI 3D modeling integrates into broader design workflows, the guide on 3D modeling for interior design workflows covers asset management and staging strategy.
Part 5: From Floor Plan to 3D Model to Render
Export Format Decision
Neural4D exports the completed model in six formats. The right choice depends on your downstream pipeline:
| Format | Best Use Case | Notes |
|---|---|---|
| .glb / .gltf | Web, AR viewers, Unreal Engine 5 | Textures embedded; single file delivery |
| .fbx | Unity, Maya, 3ds Max | Industry standard for game engine import |
| .obj | Blender, SketchUp, general DCC tools | Separate .mtl file for materials |
| .usdz | iOS AR Quick Look, Shopify AR | Apple AR ecosystem; no viewer install required |
| .stl | 3D printing, slicing software | Watertight output prints without hole-patching |
| .blend | Blender-native workflows | Full scene hierarchy preserved |
Quick format guide: Use .glb for web viewers and Unreal Engine 5. Use .fbx for Unity, Maya, or 3ds Max. Use .stl for 3D printing. Use .usdz for iOS AR Quick Look.
What Your Render Engine Still Needs
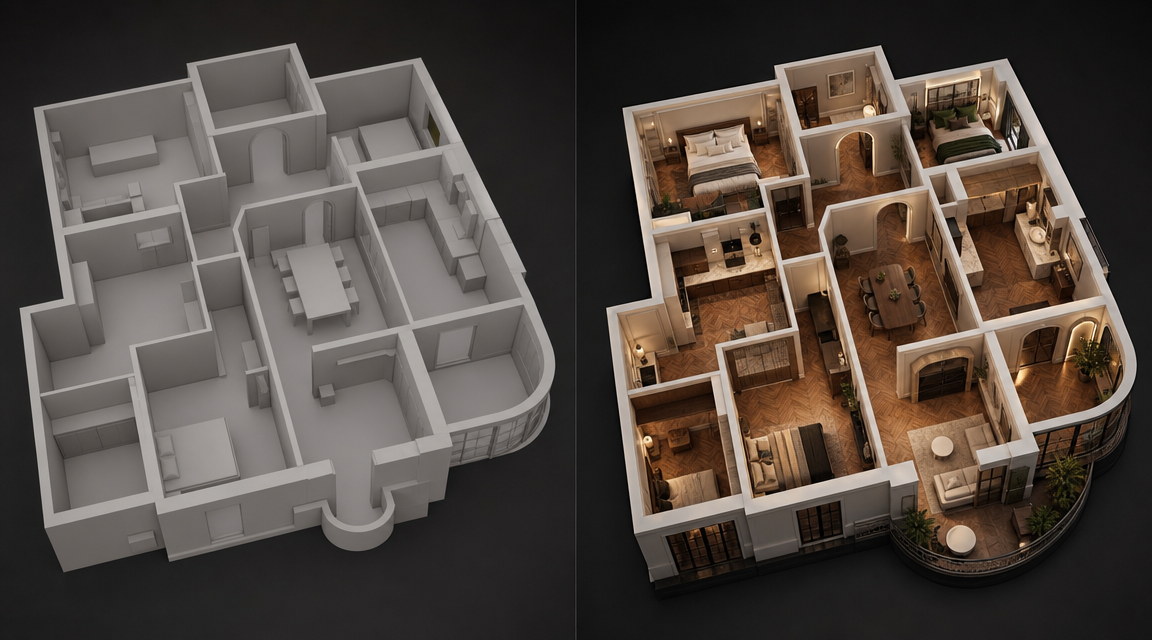
The exported model arrives with PBR maps attached, but a floor plan to 3D model is not a finished render. Lighting, camera, and environment are still yours to set. Three values decide whether an architectural render reads as a real room:
- Camera height. Architectural visualization places the camera at eye level, roughly 1.6 to 1.7 m. A camera set at ceiling height produces the dollhouse view, which reads as a diagram rather than a room.
- HDRI environment. A studio HDRI lights a product shot. An architectural interior needs an outdoor HDRI matched to the scene’s latitude and time of day, or the daylight coming through the windows will contradict the shadows on the floor.
- IES profiles on light fixtures. Real fixtures emit in measured patterns. An IES profile in Unreal, V-Ray, or Corona turns a glowing disc into a light source with falloff a viewer recognizes.
Rendering a still is minutes per frame on current hardware. The render step was never the bottleneck. Producing the model the render engine has to load was.
Where Neural4D Fits in Your Architecture Pipeline
Neural4D is not a floor plan design app. It does not replace Revit, AutoCAD, or SketchUp for construction documentation. What it replaces is the 3D visualization and presentation asset step that follows a finalized design. The tool occupies a specific, well-defined node in the pipeline: image in, watertight 3D model out.
The practical flow for most architecture and interior design teams: finalize the floor plan in your CAD software, export or photograph the layout, upload to Neural4D, generate the 3D asset, refine with Neural4D-2o if needed, export to your render engine or AR viewer. The node Neural4D occupies has historically been the most time-consuming step, and at about 2 minutes for a fully textured GLB it no longer blocks the pipeline.
Compared to AI competitors like Meshy and Tripo, the difference is output quality. Broken geometry and triangle soup might pass for a quick concept mock, but watertight mesh integrity is non-negotiable for any deliverable headed into a slicer, a game engine physics simulation, or an AR viewer. Neural4D’s Spatial Sparse Attention architecture reduces hallucinated geometry and delivers stable, engine-ready topology on complex architectural inputs.
Part 6: Frequently Asked Questions on Floor Plan to 3D Conversion
Q: Can I convert a floor plan to 3D for free?
Yes. Neural4D’s free plan includes 50 Power credits per week, which is enough to generate and test several floor plan models without a paid subscription. Free plan outputs are marked Trial and are intended for evaluation. For commercial use such as client deliverables, marketing renders, or game assets, a paid plan grants full commercial rights and higher concurrency for batch jobs.
Q: How do I convert a PDF floor plan to a 3D model?
Export the PDF as a PNG or JPG at 300 DPI or higher using any PDF viewer, then upload that image to Neural4D’s Image to 3D. The engine reads pixel-level wall contrast rather than vector paths, so a high-resolution raster image is sufficient. A vector PDF exported directly from CAD carries more dimensional information than a scan, which makes it the stronger starting point whenever you have the choice.
Q: What is the best AI for converting a 2D floor plan to a 3D model?
The deciding factor for architectural work is whether the output is a closed manifold mesh with PBR maps attached. Tools like Meshy and Tripo return results quickly but frequently produce non-manifold meshes with open edges, inverted normals, and disconnected faces that need manual cleanup before a render engine or slicer will accept them. Neural4D’s Direct3D-S2 architecture generates closed manifold geometry as its baseline output, which is why the model can go straight into Unreal Engine, Blender, or a 3D printer.
Q: Can I use a hand-drawn floor plan sketch instead of a digital file?
Yes, with caveats. A clear, high-contrast pencil or pen sketch photographed straight-on at high resolution produces usable results. Sketches with overlapping lines, very thin walls, or heavy shading inside rooms tend to confuse the wall-detection pass and produce geometry errors. If your sketch is rough, trace a cleaner version digitally or use a photo editing app to increase contrast and sharpen edges before uploading.
Q: Does Neural4D support multi-story floor plan conversion?
Each upload generates a single building level. For multi-story buildings, upload each floor plan separately to generate individual story meshes, calibrate every level against the same known dimension so the scales match, then align and combine them in Blender, Maya, or your preferred DCC tool using the exported .blend or .fbx files. Neural4D-2o adjusts ceiling and floor heights per level before export to help the stories stack correctly when merged externally.
Q: How accurate is the 3D output compared to the original floor plan dimensions?
Neural4D generates proportionally accurate geometry from the image input. Wall ratios, room adjacencies, and relative door and window positions are preserved. The model does not carry a real-world scale until you provide one, either as a Neural4D-2o instruction such as “set the total floor plan width to 12 meters” or as a uniform scale factor applied in your DCC tool. The output suits visualization, staging, and game development. It is not intended for building permits or structural engineering documents.
Part 7: Start Your Floor Plan to 3D Workflow Today
The gap between a 2D floor plan on paper and a fully navigable 3D architectural model has collapsed. The floor plan to 3D pipeline has been fundamentally changed by AI generation. What took professional modelers days of work in Blender or 3ds Max now takes a single image upload and about 2 minutes of compute time. Neural4D’s Direct3D-S2 architecture produces the watertight, PBR-textured output that general purpose AI generators struggle with: geometry that works in slicers, game engines, and AR viewers without manual cleanup.
Upload your floor plan image through the Image to 3D studio link in the button below, generate a production-ready 3D model, refine it with Neural4D-2o natural language instructions, and export to the format your pipeline requires. The 50 free weekly credits mean there is no cost to run your first test today.
Stop Modeling. Start Generating.
Upload any floor plan image and get a watertight, PBR-textured 3D model ready for Unreal Engine, Blender, or your 3D printer. In about 2 minutes.
Trusted by architects, game developers, and 3D artists worldwide.
Free users get 50 credits per week. No credit card required.