Verity 3D Model for Printing: STL Files, Settings, and Finishing
Quick Summary
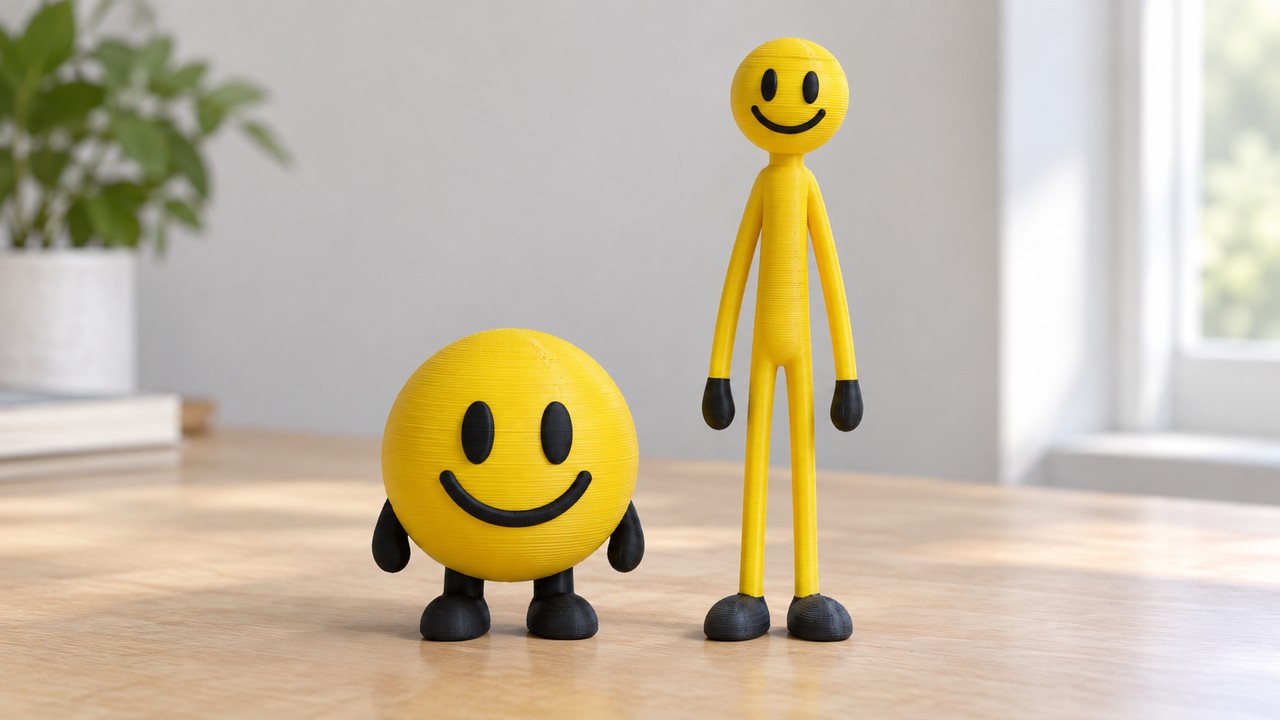
- Free Verity STL files are already published on MakerWorld, Thingiverse, Cults3D, and Printables. Two display forms exist: the compact smiling sphere and the tall lanky humanoid.
- The sphere is the hard part. A smooth ball is the worst case for FDM overhangs, so supports under the lower half and an outer brim matter far more here than on an ordinary character model.
- A published fan-art listing for the compact figure recommends 0.16-0.20 mm layers, 10-15% Gyroid infill, supports, and a brim. Treat that as a tested starting point for that model, not a universal rule.
- Resin suits the small sphere. FDM suits the large humanoid, which is usually best split into parts.
- If you want a pose or size nobody has uploaded, Neural4D can generate a custom Verity model from a reference image or a text description, with topology and polycount chosen before generating.
Yes, you can 3D print Verity. Free STL files for both the smiling sphere and the tall humanoid form are already circulating on the major model sites, so the file is the easy part. The difficulty is the shape itself: a near-perfect sphere puts its entire lower half in overhang, which is the single worst geometry you can hand an FDM printer. This guide covers where to find a Verity model, why the sphere changes your settings, what to actually set in the slicer, how to finish it, and how to generate a custom Verity of your own when nobody has uploaded the version you want.
- Part 1: Where to Find Verity STL Files (Free and Paid)
- Part 2: Why the Sphere Shape Decides Your Print Strategy
- Part 3: Verity Print Settings for FDM and Resin
- Part 4: Finishing a Verity Print: Seams and That Smiley Face
- Part 5: Making a Custom Verity 3D Model for Printing with AI
- Part 6: Common Questions About Printing Verity
- Conclusion: Start Your Verity Print
Part 1: Where to Find Verity STL Files (Free and Paid)
Verity began as a character in a 2026 Minecraft horror series, a cheerful yellow smiley-face helper that turns hostile over the course of the story, and the fandom produced printable models almost immediately. Because the character is community-driven rather than an official asset, everything available today is a fan-made derivative work, and that has two consequences worth knowing before you download anything.
First, the models vary a lot in quality and in which version of the character they depict. Second, the license is set by each individual uploader, not by a rights holder, so two files that look identical on the thumbnail can have completely different rules about selling prints. Check the license on the listing you actually download, not on a similar one.
The two forms you will find
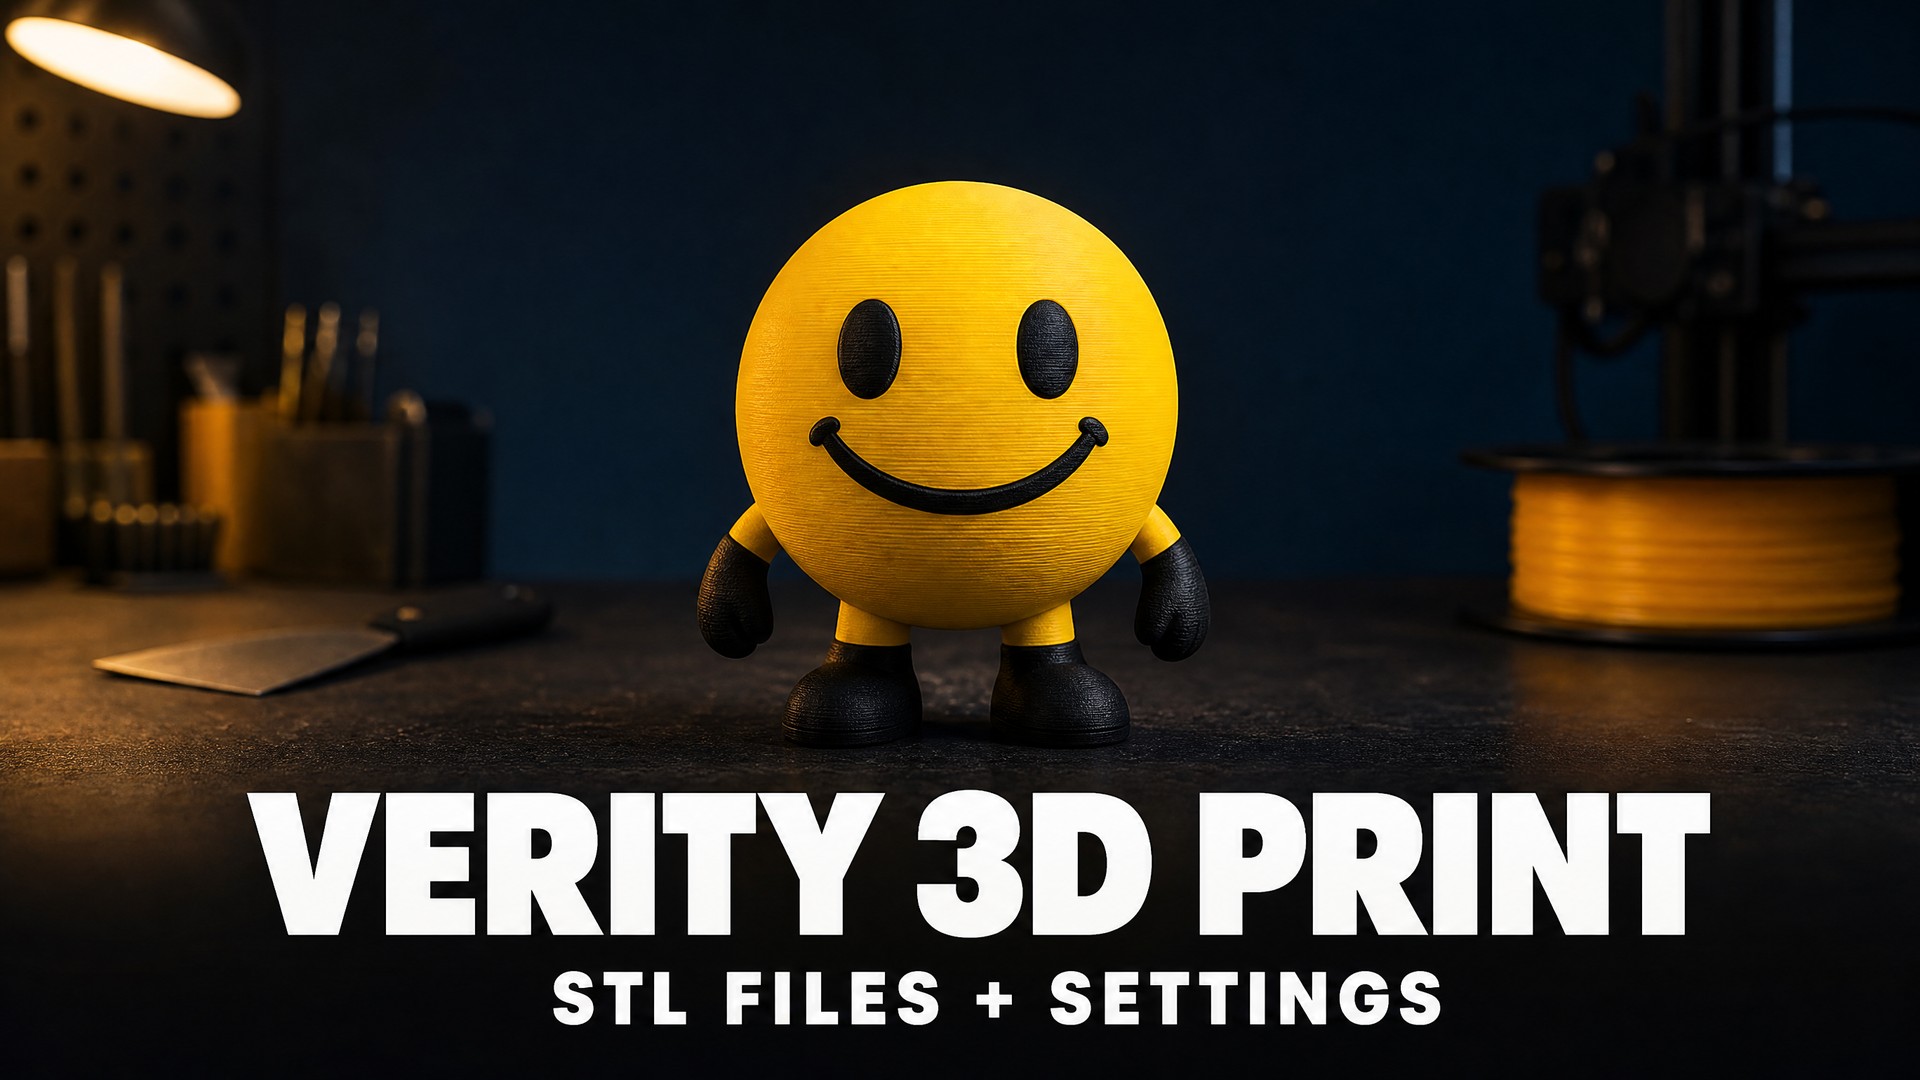
Search results cluster into two distinct silhouettes. The first is the compact form: a round yellow body with a simple black smile, small enough to sit in the palm and close enough to a true sphere that it prints as a single solid piece. The second is the tall humanoid form that the character escalates into, a lanky figure with very long thin limbs and a small spherical head. These are not interchangeable projects. The compact form is a one-piece print with a support problem; the tall form is a multi-part print with a stability and assembly problem.
Within those two shapes you will also find expression variants, usually sold or shared as a set with separate files for happy, angry, and screaming faces, and stand-mounted versions where the character floats above a base. If you want the character mounted like a collectible rather than standing on its own, the stand variants save you designing a base yourself.
Where the files live
MakerWorld has the widest selection, including a no-AMS version printed as separate parts and several staged variants of the humanoid form. Thingiverse carries a detailed fan-art figure that has been re-uploaded to several mirrors, and the original listing there includes the creator’s own print recommendations. Cults3D hosts both an eight-file expression pack and multi-part sets around 150 mm tall. Printables has smaller novelty pieces, including a flat sheet-style model. Meshy’s tag gallery also surfaces Verity models generated by other users, which is a useful reminder that the same AI route covered in Part 5 is what produced some of what you are downloading.
For the wider picture of how these sites compare on licensing and quality, the Batman 3D print guide covers the same ground for a much larger character catalog, and the Zelda 3D print guide walks through props and figures from the same fan-made ecosystem.
Part 2: Why the Sphere Shape Decides Your Print Strategy
Most character prints fail at thin details: fingers, weapon tips, hair strands. Verity fails in the opposite way. The compact form is close to a perfect ball, and a ball is geometrically hostile to FDM printing.
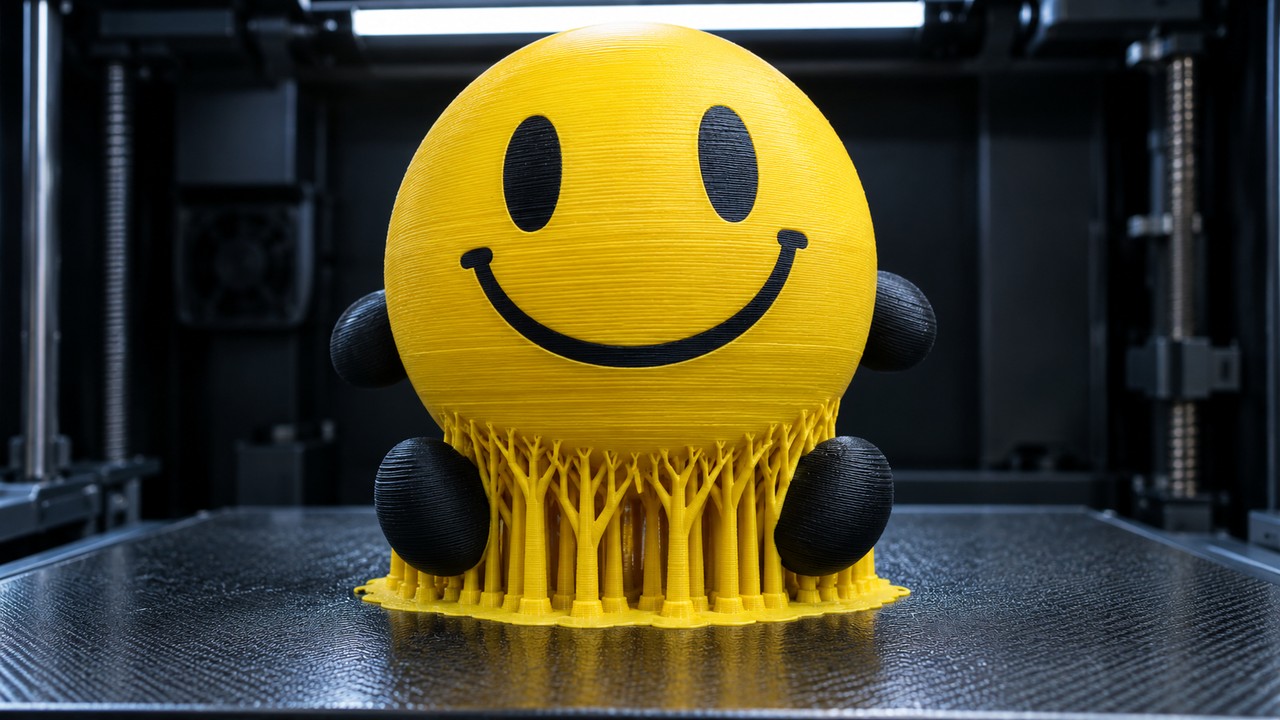
FDM printers handle overhangs up to roughly 45 degrees from vertical before the extruded plastic starts sagging, because each new layer still has enough of the previous layer beneath it to bond against. On a sphere, the angle between the surface and vertical increases continuously as you move up from the equator. Above the halfway point the surface tilts inward. Below it, the entire lower hemisphere is overhang, and at the very bottom the surface is horizontal. There is no orientation that avoids this, because a sphere looks the same from every direction. Rotating it only decides where the bad region lands.
That produces two practical problems. The first is support volume: a large fraction of the model’s height needs support underneath it, which is more material and more print time than the figure’s small size suggests. The second, and the one that actually ruins prints, is contact scarring. Supports have to touch the model somewhere, and on a sphere every support contact lands on a curved visible surface, which is exactly where a glossy yellow finish shows every blemish.
Orienting the compact form
Because you cannot eliminate the overhang, choose where it goes. Lying the sphere so the smiling face points upward and slightly back means the supports concentrate on the smooth back and underside of the body, leaving the eyes and mouth untouched. Printing the face-down orientation is the common mistake: it puts the tightest curvature, the finest detail, and the most support contacts all on the same surface.
A secondary benefit of facing the detail upward is that the face is printed last, on top of an already-solid mass. Facial features printed early can be disturbed by the nozzle dragging across the growing sphere.
Why the tall form has the opposite problem
The humanoid version has almost no overhang problem, because a thin vertical limb is mostly self-supporting. Its issue is that it is tall, thin, and top-heavy, so the failure mode moves from sagging to wobbling and detachment. Long thin legs print with very little bed contact area, and the small spherical head at the top of a long body is a lever arm. Splitting the model at the waist and printing the upper and lower halves separately is the standard fix, and it also lets you print the legs flat on the plate for maximum adhesion.
For a broader look at how model geometry drives slicer decisions, see this guide to preparing and exporting models for 3D printing.
Part 3: Verity Print Settings for FDM and Resin
The published print guidance that ships with the fan-art Verity figure listing is a reasonable starting point, and it is worth quoting because it directly addresses the sphere: 0.16-0.20 mm layer height, dropping to 0.12 mm if you want the facial curves smoother, 10-15% Gyroid infill, supports required under the spherical underside, and an outer brim recommended for bed adhesion. Those numbers come from one creator testing one specific model, so treat them as a validated starting point rather than a universal answer, and adjust from there.
The table below shows how the three common variations differ. Values come from that published guidance where it applies, and from standard FDM practice for the columns it does not cover.
| Setting | Compact sphere, FDM | Tall humanoid, FDM | Compact sphere, resin |
|---|---|---|---|
| Layer height | 0.16-0.20 mm, or 0.12 mm for a smoother face | 0.20 mm | 0.03-0.05 mm |
| Nozzle | 0.4 mm | 0.4 mm | Not applicable |
| Infill | 10-15%, Gyroid | 10-15%, Gyroid | Hollow with 2 mm walls |
| Wall loops | 3 | 3 | Not applicable |
| Supports | Required, tree or organic, under the lower hemisphere | Only at limb overhangs, after splitting at the waist | Angle the model, add drain holes |
| Brim | Outer brim recommended | Outer brim recommended for the legs | Not applicable |
| Material | PLA or PLA+ | PLA+ for stiffness | ABS-like resin |
FDM settings that matter for the sphere
Use tree or organic supports rather than a blocky support lattice. Tree supports reach the model through a small number of contact points, which means fewer scars on a surface you cannot hide, and they are easier to break away from curved geometry without gouging it. Setting supports to touch the build plate only, rather than branching off the model itself, keeps contact points off the sphere entirely where the geometry allows it.
A slightly larger support Z gap than usual pays off here. The default gap is tuned to hold geometry still while staying removable, but on a glossy sphere a support that fuses to the surface leaves a mark you will spend more time sanding than the gap saved. Increasing it slightly trades a little more cleanup risk underneath for a much cleaner visible surface.
Gyroid infill at 10-15% is more than adequate for a display piece this size, and Gyroid is worth keeping rather than swapping for a simpler pattern because it distributes strength evenly in all directions, which suits a shape loaded from every angle. Raising infill beyond that mostly adds print time and weight without improving how the piece displays.
Resin settings for the compact form
If the model you want is the small smiling sphere, resin is the better tool, for a reason that follows directly from Part 2. The sphere’s cosmetic problem on FDM is the layer lines: they run horizontally across a curved surface where nothing hides them, and on a glossy yellow finish they catch the light. Resin cures each whole layer at once rather than extruding a bead, so the surface comes off the printer smooth with no layer lines to sand. You still need supports under the lower half and they still leave contact marks, but you start from a smooth surface instead of a ridged one.
Two adjustments matter. Angle the model rather than printing it flat, so the cross-section that peels away from the film each layer stays small, and hollow the sphere with drainage holes if it is more than a few centimeters across, since a solid sphere of resin is heavy and will keep curing unevenly inside. Pre-supported files save real setup time here, and for a shape with this much overhang they are usually worth preferring over a bare model.
If you are converting a flat reference into a mesh first, the image to STL page covers the conversion side, and the same constraints from Part 2 apply to whatever geometry comes out of it.
Part 4: Finishing a Verity Print: Seams and That Smiley Face
Verity is an unusually forgiving model to finish, and the reason is the character design. There is no armor plating, no fabric texture, and no color breakup to reproduce. It is a smooth yellow body with two black eyes and a black smile, which means the finishing work concentrates on two things: making the yellow surface flawless, and getting the face crisp.
Sanding and priming
Start at 220 grit on the support contact zones rather than reaching for something coarser. Support scars on PLA come away fairly cleanly, and a heavy grit will flat-spot the curvature around them, which is noticeable on a sphere. Work up through 400 and then 600 on the visible surfaces. Because the form is so simple, an uneven sanding job is far more visible here than on a busy model, so it is worth the extra passes.
Follow with a filler primer in two or three thin coats, wet sanding at 600 between coats, until the surface feels uniformly smooth. Filler primer is doing double duty on this model: it fills the layer lines and it gives the glossy topcoat something to bond to. Skipping it and spraying gloss directly onto sanded PLA tends to show every remaining scratch, because a glossy finish reflects imperfections instead of scattering them.
Getting the yellow and the face right
The yellow is the whole character. A single bright, saturated, slightly warm yellow in a gloss or semi-gloss finish reads correctly, and a matte finish reads as unfinished plastic. Thin coats applied in several passes give a better result than one heavy coat, which is prone to runs on a curved surface.
The face is where the model either works or does not. Masking a smile onto a sphere is awkward, so the more reliable route is to paint the eyes and mouth by hand with a small brush after the yellow has fully cured, then clean the edges with a fine-bristled brush barely dampened with thinner. If your model shipped with separate expression face pieces, paint those separately and fit them after, which is far easier than painting a curved mouth in place.
If you printed the multi-part humanoid, glue the sections with a cyanoacrylate or a two-part epoxy, then fill and sand the seams before priming so the joins disappear under the topcoat. Prime the whole assembled figure rather than the parts separately, or the seams will show as a color break. For a look at how the same sand, fill, prime cycle plays out on a much more detailed character print, see the Batman 3D print finishing workflow.
Part 5: Making a Custom Verity 3D Model for Printing with AI
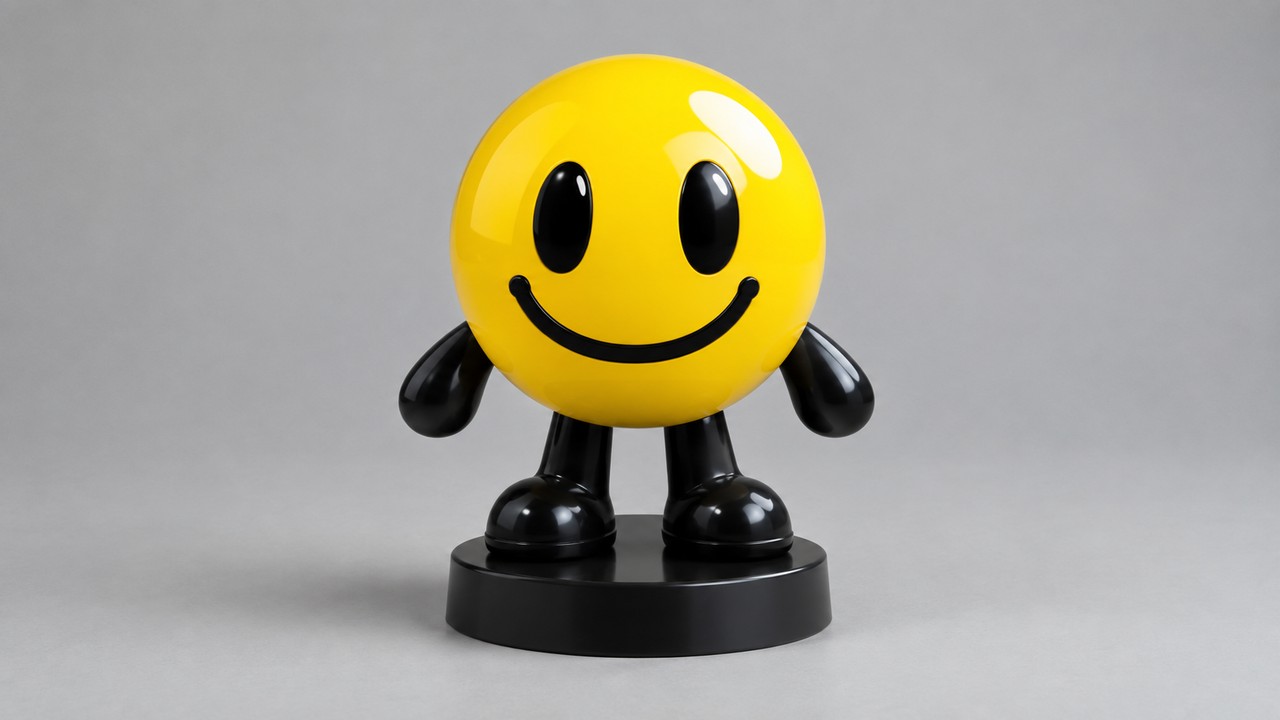
Downloading an existing file is the fastest route to a printed Verity, but it locks you into someone else’s pose, scale, and version of the character. If you want the humanoid stage in a specific stance, a size that matches a shelf or a set, or a variant nobody has uploaded, generating the mesh yourself is now a practical option rather than a research project.
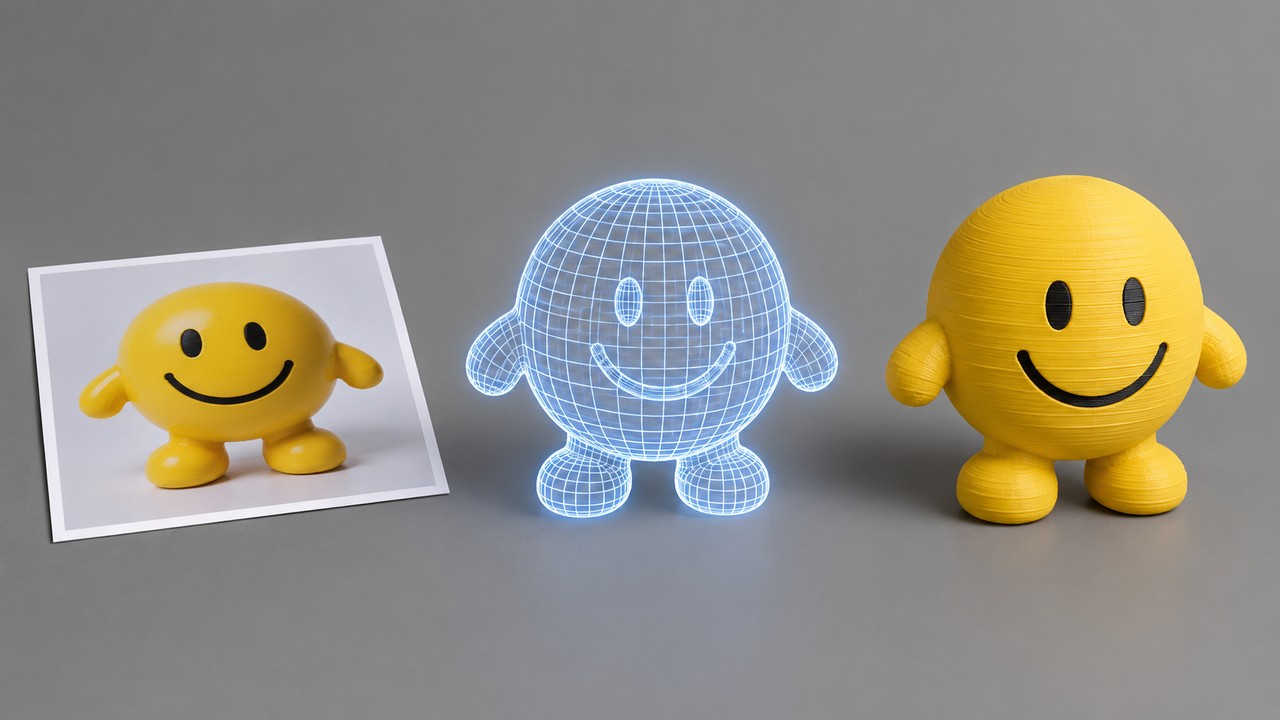
Turning a reference image into a printable mesh
Neural4D (N4D) takes a single reference image through Image to 3D, or a written description through Text to 3D, and returns a mesh you can export as STL for slicing. The generation happens in two stages, and the distinction matters if you are timing a project: the base white mesh takes about 90 seconds, while PBR texture generation is a separate step that adds time on top, so a complete textured model normally takes more than two minutes.
For a Verity print you can skip most of that texture work. You are going to paint the figure anyway, and a flat yellow topcoat over a primed surface is easier to control than a baked texture with the wrong shade. Generating geometry only and finishing by hand is the more predictable route for this specific character.
Choosing topology and polycount before you generate
Text to 3D and Image to 3D both let you pick the topology and the target face count before the model is built, which is the setting that matters most for a print. Quad topology is better for edits and animation and defaults to 50,000 faces with a range from 1,000 to 100,000. Triangle topology preserves more surface detail. For a display print, Triangle keeps more of the fine curvature on the face. For a model you intend to pose or modify afterward, Quad gives you cleaner geometry to work with.
Getting this right at generation time is the point. The choice is made before the mesh exists, so there is no separate repair pass to run afterward, and no need to fix topology on a model after the fact.
What the output gives you, and what it does not
The meshes are watertight, which is the property that matters for printing, and the export list includes STL alongside OBJ, FBX, GLB, USDZ, and BLEND. STL is the format to send to a slicer. The others are useful for viewers and asset pipelines, not for printing.
Two limits are worth stating plainly, because they are easy to assume otherwise. Conversational editing through Neural4D-2o works only on models generated inside the current session, so you cannot import a Verity STL you downloaded from MakerWorld and edit it by describing changes. And AI Texture applies only to meshes generated in 3D Studio, so it cannot be used to texture an external model you brought in. Both features are for assets you created here, which is consistent with the geometry-only workflow recommended above.
If you want to compare generation options before committing to one, the roundup of best AI tools for 3D printing puts the alternatives side by side, and the walkthrough on printing AI generated models covers taking a generated mesh all the way to a finished print.
Generate a Custom Verity Model
Start from a reference image or a written description, choose the topology, and export a watertight STL for your slicer.
No credit card required • 50 free Power credits every week
Part 6: Common Questions About Printing Verity
Q: Can you 3D print Verity?
Yes. Fan-made Verity models are already published on MakerWorld, Thingiverse, Cults3D, and Printables, covering both the compact smiling sphere and the tall lanky humanoid form. The compact form prints as a single piece on either FDM or resin. The humanoid form is usually split into parts because of its height.
Q: Is there an official Verity 3D model?
No. Every Verity model currently available is a fan-made derivative work. That means the license is set by each individual uploader rather than by a rights holder, so you should read the license on the specific listing you download. Two files that look the same on the thumbnail can carry completely different rules about selling prints.
Q: Why does my Verity print keep failing around the bottom?
The compact Verity body is close to a sphere, and the entire lower hemisphere is overhang that needs support. If the print detaches or the underside sags, you are most likely missing an outer brim or running too few supports under the lower half. A sphere also touches the plate across a very small area, so adhesion is weaker than the model’s size suggests. Add a brim, use tree supports that reach from the build plate, and re-check bed level.
Q: Should I print Verity in resin or FDM?
Resin for the small smiling sphere, FDM for the large humanoid. On the sphere, the main problem with FDM is layer lines running across a curved surface you cannot hide, and those show badly under a glossy finish. Resin prints smooth off the machine, so the work shifts from sanding ridges to cleaning up support marks. Both methods still need supports under the lower half. FDM is the practical choice for the humanoid form, where the print is large, mostly self-supporting, and often split into parts.
Q: How do I get Verity’s yellow colour?
Either print in yellow filament and accept a matte finish, or print in any colour and spray a gloss yellow topcoat over a filler primer. The second option gives the smooth, saturated look the character has. Some multi-part models also include AMS-ready variants that swap filament colour at a set layer, which handles a two-tone version without any painting.
Q: Can I change Verity’s pose or size before printing?
Not by editing a downloaded STL, no. But you can generate your own model instead of downloading one. Neural4D’s Text to 3D and Image to 3D let you describe the pose or supply a reference image, and you choose the topology and target face count before the mesh is built, so the geometry comes out suited to what you plan to do with it. Export as STL and slice it directly.
Conclusion: Start Your Verity Print
A Verity 3D model for printing is one of the easier character projects to start and one of the more instructive to finish, precisely because the shape is so simple. The file is free and widely available in two distinct forms. The challenge is entirely in the geometry: the compact form puts its whole lower half in overhang, and the tall form trades that problem for height and stability. Get the supports and the brim right on the sphere, or split and plate the limbs on the humanoid, and the print itself tends to come out clean.
From there the finishing is straightforward, because the character has no texture to reproduce. Sand the support zones carefully, prime to fill the layer lines, lay down a gloss yellow, and paint the face last. That order is what separates a print that looks like a print from one that looks like a collectible.
And if the version you want does not exist yet, the tall form in your own pose at your own scale, a custom Verity 3D model for printing is a generation away. Neural4D builds the mesh from a reference image or a description and exports a watertight STL, with the topology and face count chosen before generating so the geometry arrives ready for your slicer. Free users get 50 credits every week, so there is nothing to lose by trying it on the pose you actually want.
Your Next Print Starts Here
Describe the pose or upload a reference image. Get a watertight mesh you can export as STL and slice.
Free to start • STL / OBJ / GLB export • Watertight mesh