How to Create 3D Models for Unreal Engine 5: The Complete 2026 Workflow
Quick Summary
Unreal Engine 3D modeling covers three separate paths into the engine: the built-in Modeling Mode, an external DCC tool such as Blender or Maya, and an AI generator that exports an engine-ready mesh.
- UE5 Modeling Mode handles blockouts, boolean cuts, and in-context edits inside the editor, which makes it the fastest route for rough shapes and level dressing.
- Blender and Maya stay the control standard for hero assets, deformable characters, and any mesh that needs deliberate edge flow before rigging.
- FBX is the default interchange format for Unreal Engine 5, with OBJ reserved for static geometry and glTF for compact static assets.
- Import failures trace back to four causes: wrong scale unit, dropped smoothing groups, non-manifold geometry, and inverted normals.
- Neural4D generates watertight, quad-dominant meshes from text or a single image and exports FBX, OBJ, and GLB, which takes the blockout stage off the critical path.
Creating 3D models for Unreal Engine 5 comes down to three decisions: which tool builds the geometry, which format carries it into the editor, and which settings keep it intact on arrival. This guide covers the exact menu paths, the version and plugin requirements, and the import options for each path, along with the failure modes that send finished assets back to the modeling stage.
- Part 1: Why Unreal Engine 5 Asset Creation Still Slows Teams Down
- Part 2: Unreal Engine 3D Modeling: What UE5 Handles and What It Does Not
- Part 3: Prerequisites and Version Setup Before You Start
- Part 4: How to Create 3D Models for Unreal Engine 5 and Import Them Cleanly
- Part 5: Where Blender and Maya Still Make Sense
- Part 6: Why More Teams Now Use Neural4D for UE5 Assets
- Part 7: Conclusion: Build Faster Without Breaking Your Pipeline
- Part 8: Frequently Asked Questions on Unreal Engine 5 Models
Part 1: Why Unreal Engine 5 Asset Creation Still Slows Teams Down
Unreal Engine 5 removed one old limitation and exposed another. Nanite made dense geometry cheaper to render. It did not reduce the time required to produce that geometry. An Unreal Engine 3D pipeline still loses hours to blocking out props, resetting pivots, repairing topology, rebuilding forms, and re-exporting files that looked correct in one application and broke inside the editor.
The question is not whether you can make a 3D model for UE5. You can. The question is whether your workflow produces enough usable assets to keep level design and gameplay testing moving, or whether every asset becomes a cleanup ticket that lands on an artist’s desk before it can be placed in a scene.
What slows an Unreal Engine 3D pipeline down:
- Placeholder assets stay in the level longer than planned because nothing replaces them on schedule
- Imported meshes need manual repair before they are usable in a lit scene
- Traditional modeling takes longer than the task justifies for routine props and environment pieces
- Low-grade AI tools emit broken geometry that costs more cleanup than it saves
The hidden cost is not software licensing. It is iteration drag. When every asset takes too long to travel from idea to engine, level design slows down, gameplay testing slows down, and scheduling decisions get made for the wrong reason.
Part 2: Unreal Engine 3D Modeling: What UE5 Handles and What It Does Not
Can You Make 3D Models in Unreal Engine 5?
Yes. Unreal Engine 5 ships with a full polygon modeling toolkit called Modeling Mode, and it is capable of producing finished static meshes without leaving the editor. What it does not ship with is a sculpting or retopology workflow comparable to a dedicated DCC application, and it has no native path for generating geometry from a prompt or a reference image.
That gives three practical routes into an Unreal Engine 3D workflow: model directly in Modeling Mode, model in Blender or Maya and import the result, or generate the base mesh with an AI tool and refine it. Each route has a different ceiling.
When UE5 Modeling Mode Is Enough
Modeling Mode is practical for blockouts, simple environment edits, boolean cuts, and proportion changes. If a wall section needs to be thicker or a collision shape feels wrong, fixing it inside the editor is faster than round-tripping through another application. You stay in the scene, keep scale consistent, and make decisions in context.
Speed at this stage comes from reduced friction, not from perfect topology. The tool is built for iteration inside a level, and that is where it earns its place.
How to Open Modeling Mode in Unreal Engine 5
The Modeling Tools Editor Mode plugin is enabled by default in current UE5 releases. If the tools do not appear, confirm the plugin first, then switch modes.
- Open Edit > Plugins and confirm that Modeling Tools Editor Mode is enabled. Restart the editor if you changed it.
- Use the Select Mode dropdown in the viewport toolbar and choose Modeling, or press SHIFT+5.
- Set the level’s display units to centimeters under Edit > Project Settings > Editor > Appearance before you model anything.
- Select a mesh in the viewport and pick a tool from the Modeling Mode toolbar. Epic groups the tools into categories such as Create, PolyModel, Deform, and Attributes.
- Turn on the gizmo alignment shortcuts when placing geometry: Ctrl plus click aligns the gizmo to a surface, and Q toggles orientation lock.
- Accept the pending change in the tool panel before switching tools, or the edits are discarded.
Epic publishes the full tool reference in the Modeling Mode documentation. The same page carries an official caution about production use:
“Learn to use this Beta feature, but use caution when shipping with it.”
Epic Games
Modeling Mode documentation, Unreal Engine
What Unreal Engine 3D Modeling Cannot Do
Modeling Mode is not a replacement for a full asset pipeline. It has no sculpting brushes for organic detail, no retopology solver, and no rigging or skinning tools. It also cannot author geometry from a text prompt or a photograph, which is the gap AI generation fills.
The tool is strongest for blockouts, kitbash assembly, and in-engine fixes. It is weakest when you need a polished, reusable, animation-ready asset with controlled edge flow, and it is not designed to produce many props at volume.
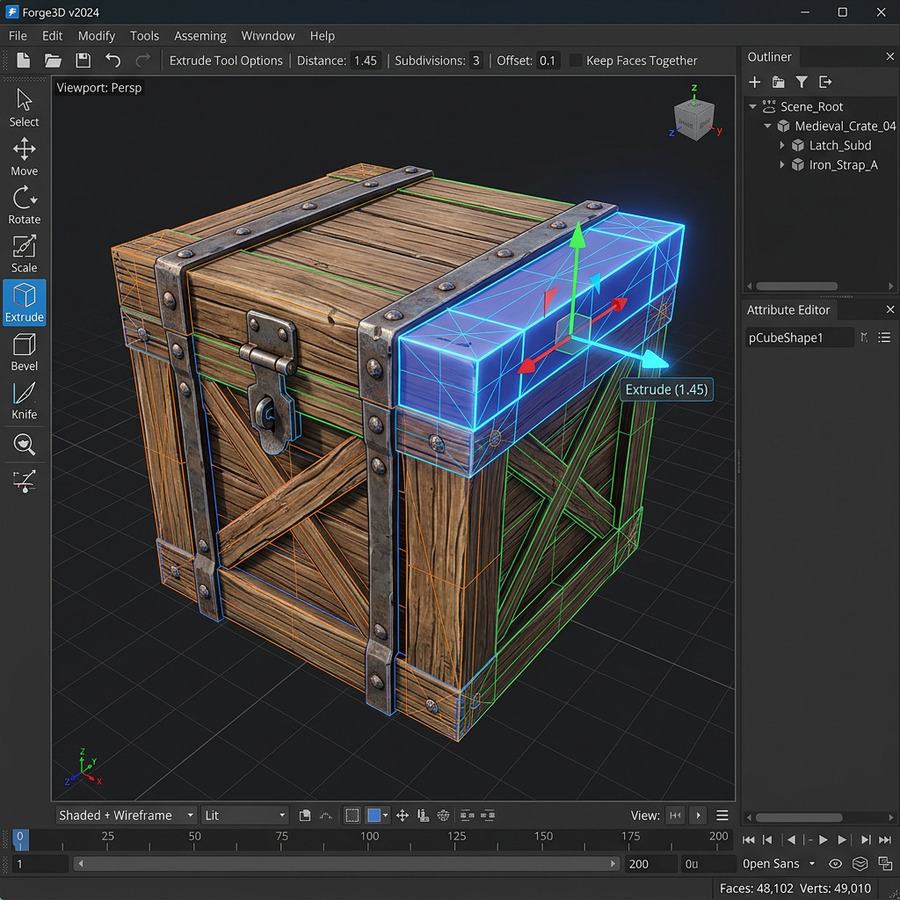
Modeling Mode keeps blockout edits inside the editor, which removes a full export and import cycle for small changes.
Read More:
For a broader look at production-focused asset workflows, see AI 3D game assets and the guide to importing 3D models into Unity 6.
Part 3: Prerequisites and Version Setup Before You Start
Most import problems are decided before the file reaches the engine. Version, plugin state, and unit scale all need to be settled first, because none of them can be corrected cleanly after an asset has been placed and referenced in a level.
Version and Plugin Requirements
Modeling Mode has shipped with Unreal Engine 5 since the 5.0 release and has expanded in every subsequent version. Epic maintains the reference under the current documentation set, which at the time of writing is the Unreal Engine 5.8 documentation.
- Unreal Engine 5.0 and later: Modeling Mode is available through the Modeling Tools Editor Mode plugin.
- Recent 5.x releases: additional tools were added under the Create, PolyModel, and Deform categories, so older tutorials may reference a smaller toolbar.
- Plugin state: if the Modeling option is missing from the Select Mode dropdown, the plugin is disabled or the editor has not been restarted since it was enabled.
- Project template: a Games template with Starter Content is the fastest way to test an import before you commit an asset to a live project.
Project Scale, Units, and Import Defaults
Unreal Engine measures in centimeters by default, and one Unreal unit equals one centimeter. Blender and Maya commonly work in meters, and a file exported at the wrong scale arrives either a hundred times too large or too small. Set the export unit in the source application to match the engine rather than fixing scale after import, because a rescaled mesh carries transform values that cause problems later in physics, collision, and lighting.
Export Settings in Your Modeling Tool
- Apply all modifiers and transforms before export. Unapplied scale is the most common cause of a correct-looking file that imports at the wrong size.
- Triangulate or keep quads deliberately. UE5 accepts both, but the engine triangulates on import, so a quad-dominant mesh gives you a cleaner result than an already-triangulated one.
- Bake or assign smoothing groups and confirm the export includes them, or the mesh arrives faceted.
- Keep the mesh manifold. Open edges, overlapping faces, and interior geometry are what produce shading artifacts after import.
- Name the object and materials before export. Those names become the asset names in the Content Browser.
Part 4: How to Create 3D Models for Unreal Engine 5 and Import Them Cleanly
Which File Format to Use: FBX, OBJ, or glTF
Unreal Engine 5 imports several mesh formats, and the right one depends on whether the asset carries a skeleton, materials, or animation.
| Format | Best For | UE5 Support | Watch Out For |
|---|---|---|---|
| FBX | Rigged characters, animated meshes, assets that carry materials and skeleton data | Native import with the widest option set, including skeletal mesh, animation, and material import | Large files; export scale and axis must be correct before export |
| OBJ | Static geometry, quick shape transfer, single-material props | Static mesh only, with no rig or animation data | No skeletal support and limited material fidelity |
| glTF / GLB | Compact static assets, runtime and web-adjacent pipelines | Handled by the built-in glTF importer | Fewer import controls than FBX and not the standard path for skeletal meshes |
Epic documents the full settings list in the FBX Import Options reference and the format handling in the glTF importer documentation. For a deeper format comparison, see glTF vs FBX.
Step-by-Step: Import a Model into Unreal Engine 5
- Confirm the source file is exported at centimeter scale with transforms applied.
- Open the Content Browser and navigate to the folder that should hold the asset.
- Drag the FBX or OBJ file from your file browser into the Content Browser, or use the Import button in the Content Browser toolbar.
- In the FBX Import Options dialog, set Import Uniform Scale to 1.0 if the file was exported in centimeters.
- Under Mesh, enable Generate Lightmap UVs and Remove Degenerates, and set Normal Import Method to Import Normals and Tangents for a mesh that already has clean normals.
- Under Material, choose whether to import materials and textures or to create a single default material.
- If the file contains a skeleton, expand Skeletal Mesh and confirm the skeleton asset before importing.
- Click Import All, then drag the resulting static mesh from the Content Browser into the level.
How to Verify the Asset Imported Correctly
- Check the dimensions. Open the static mesh asset and compare its bounding box against the expected real-world size. A two-meter door should read as roughly 200 units on the long axis.
- Check the triangle count. The asset details panel reports triangles and vertices. Compare against your target, since an unexpectedly high count usually means modifiers were not applied.
- Check for shading artifacts. Place the mesh under a directional light and orbit it. Faceted bands indicate missing smoothing groups or normals that were not imported.
- Check the pivot. The pivot should sit where you need it for placement. If it does not, correct it in the source tool and re-export rather than offsetting the actor.
- Check collision. Confirm that simple collision was generated and matches the visible shape closely enough for your gameplay needs.
Common Import Failures and How to Fix Them
- The mesh is 100 times too large or too small. The source file was exported in meters. Re-export at centimeter scale instead of correcting the scale in the editor.
- The mesh is faceted or shows hard edges that should be smooth. Smoothing groups were not exported. Re-export with smoothing groups included.
- The mesh renders with dark patches or inside-out faces. Normals are inverted. Flip them in the modeling tool and re-export.
- Lightmap errors or black blotches under static lighting. Lightmap UVs are missing or overlapping. Enable Generate Lightmap UVs on import, or author a dedicated UV channel.
- The asset imports with no materials. Texture paths did not resolve. Move the textures next to the mesh file or embed them in the export.
- The mesh will not generate usable collision. The geometry is non-manifold, meaning the surface has gaps, self-intersections, or zero-thickness areas. Repair the mesh before importing.
A generated mesh avoids several of these failure modes at the source. Neural4D outputs watertight, manifold geometry with consistent normals, so the normals, collision, and lightmap steps above pass on the first import rather than sending the asset back to the modeling stage. If you are moving assets between engines, the workflow in the guide to importing 3D models into Unreal Engine 5 covers the engine-side settings in more depth.

A watertight, quad-dominant mesh clears the normals, collision, and lightmap checks on the first import.
Skip the repair pass on your next UE5 asset
Generate import-ready geometry from a text prompt or a single image, then bring it into the editor as FBX, OBJ, or GLB.
Generate Your First Unreal-Ready Asset
Free users get 50 credits per week. No credit card required.
Part 5: Where Blender and Maya Still Make Sense
Blender and Maya still matter. Hero assets, animation-heavy characters, and anything that depends on precise deformation need manual control, because edge flow determines how a mesh behaves when it bends, rigs, or animates under pressure. The Blender manual on mesh modeling and the Maya product documentation both treat topology as the foundation of downstream behavior, not as a finishing step.
The cost sits in the middle of the pipeline. Traditional modeling is slow for routine production work, and background props, modular pieces, filler assets, and early-stage concept models do not need hours of careful hand-built geometry. They need to exist quickly, import correctly, and hold up in the scene.
That mismatch is the real problem. High-value artist time goes to low-leverage tasks, and the project pays twice: once in labor, and again in delay.
A simple rule:
- Use manual modeling where topology control is mission-critical
- Use faster generation workflows where speed and volume matter more than hand-crafted detail
- Stop treating every environment prop like a hero asset
Apply that rule and the split becomes clear. Reserve Blender and Maya for the assets a player will study up close, and route the rest to whichever path gets them into the engine fastest.
For the budgets that decide how much geometry a given asset can carry, see polygon count budgets for 3D game assets. When a hand-built mesh does arrive with problems, the Blender mesh cleanup guide covers the repair workflow.
Part 6: Why More Teams Now Use Neural4D for UE5 Assets
Neural4D fills the stage that sits between an idea and a finished asset. It removes routine bottlenecks rather than replacing the artist who handles the hero work.
Neural4D uses the Direct3D-S2 architecture to generate native volumetric geometry instead of approximating a surface from flat views. That difference is measurable inside Unreal Engine 5, because the engine cares about the mesh, not the thumbnail. A surface approximation that reads well in a preview can still collapse into non-manifold geometry the moment collision, lighting, and materials are applied.
Base mesh generation runs in roughly 90 seconds. That figure covers the base mesh only, and texturing is a separate stage that takes additional time. Keeping the two stages distinct matters, because vague speed claims hide the real production cost.
The output is watertight and quad-dominant, which is what makes it useful in an engine. Watertight geometry produces reliable collision and clean lightmap bakes, and a quad-dominant surface triangulates predictably on import instead of producing the sliver triangles that cause shading artifacts.
Why this fits a production pipeline:
- Base mesh generation is fast enough to support active iteration on a scene
- Clean topology reduces downstream cleanup time before an asset reaches the engine
- Watertight output clears collision, normals, and lightmap checks on the first import
- Neural4D-2o refines a result through conversational edits instead of a full regeneration, so a mesh can be adjusted without starting over
Neural4D exports FBX, OBJ, and GLB, so the same base asset moves into UE5, into a 3D printing pipeline, or into a real-time viewer without a conversion step. For teams producing environment props and modular kit at volume, that removes the blockout stage from the critical path entirely. The AI game asset generator page covers the game-specific workflow.
To understand the architecture behind the mesh output, read Decoding Direct3D-S2. For the quality standard these assets are held to, see AI 3D assets production ready. Texture workflows are covered in what PBR texturing is and in the guide to generating a PBR texture from an image.
Need a faster path from concept to UE5-ready asset?
Use Neural4D when you need usable geometry faster, not more cleanup work.
Generate Your First Unreal-Ready Asset with Neural4D
Free users get 50 credits per week. No credit card required.
Part 7: Conclusion: Build Faster Without Breaking Your Pipeline
To create 3D models for Unreal Engine 5, the strongest workflow is not manual-only or AI-only. It is a deliberate mix of tools at the right stages. Use Modeling Mode when an in-engine fix is faster than a round trip. Use Blender or Maya when topology control is non-negotiable. Use Neural4D when you need usable geometry at volume without filling the pipeline with avoidable cleanup work.
The teams that ship fastest are not the ones with more artists. They are the ones with less friction between an idea and a playable scene. That is the whole advantage: better asset flow, faster iteration, and fewer delays caused by geometry that should never have broken in the first place.
Part 8: Frequently Asked Questions on Unreal Engine 5 Models
Q: Can you make 3D models in Unreal Engine 5?
Yes. Modeling Mode is a built-in polygon modeling toolkit that can create and edit static meshes without leaving the editor. It covers blockouts, boolean operations, and shape editing, but it has no sculpting brushes, no retopology solver, and no way to generate geometry from a prompt or a reference image. Most teams combine it with an external tool or a generator for finished assets.
Q: How do you create 3D models for Unreal Engine 5 from scratch?
Pick a route first. For a quick blockout, enable the Modeling Tools Editor Mode plugin, press SHIFT+5, and build the shape in engine. For a finished asset, model in Blender or Maya with deliberate edge flow, apply transforms, and export at centimeter scale as FBX. For a fast base mesh, generate the geometry and export FBX, OBJ, or GLB before refining it.
Q: What file format should I use for Unreal Engine 5 models?
FBX is the default choice because it carries skeleton, animation, and material data and exposes the widest import option set. Use OBJ for static, single-material geometry where you do not need a rig, and glTF for compact static assets. If an asset needs to deform or animate, FBX is the only one of the three with full skeletal support.
Q: Why do some AI-generated models break after import into Unreal Engine 5?
Most generators optimize for how a mesh looks in a preview rather than whether the surface is usable geometry. That produces non-manifold areas, inconsistent normals, and zero-thickness regions, which fail when the engine tries to generate collision or bake lighting. Neural4D outputs watertight, manifold meshes so those steps pass on the first import.
Q: Is UE5 Modeling Mode enough for full asset production?
It is enough for prototyping, quick edits, blockouts, and simple environment work. It is not a full asset pipeline, because it lacks sculpting, retopology, and rigging. For polished, reusable, animation-ready assets, teams still pair it with an external modeling application or a generation workflow.
Q: Does the 90 second generation time include textures?
No. Roughly 90 seconds refers to the base mesh generation stage, which produces geometry only. Texturing and PBR material generation are separate stages and take additional time. Treat the base mesh figure and the full textured output as two different numbers.
Q: Do I still need Blender if I use UE5 Modeling Mode?
For some assets, yes. Modeling Mode handles in-engine edits and rough shapes well, but it has no retopology tools and no way to author controlled edge flow for a deforming character. Any mesh that will be rigged, animated, or inspected closely by a player is still faster to build in Blender or Maya.
Q: How do I fix a model that imports at the wrong scale?
Correct it at the source rather than in the editor. Re-export from the modeling application at centimeter scale with all transforms applied, then delete the imported asset and import again. Rescaling the actor in the level leaves transform values that cause problems later in physics, collision, and lighting.