AI Image to 3D for Medical Device Prototyping: From Sketch to Watertight Mesh in 90 Seconds
Quick Summary
- Medical device prototyping is the iterative process of turning a design concept into a physical testable model, critical for form validation and design verification before regulatory submission.
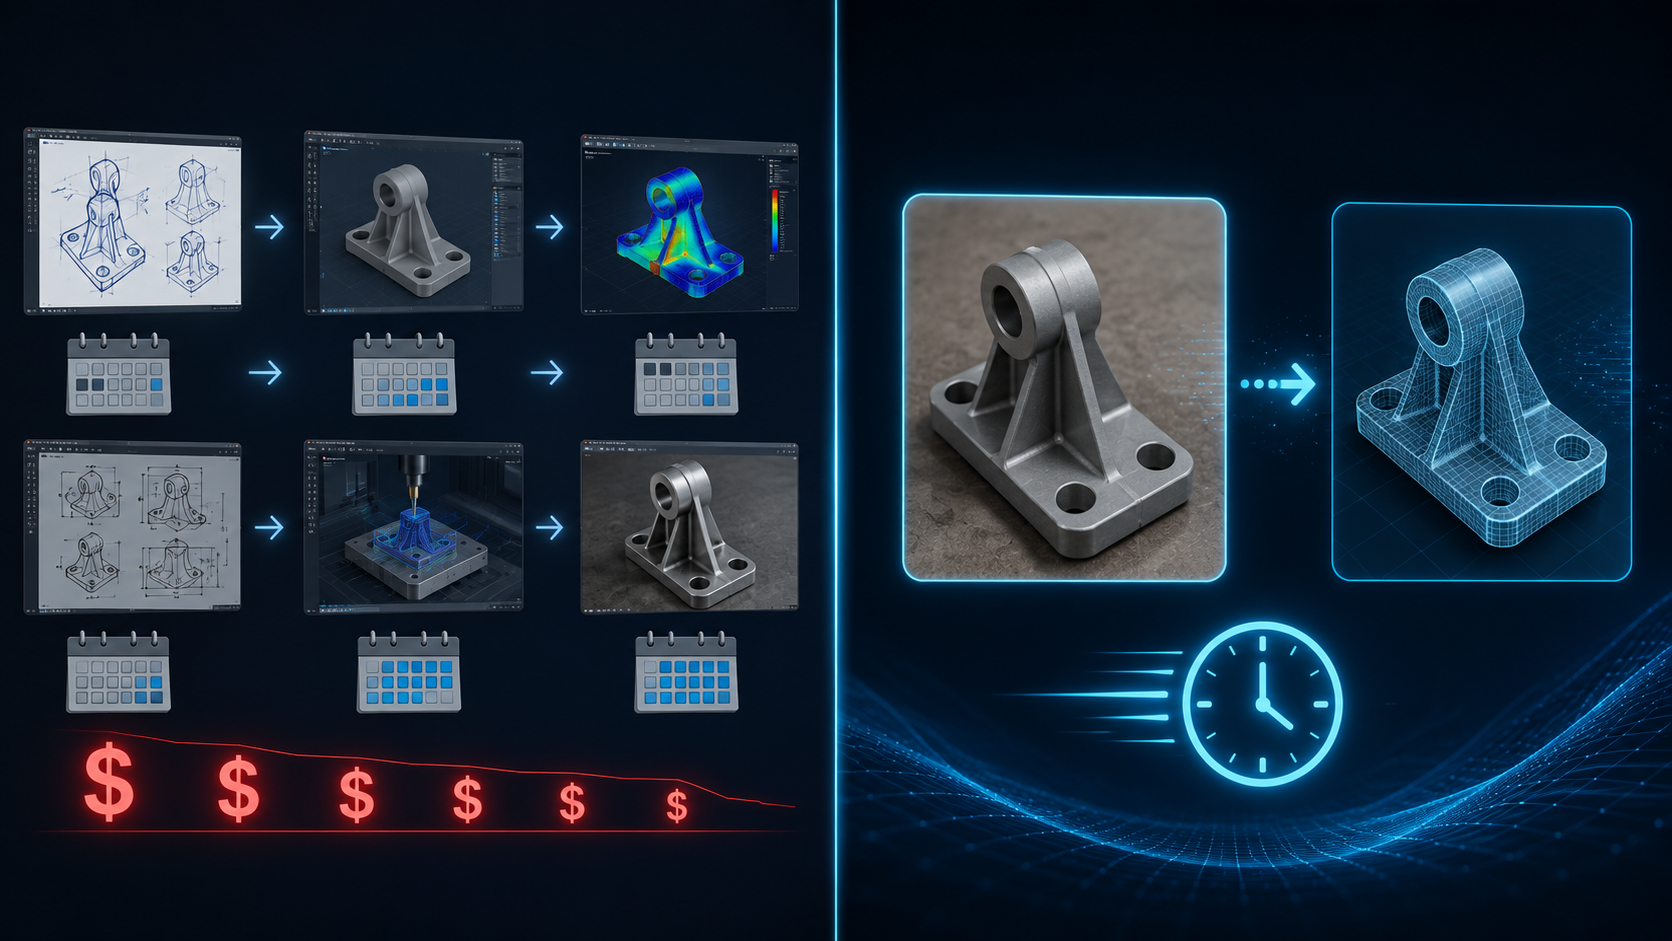
- Traditional methods (CNC machining, manual CAD) cost $500+ per iteration and take weeks per cycle, making rapid experimentation nearly impossible for most teams.
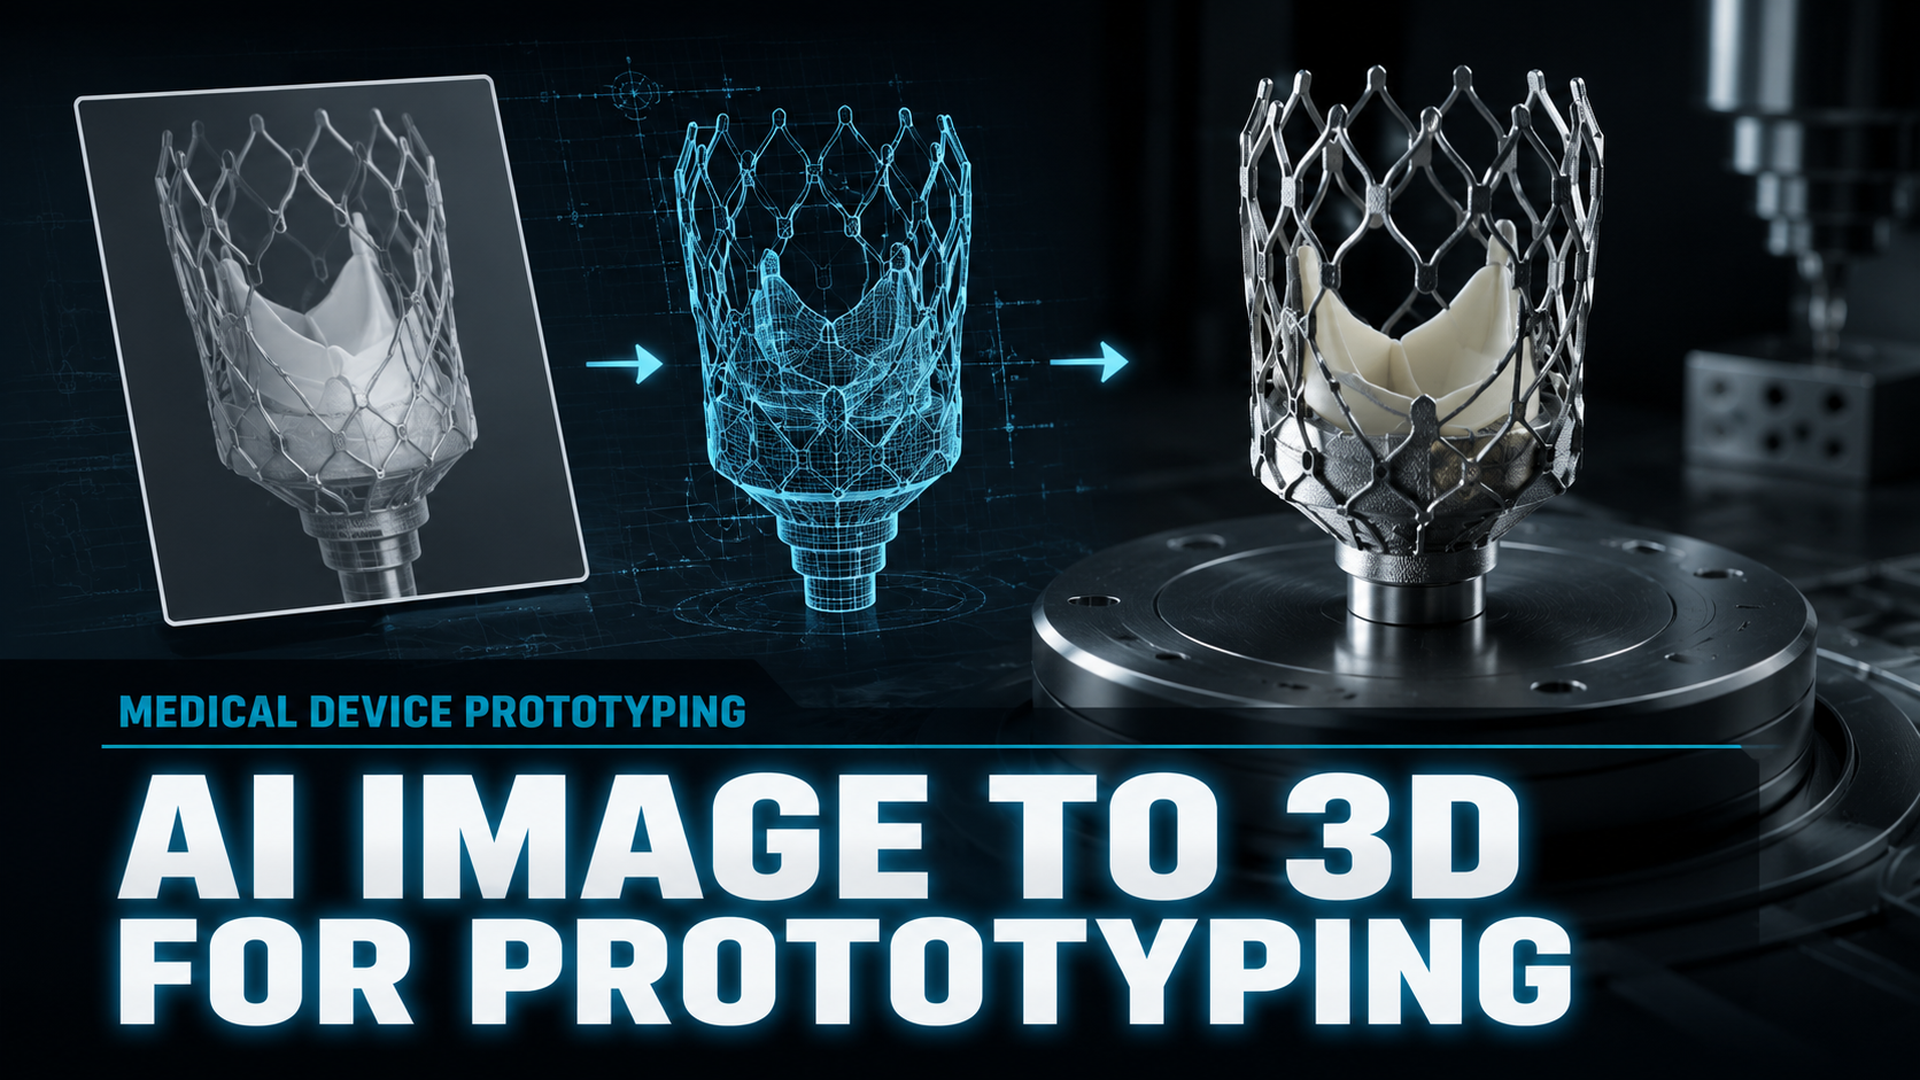
- AI Image to 3D tools like Neural4D generate watertight, manifold-ready meshes from a single photograph or sketch in approximately 90 seconds for the base geometry.
- Neural4D eliminates the manual mesh repair loop that plagues other AI 3D generators, producing output that goes directly into 3D printing slicers or CAD software without patching.
Medical device prototyping has a speed problem. Each round of CNC machining costs hundreds of dollars and takes weeks. The design iteration cycle (the very engine of innovation) is throttled by the tools used to power it. AI Image to 3D changes this: upload a photograph or rough sketch, and receive a watertight, 3D-printable mesh in minutes, not days.
Table of Contents
- Part 1: The Cost of Slow Prototyping in Medical Device Design
- Part 2: AI Image to 3D: A New Paradigm for Medical Device Prototyping
- Part 3: Neural4D vs. The Competition: A Prototyping Reality Check
- Part 4: Real-World Workflows: From Concept to Physical Prototype
- Part 5: Step-by-Step: Integrating Neural4D into Your Prototyping Pipeline
- Part 6: Common Questions on AI Medical Device Prototyping
- Get Started: Your First Medical Prototype in 90 Seconds
Part 1: The Cost of Slow Prototyping in Medical Device Design
Medical device design starts with a problem and a sketch. What happens next determines whether that sketch becomes a working prototype in weeks or months. The traditional route is punishing.
Iteration at $500 a Round
A single CNC-machined prototype for a custom surgical instrument starts around $500 and climbs fast with complexity. Lead times stretch to three or four weeks per shop visit. When the design needs revision (and it always does), the clock resets. Teams that should be running 15 iterative cycles settle for three or four because the budget and timeline simply cannot absorb more.
The CAD Barrier
SolidWorks and AutoCAD demand months of hands-on training before a designer can produce reliable geometry. Blender is free but equally steep. The learning curve pushes domain experts, including surgeons, biomedical engineers, and product designers, into a bottleneck where they must either wait for a CAD specialist or export hours of self-teaching. Neither option accelerates medical device prototyping.
QMSR 2026 and the Documentation Burden
As of February 2026, the FDA’s Quality Management System Regulation (QMSR) incorporates ISO 13485:2016 by reference, making design controls more rigorous than ever. Every prototype iteration must be documented, traced, and justified. Tools that produce unpredictable or non-reproducible geometry introduce compliance risk. The practical question is no longer whether AI can generate a 3D model, but whether that model meets the traceability and quality standards the new regulatory environment demands.
💡 The FDA QMSR (effective February 2026) raises the bar for design validation across all device classes. The new standard rewards prototyping tools that produce consistent, traceable, watertight geometry from reproducible inputs.
Part 2: AI Image to 3D: A New Paradigm for Medical Device Prototyping
AI Image to 3D eliminates the two biggest bottlenecks in early-stage medical device prototyping: the time cost of geometry creation and the hidden cost of mesh repair. Instead of modeling from scratch or waiting for a CNC slot, you feed a single image into an AI engine and receive a fully closed, printable mesh in under two minutes.
Input Flexibility
The input can be a napkin sketch, a photograph of existing anatomy, or a low-resolution render from any source. Neural4D’s Image to 3D feature accepts a single 2D image and reconstructs full 3D geometry from it. This means a surgeon can photograph a bone defect during a clinic visit and have a patient-specific model ready for review before the end of the day. A product designer can sketch a clamp geometry on paper, snap a phone photo, and export an STL for a test print.
Why Watertight Geometry Matters for Medical Image to 3D Prototyping
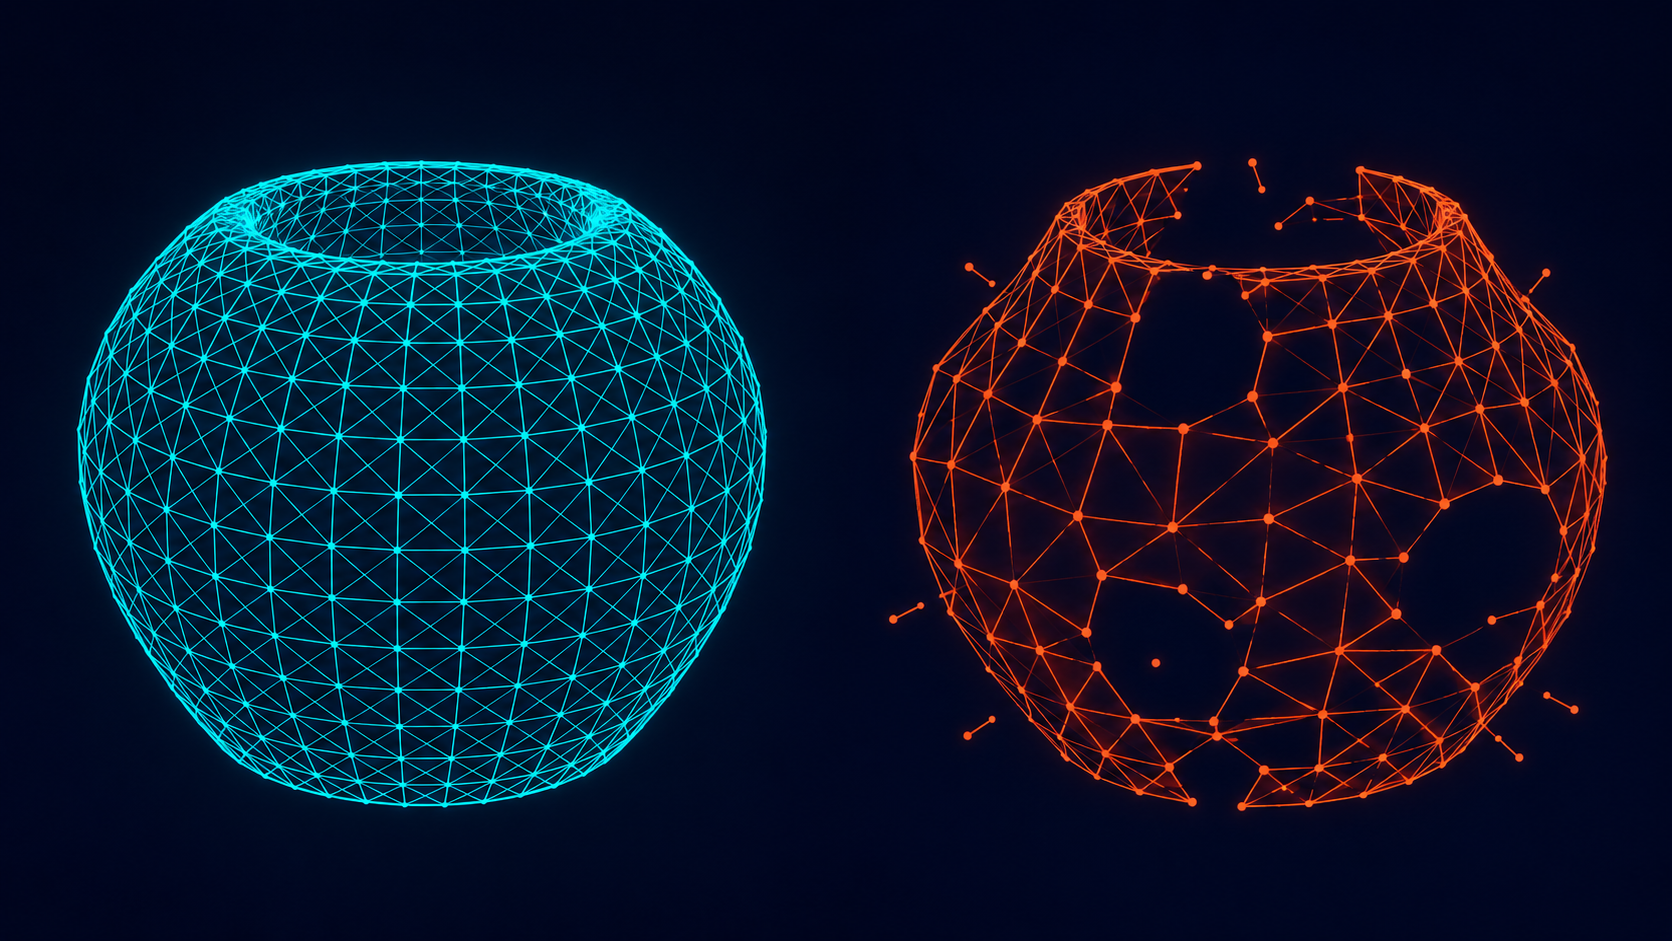
“Watertight” means every edge in the mesh is connected to exactly two faces: no holes, no gaps, and no inverted normals. A non-watertight mesh will fail mid-print, often hours into a job, with no warning. Competitor AI tools (Meshy, Tripo) routinely output non-manifold geometry that must be manually patched in Netfabb, Blender, or Meshmixer before it can be sliced. When you use Image to 3D for medical prototyping with Neural4D, the Direct3D-S2 architecture outputs mathematically watertight meshes by design. The STL goes straight into your slicer. No repair step needed.
💡 Neural4D’s Spatial Sparse Attention (SSA) and Direct3D-S2 engine, presented at NeurIPS 2025, process full volumetric data rather than estimating depth from 2D projections. This is the architectural reason its meshes are consistently watertight while competitors’ are not.
Technical Foundation
Unlike generative AI tools that predict depth maps from flat images (producing distorted backsides and hollow shells), Neural4D’s Attribute VAE encodes geometry and texture directly in native volumetric space. The result is a mesh with clean topology, proper thickness, and no projection artifacts. For medical device prototyping, this means the digital model accurately represents the physical form before a single gram of material is printed.
Part 3: Neural4D vs. The Competition: A Prototyping Reality Check
The medical device prototyping workflow involves choosing between three categories of tools. Each has a clear role, and each has a clear limitation.
| Approach | Best For | Limitation |
|---|---|---|
| Neural4D (Image to 3D) | Rapid concept iteration from sketches or photos; watertight output for 3D printing | AI-generated geometry requires parametric CAD validation before design transfer (production) |
| Traditional CAD (SolidWorks, AutoCAD) | Final engineering specs, parametric modeling, FEA analysis | Steep learning curve; $500+ per CNC iteration; weeks per design cycle |
| AI Competitors (Meshy, Tripo, Luma AI) | Quick visual exploration, non-production previews | Output is frequently non-manifold; requires 1-3 hours of manual mesh repair per model before printing |
| Medical-Specific AI (Shap-MeD, Axial3D) | CT/MRI segmentation to 3D printable anatomy | Designed for existing medical imaging data, not for creating new prototype geometry from a photo or sketch |
Traditional CAD: Where It Belongs
No one is arguing that AI replaces dedicated CAD software for 3D printing for production-intent design. What AI replaces is the first 80 percent of the journey. This includes concept modeling, the form studies, the iterative rounds of “what if we moved the hinge point.” That work currently consumes weeks in CAD or CNC queuing. AI compresses it to minutes.
AI Competitors: The Hidden Repair Tax
The promise of AI 3D generation is speed. The reality of Meshy and Tripo is a fast mesh that looks acceptable in preview and fails catastrophically in the slicer. Hidden holes, inverted faces, and disconnected vertices are typical. Repairing a single model in Netfabb or Blender costs one to three hours of hands-on work. When you factor that time into the iteration budget, the “fast” AI tool is no faster than manual modeling. Neural4D’s watertight output eliminates this tax entirely. The model that comes out of generation is the model that goes into printing.
Stop Repairing Broken Meshes
Generate your first watertight medical prototype with Neural4D Image to 3D. No repair step required.
Free tier includes 50 power per week to test your first prototype.
Part 4: Real-World Workflows: From Concept to Physical Prototype
Abstract speed claims are cheap. Concrete workflows are what matter for practical medical device prototyping. Using Image to 3D for medical prototyping means starting from a visual reference you already have, not a CAD file you need to build from scratch.
Custom Prosthetic Components
A prosthetist photographs the residual limb. Neural4D generates a base mesh matching the gross anatomy. The engineer imports the mesh into CAD for socket trim-line adjustments and adds the pin-lock housing. Total time from photo to printable model: under 90 minutes, compared to a full day of manual scanning and modeling. This mirrors the approach validated by the 3DMedX team in Sierra Leone, where AI-designed prosthetic sockets improved patient mobility scores by 7 points on the LEFS scale.
Surgical Planning Models
A surgeon sketches the planned incision and osteotomy path on a radiograph or photograph. Neural4D generates a 3D bone model with the cut guide geometry embedded. Export as STL, print overnight, review in the morning. For complex cases involving patient-specific implants, the model also serves as a visual communication tool between the surgeon and the design engineer before any metal is cut.
Rapid Jig and Fixture Design
A biomedical engineer photographs an existing surgical instrument. Neural4D generates the mating jig geometry: the clamp, the alignment guide, and the drill template in a single generation pass. Rapid prototyping medical device workflows that previously required four engineering days collapse to a morning.
Part 5: Step-by-Step: Integrating Neural4D into Your Prototyping Pipeline
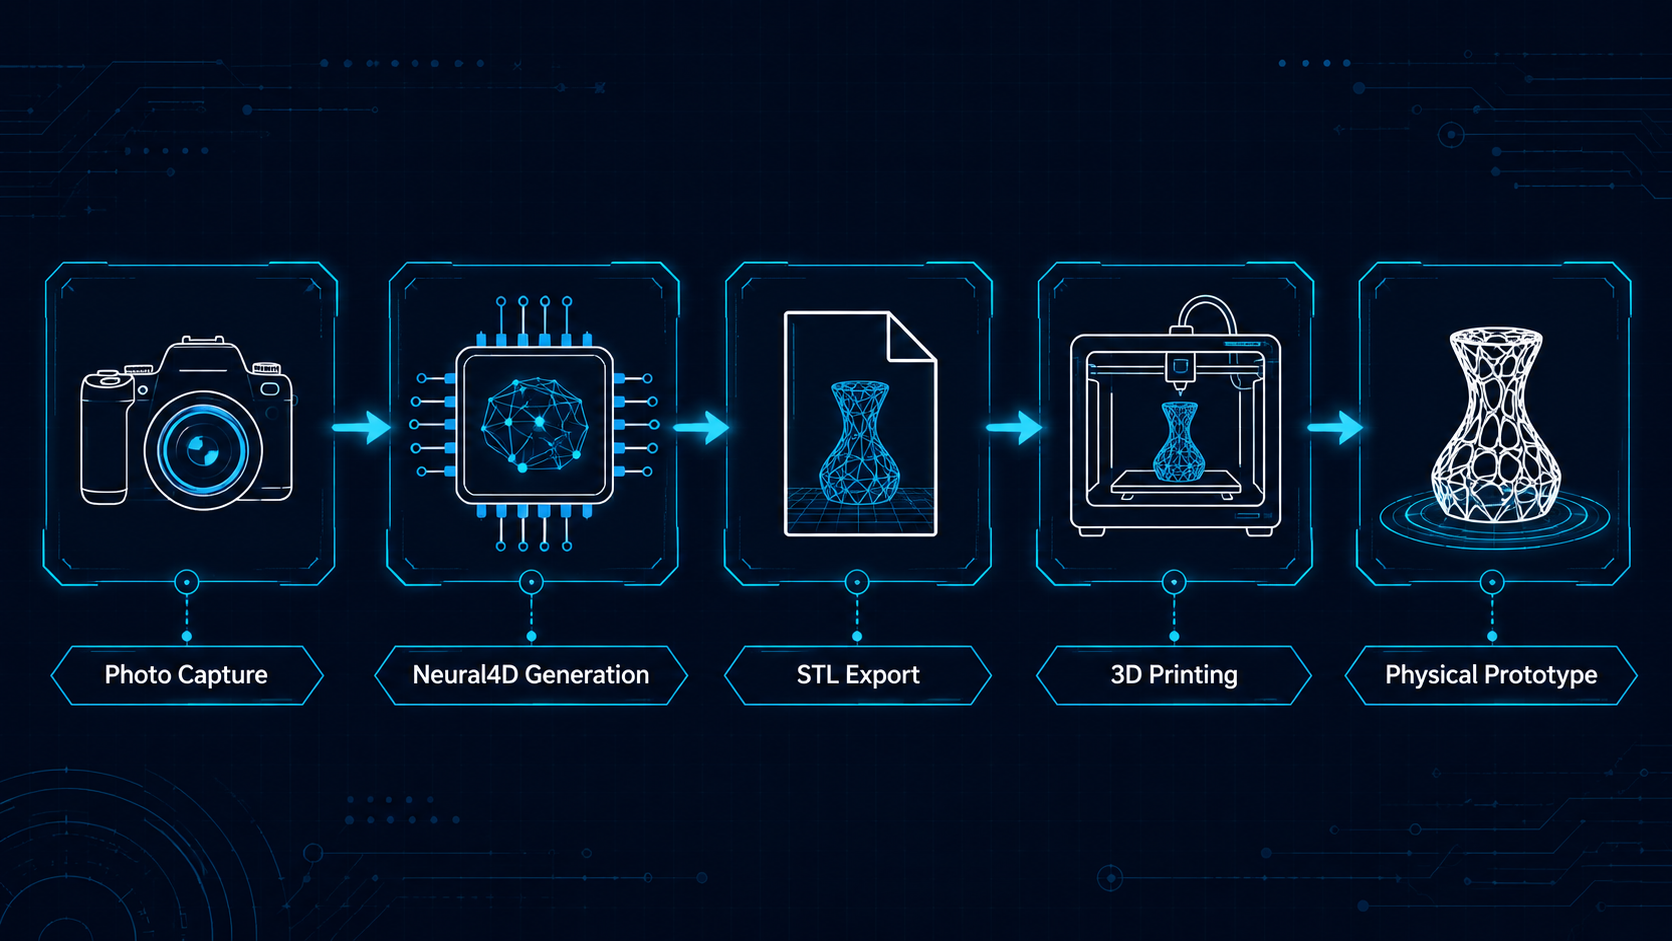
Here is the exact workflow an engineer or designer follows to go from a concept image to a physical prototype.
Step 1: Capture your reference. Photograph your sketch, an existing part, or a reference object under even lighting. A 3/4 view angle produces the most accurate geometry.
Step 2: Upload to Neural4D Image to 3D. Navigate to the AI Image to 3D generation tool. Upload your medical device concept image and select whether you need the base mesh only (approximately 90 seconds) or PBR textures for visual review (2 minutes or more). The base mesh output is a watertight, manifold-ready model designed for medical prototyping workflows.
Step 3: Apply manifold thickening. Neural4D’s internal manifold thickening detects thin-walled regions and reinforces them automatically. This step is optional but recommended for medical device prototypes that will undergo physical handling or fit testing.
Step 4: Export and slice. Export as STL or OBJ. The file is ready for Cura, PrusaSlicer, or any standard slicer. No hole-patching, no normal recalculation, no repair pass. Send to print.
For a detailed walkthrough of the export workflow, see how to convert images to STL for 3D printing and the guide on how to convert image to STL for 3D printing on the Neural4D blog.
Part 6: Common Questions on AI Medical Device Prototyping
Q: What is the fastest way to create a prototype for a medical device?
Using an AI Image to 3D tool like Neural4D for medical device prototyping. Upload a photograph or sketch of your concept and receive a watertight, 3D-printable mesh in approximately 90 seconds. This compresses the first prototyping cycle from weeks to minutes, allowing you to evaluate form, fit, and function before committing to expensive CNC machining or production tooling.
Q: Is AI-generated 3D geometry watertight enough for medical 3D printing?
It depends on the AI engine. Most AI 3D generators (Meshy, Tripo) output non-manifold geometry that must be manually repaired before printing. Neural4D’s Direct3D-S2 architecture produces mathematically watertight meshes by design: every edge is connected to exactly two faces, meaning the STL file goes directly into your slicer without any repair step. This is the standard required for reliable medical 3D printing.
Q: How does AI Image to 3D compare to SolidWorks for medical device prototyping?
They serve different stages of the same pipeline. AI Image to 3D is optimized for rapid concept iteration in medical prototyping, generating geometry from a single image in seconds rather than hours. SolidWorks is optimized for production-intent parametric design, FEA analysis, and design transfer. The most efficient workflow uses AI for the concept and engineering prototype stages, then moves to SolidWorks for final validation and regulatory documentation.
Q: What file formats do I need for medical device 3D printing?
STL is the universal standard for 3D printing and is supported by every slicer. OBJ is useful when the model includes texture or color information. For engineering workflows that require parametric editability, export neutral formats like STEP or IGES are preferred, but these require a CAD package to generate from the mesh. Neural4D exports STL, OBJ, GLB, FBX, and USDZ, covering the full range from printing to AR visualization.
Q: Can Neural4D handle organic shapes for custom implants or prosthetics?
Yes. Neural4D’s Attribute VAE encodes geometry in native volumetric space, which naturally captures the freeform, non-parametric curves typical of anatomical shapes. The Image to 3D feature performs particularly well on organic geometry because the volumetric approach does not rely on hard-edge primitives or planar assumptions. For prosthetic socket design, start with a photograph of the residual anatomy and let the AI establish the base contour.
Q: How does the new FDA QMSR (ISO 13485) affect AI prototyping workflows?
The QMSR, effective February 2026, requires that design and development outputs be documented, verified, and traceable. AI tools used in prototyping must produce reproducible geometry from the same inputs: otherwise each generation cycle introduces uncontrolled variation. Neural4D’s deterministic output (identical inputs produce identical meshes) supports the traceability requirements of ISO 13485 Clause 7.3, making it suitable for use within a controlled design process.
Q: What types of medical devices can be prototyped with Image to 3D?
Any device whose geometry can be reasonably inferred from a 2D visual reference is a candidate. This includes surgical instruments (clamps, retractors, drill guides), external prosthetics (sockets, fairings), orthotic supports, surgical planning models, and patient-specific anatomical models for pre-operative rehearsal. Devices that require internal channel geometry (e.g., catheters, fluid paths) or exacting mechanical tolerances still need parametric CAD for the final design phase.
Get Started: Your First Medical Prototype in 90 Seconds
Medical device prototyping should not be the bottleneck in your design process. Using Image to 3D for medical prototyping with Neural4D gives you watertight, manufacturing-ready geometry from a single image: no CAD skills required and no mesh repair needed, no weeks of waiting for a CNC slot.
Ready to Iterate in Minutes, Not Weeks?
Upload a single image and export an STL ready for 3D printing. Compress your next prototyping cycle from weeks to moments.
Free tier includes 50 power per week for your first prototype. No credit card required.
For a broader look at how Neural4D compares with other AI 3D tools in the market, read our guide to the best AI image to 3D model tools and explore our AI 3D model generation capabilities for industrial applications. For a direct comparison across technical specs, see how Neural4D stacks up against Tripo, Meshy, and Rodin.