Mandalorian Helmet 3D Print: Complete Guide to Files, Settings & Finishing
Quick Summary
- Top free Mandalorian helmet STL files come from MyMiniFactory, Printables, and Cults3D: Din Djarin, Boba Fett, and Bo-Katan variants
- Recommended print settings: 0.16–0.2 mm layer height, 15% gyroid infill, 3–4 walls, tree supports
- A full-size wearable helmet uses 700–775g of filament; budget 3.5–4+ days of total print time
- Always measure head circumference and calculate a scaling factor before slicing
- Beskar finish requires: primer, dark metallic base coat, dry-brushed highlights, and a weathering wash
- Neural4D Image to 3D can generate a custom helmet 3D model from a reference photo, producing a watertight STL ready for slicing
Getting a Mandalorian helmet 3D print right comes down to three decisions made before you ever click Print: which STL file you use, whether the scaling matches your head, and what post-processing approach delivers the Beskar steel look. Rush any of these and you are staring at a warped visor or a seam line that catches every camera angle. This guide walks through all three stages in sequence, including how to generate a fully custom helmet design using AI if you want something unique to your clan.
- Part 1: Choosing Your STL File and Helmet Variant
- Part 2: Print Settings, Sizing, and Slicing
- Part 3: Assembly, Gap Filling, and Beskar Finishing
- Part 4: Generate a Custom Mandalorian Helmet with AI
- Part 5: Filament Cost and Print Time Estimates
- Part 6: Common Questions on Mandalorian Helmet 3D Printing
- Start Printing Your Mandalorian Helmet
Part 1: Choosing Your STL File and Helmet Variant
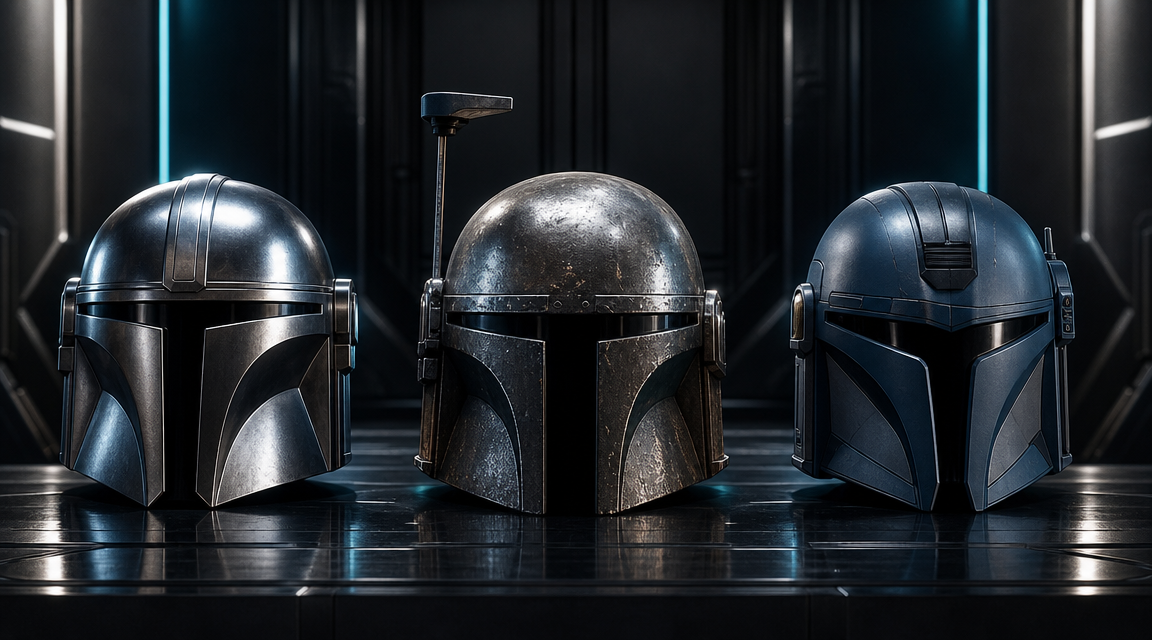
The Mandalorian universe has three distinct helmet silhouettes that show up constantly in the maker community. Each prints differently and has a different complexity level.
Din Djarin (The Mandalorian)
The most printed variant. T-shaped visor, bell dome, and bare Beskar metallic finish make it identifiable. The visor slot is narrower than Boba Fett’s, so many files split it into 6–8 pieces to fit standard 220 mm beds. Rob Pauza’s file on MyMiniFactory has logged over 100,000 downloads and comes in 1-piece, 2-piece, and 8-piece options. Printables also hosts a well-rated Din Djarin helmet with adjustable scaling built into the slicer profile.
Boba Fett
Larger dome, longer ear caps, and a pronounced full-cheek slope indent. Expect 15–20% more filament compared to Din’s helmet. The bridge between the ear cap and the dome needs careful support placement to avoid drooping. ESB and ROTJ accuracy variants exist on Cults3D for prop-builders who want screen-accurate geometry.
Bo-Katan (Nite Owl)
Distinguished by the Y-shaped visor and slightly rounder dome. Cat-eye visor profile is more complex to orient on the print bed. Requires a 0.6 mm nozzle for faster printing or patience with a 0.4 mm setup. Moving rangefinder attachments are secured with 10 mm x 3 mm magnets.
For most first-time builds, start with Din Djarin and Rob Pauza’s multi-part file. The community support is strongest, and the split geometry fits any printer with a bed of 220 mm or larger.
Fans building similar IP props have tackled comparable complexity. If you have already completed an Iron Man helmet 3D model or worked through a photo-to-STL conversion workflow, the Mandalorian helmet adds one new challenge: the visor geometry requires more deliberate support strategy than a smooth faceplate.
Part 2: Print Settings, Sizing, and Slicing
Sizing Before You Slice
Scale errors are the number one cause of failed Mandalorian helmet 3D print builds. Measure your head circumference with a flexible tape (no tape measure? use a string against a ruler), 1 inch above your eyebrows and level across the back. Most STL files are designed around a 57–60 cm reference head. Use this formula:
(Your head circumference ÷ Reference circumference) × 100 = scale percentage
Example: 59 cm head ÷ 58 cm reference × 100 = 101.7%
Add 5–10% on top of calculated fit to account for foam padding inside the helmet. Print a test dome section first before committing to the full print run.
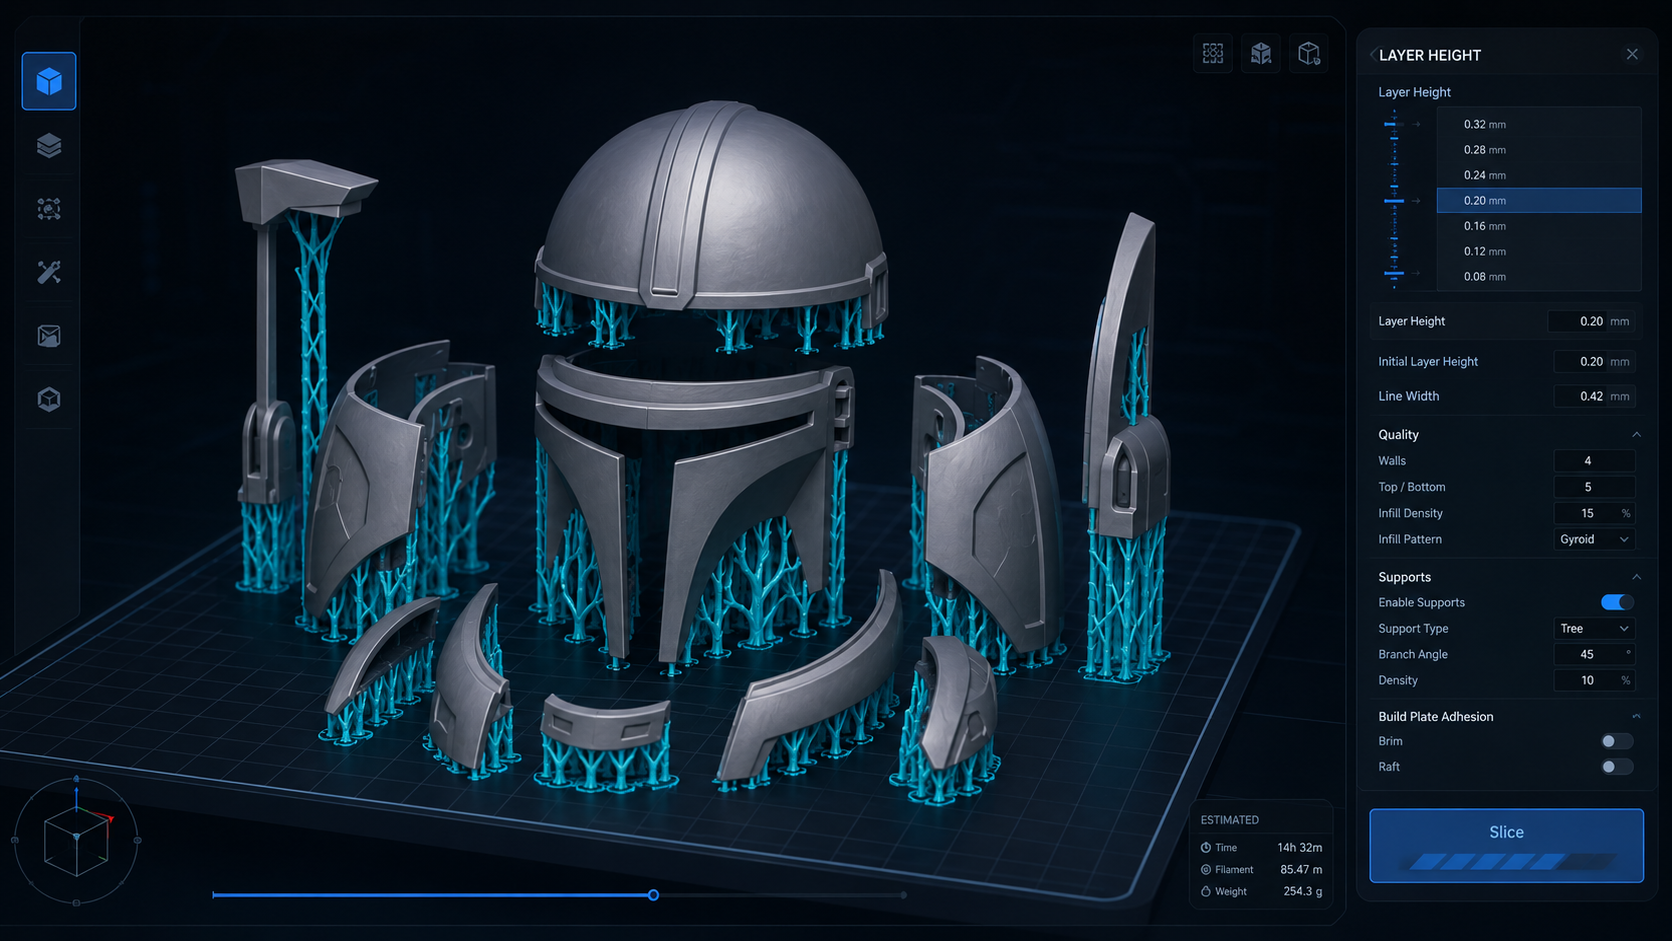
Recommended Print Settings
| Setting | Value | Notes |
|---|---|---|
| Layer height | 0.16–0.2 mm | Use variable layer height on dome curves to cut stair-stepping |
| Infill | 15% | Gyroid pattern for strength without excess weight |
| Walls/perimeters | 3–4 | 4 walls if you plan heavy sanding during post-processing |
| Supports | Tree, 45° threshold | Easier removal on interior surfaces; minimal contact points |
| Print speed | 40–50 mm/s | Slower on visor slot overhangs; standard speed on dome sections |
| Bed temp (PLA) | 60°C | Brim recommended for large flat ear cap sections |
| Extruder temp (PLA) | 200–215°C | Lower end for better layer bonding on vertical walls |
Filament Choice
PLA is the easiest starting point. Silver PLA+ produces the closest raw-print color to Beskar steel, which reduces the number of paint coats needed. If the helmet will be worn at outdoor summer events, PETG handles heat better and resists deforming. ABS is reserved for advanced builders only: it warps without an enclosure and requires acetone smoothing that removes fine surface detail.
Orientation and Part Splits
Orient the dome section face-down when possible to minimize support contact on the exterior surface. For multi-part files, print the face plate separately from the dome to get cleaner detail on the T-visor cutout. Visor slots printed vertically produce sharper edges than horizontal orientations.
Part 3: Assembly, Gap Filling, and Beskar Finishing
Assembly and Gap Filling
Dry-fit all parts before applying any adhesive. Two-part epoxy is stronger than super glue for seam joins and resists flexing when the helmet is worn. Fill remaining seam lines and print lines with spot putty or body filler. Apply thin layers and let each cure fully before sanding. Sand progressively: 120 grit to remove high spots, 220 grit to smooth, 400 grit before priming.
Primer and Paint for the Beskar Finish
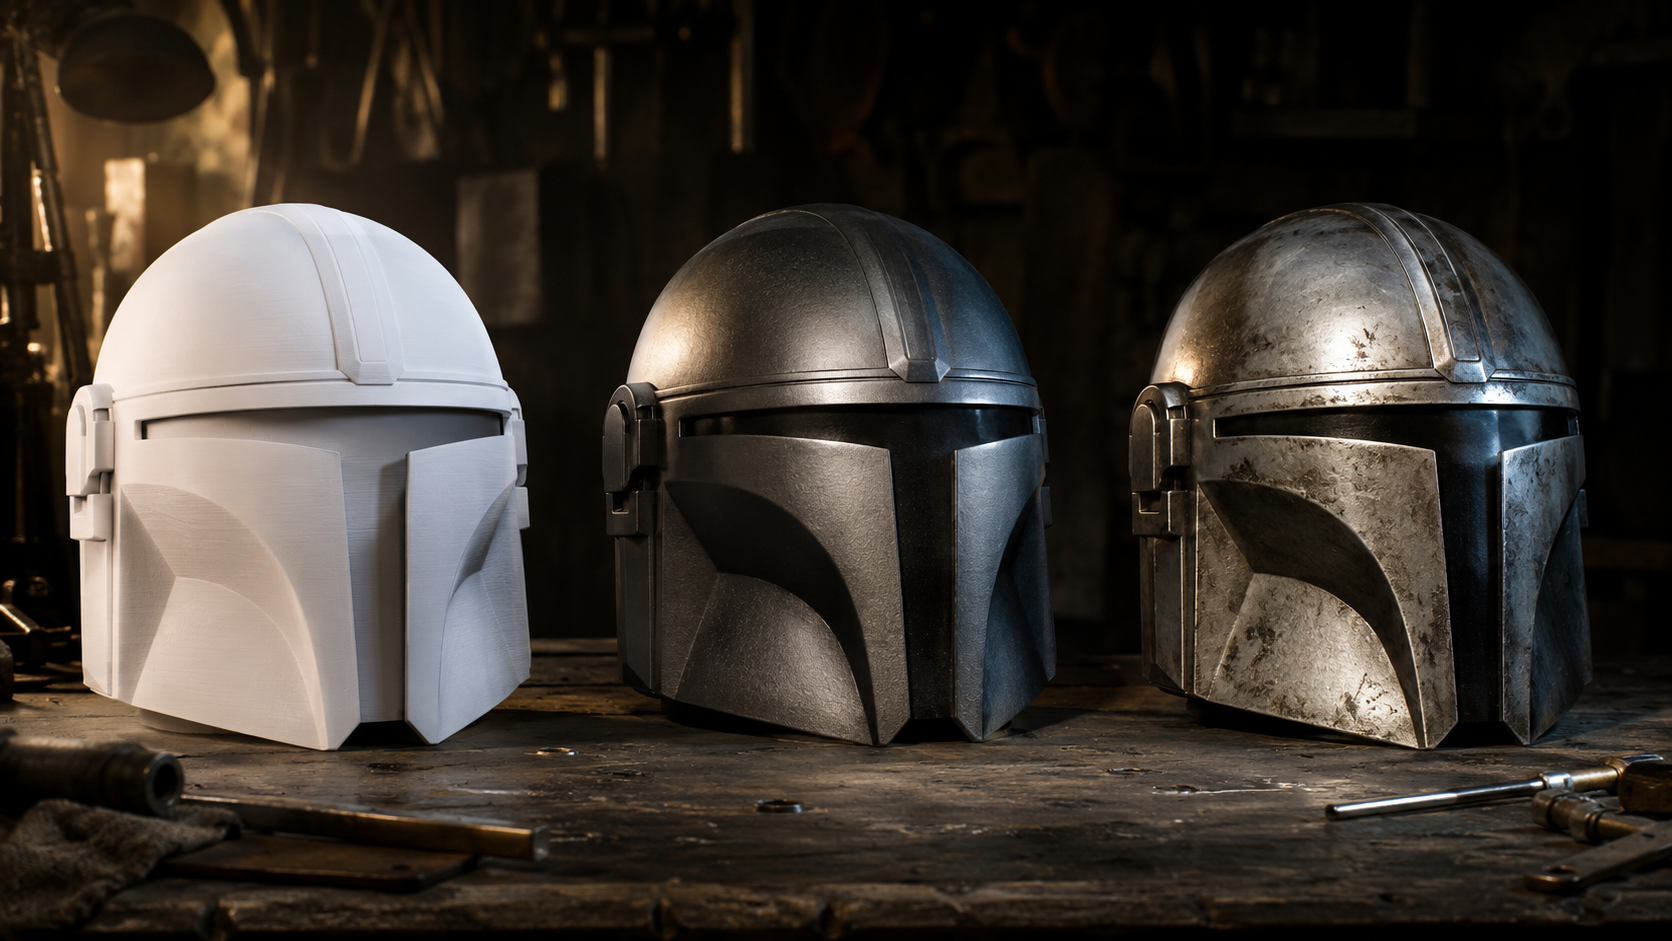
The iconic Beskar look is a layered metallic technique, not a single coat. Apply a plastic-adhesion primer first. Then follow this sequence:
1. Plastic primer (2 thin coats, 30 min cure between coats)
2. Dark steel base: Rust-Oleum Dark Steel spray, full coverage
3. Dry-brush highlight: lighter silver applied with a stiff flat brush on raised edges only
4. Weathering wash: thinned black or brown acrylic pushed into recesses, wiped off flat surfaces
5. Seal: matte or satin acrylic sealer to lock all layers
The dry-brush step is where the dimensional look comes from. Use a near-dry brush with almost no paint on the bristles and drag it lightly across the surface edges. This catches raised geometry and mimics battle-worn durasteel.
Visor Installation
Gold or smoke-tinted acrylic sheet cut to the T-visor profile is the standard approach. Thickness of 1.5–2 mm balances flexibility and rigidity. Secure with a thin bead of E6000 adhesive around the inner rim. Velcro strips on the interior surfaces let you attach helmet padding for a comfortable fit.
Part 4: Generate a Custom Mandalorian Helmet with AI
Pre-made STL files cover the canon designs, but they lock you into someone else’s geometry. If you want a custom Mandalorian helmet variant with modified visor geometry, unique clan markings integrated into the mesh, or proportions tuned specifically to your build, generating a 3D model from a reference image is a faster path than manual modeling.
Neural4D’s Image to 3D pipeline takes a reference photo or sketch of your custom helmet concept and reconstructs the 3D geometry using the Direct3D-S2 engine. The output is a watertight mesh ready for STL export. Watertight means no hidden holes for your slicer to flag as non-manifold errors. You skip the Meshmixer repair step that often breaks surface normals on models generated by other tools.
The workflow is Input → Generate → Regenerate (via Neural4D-2.5 for shape adjustments) → Export as STL. Neural4D-2.5 lets you refine the mesh through natural language: instruct it to deepen the ear cap slope, widen the dome, or adjust the visor cut angle. Once the geometry matches your vision, export the STL directly into your slicer.
Neural4D also exports a textured GLB with full PBR maps. For 3D printing purposes the textures don’t transfer to the print itself, but the texture map gives you a precise color reference: you can see exactly where the Beskar silver transitions to darker recesses, which makes hand-painting or airbrushing significantly faster than working from screen references alone.
For makers who have already worked through similar prop builds, the same Image to 3D approach that works for a Gundam 3D model or a Chainsaw Man 3D print applies directly here. You control the source image, and the engine handles the geometry reconstruction.
Generate Your Custom Helmet Mesh
Upload a reference image and get a watertight STL file in minutes. No modeling software required.
Free users get 50 credits per week. No credit card required to start.
Part 5: Filament Cost and Print Time Estimates
| Helmet Variant | Filament (PLA) | Total Print Time | Difficulty |
|---|---|---|---|
| Din Djarin (standard) | 700–775 g | 3.5–4 days | Intermediate |
| Boba Fett (full size) | 800–950 g | 4–5 days | Intermediate–Advanced |
| Bo-Katan (Nite Owl) | 650–750 g | 3–4 days | Intermediate |
| Custom AI-generated | Depends on geometry | Variable | Depends on complexity |
These figures assume a single printer running unattended overnight on a standard Mandalorian helmet 3D print job. Budget 1 kg of filament per helmet plus 200–300 g for failed test pieces and support waste. Print time scales with layer height: switching from 0.2 mm to 0.1 mm roughly doubles the clock.
Total material cost for a Din Djarin helmet in PLA: approximately $15–$25 USD in filament. Post-processing consumables (primer, paint, sealer, putty) add another $30–$50 depending on paint quality. A production-grade metallic helmet finish achievable for under $80 total is one reason this project remains one of the most-requested cosplay builds in the community.
MyMiniFactory’s most-downloaded Mandalorian helmet file has logged over 103,000 downloads, a data point that underlines why this specific build has become a benchmark cosplay project in the 3D printing community.
Part 6: Common Questions on Mandalorian Helmet 3D Printing
Material costs run $15–$25 for filament on a standard Din Djarin helmet (700–775 g of PLA at typical spool prices). Add $30–$50 for primer, metallic paint, weathering wash, and sealer. Total for a quality finished helmet: $50–$75, assuming you already own a 3D printer.
Any printer with a bed of 220 mm x 220 mm or larger handles multi-part files. The Prusa MK4 and Bambu Lab P1S are frequently cited in the community for reliable layer adhesion on curved dome surfaces. Print volume matters less than consistent bed leveling and temperature control for a project this large.
Licensed replicas start at $150 for painted display models and run to $500+ for wearable prop-grade builds. Fan-made commission helmets from Etsy range from $80 to $250. 3D printing your own cuts that cost to material and time, making it the lowest-cost path to a screen-accurate wearable.
STL files that are fan-created and distributed for personal use only are generally tolerated under Disney’s policy for non-commercial fan projects. Printing for personal cosplay use is widely practiced. Selling printed helmets, especially designs based directly on screen geometry, crosses into commercial use of Disney’s intellectual property and is legally problematic. Always check the specific license attached to the STL file you download.
Want a Helmet No One Else Has?
Generate a custom Mandalorian-inspired helmet mesh from your own concept art or reference photo. Watertight STL, ready to slice.
Direct3D-S2 engine. Watertight output. Export as STL or GLB.
Start Printing Your Mandalorian Helmet
A Mandalorian helmet 3D print is one of the more rewarding prop projects in the maker space, not because it is technically difficult, but because the finish quality is entirely in your hands. Pick the right STL for your printer bed, calculate the scaling before you slice, run tree supports on interior surfaces only, and treat the Beskar finish as a layered painting process rather than a spray-and-done job. Follow that sequence and the result looks like a prop build that cost three times the actual material budget.
If you want a helmet design that is genuinely unique rather than a print of an existing community file, Neural4D’s Image to 3D engine converts a concept sketch or reference photo into a watertight mesh ready for your slicer. The geometry is clean, the STL exports immediately, and you own the design from the first generation.