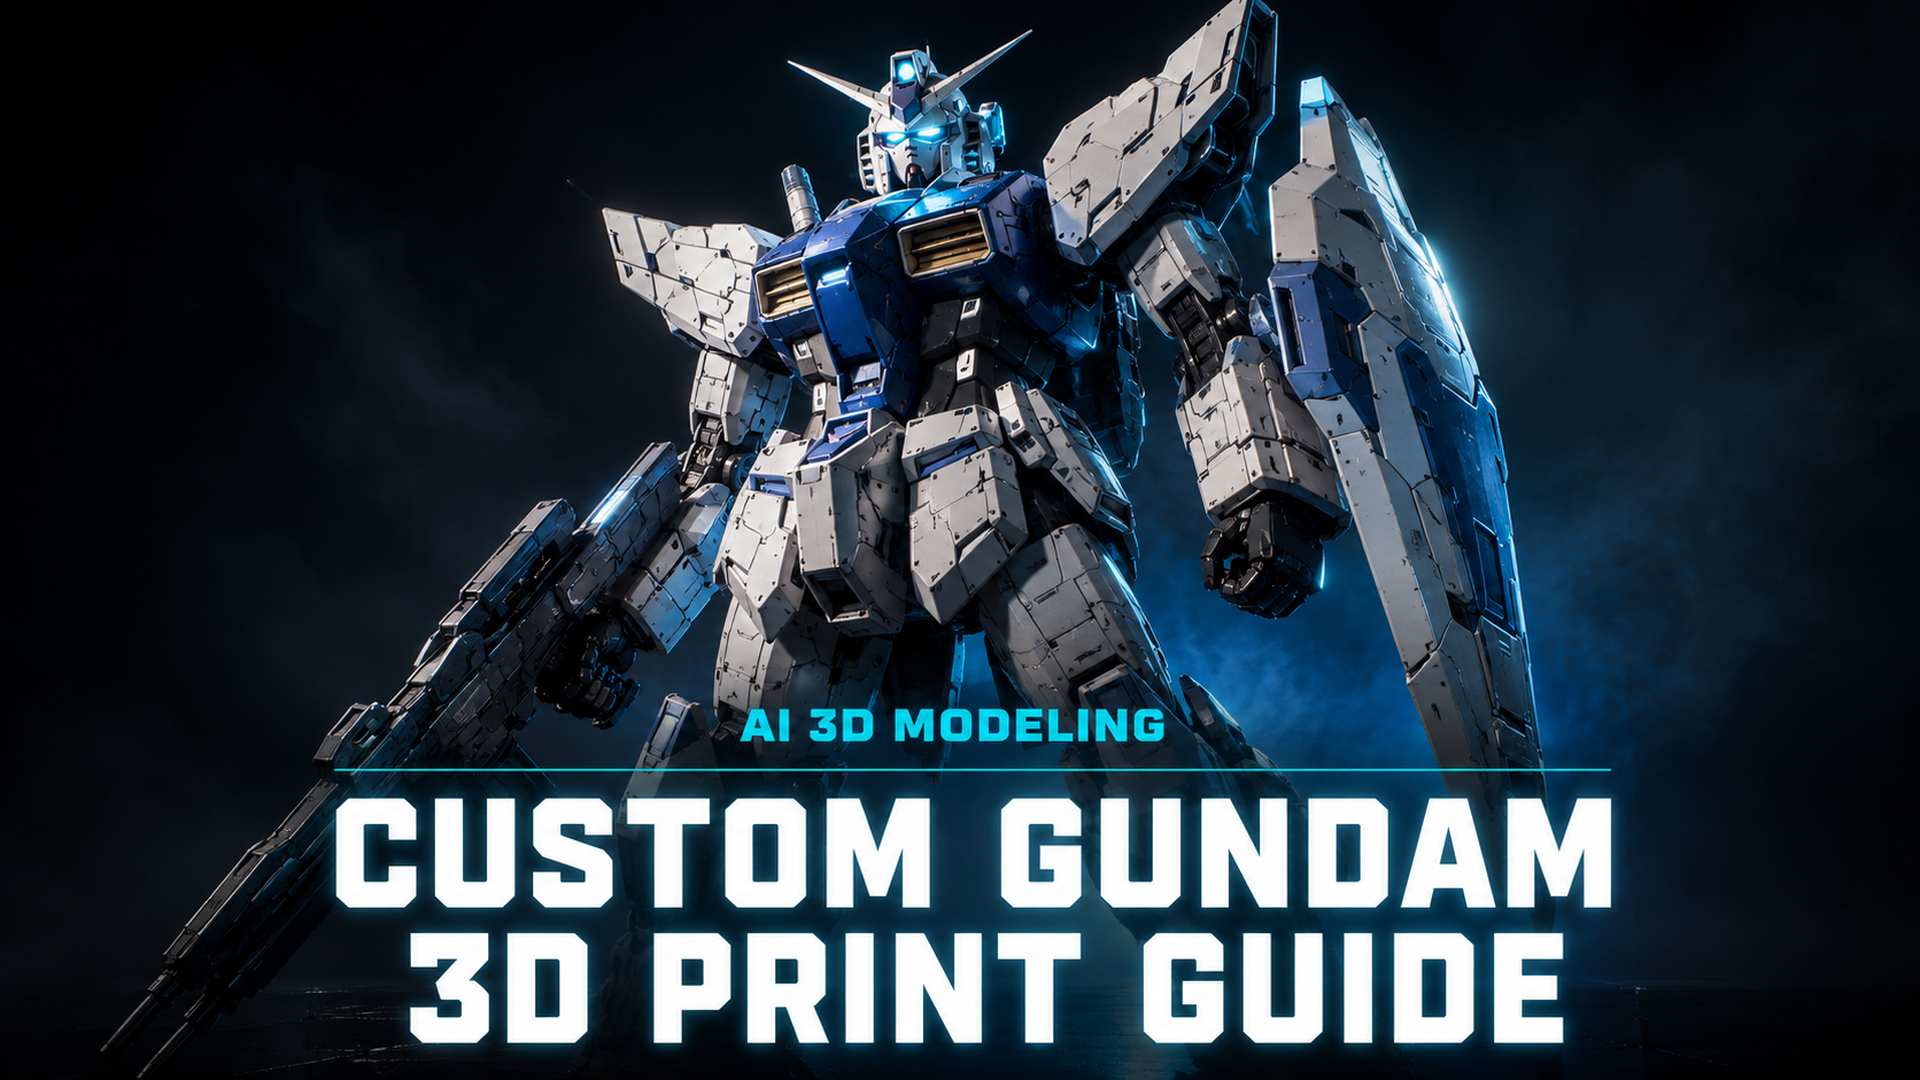
Gundam 3D Print: How to Create Custom Models Using AI (2026 Guide)
Quick Summary
- Nearly 1 in 4 downloaded Gundam STL files contain non-manifold geometry that breaks slicers
- Resin printers capture armor panel lines and joint detail that FDM cannot match below 0.15mm layer height
- Neural4D’s Image to 3D converts a reference photo into a watertight STL with zero manual mesh repair needed
- Post-processing order matters: supports off, sand 80-2000 grit, filler primer, panel line, topcoat
Gundam 3D print projects fail most often before the printer ever starts. You download an STL, load it into your slicer, and get a wall of errors: non-manifold edges, open surfaces, inverted normals. The mesh is broken. This guide covers every step from generating a clean, slicer-ready Gundam model with AI to getting a painted, panel-lined finished figure on your shelf.
Table of Contents
- Part 1: Why Most AI-Generated Gundam Models Fail in the Slicer
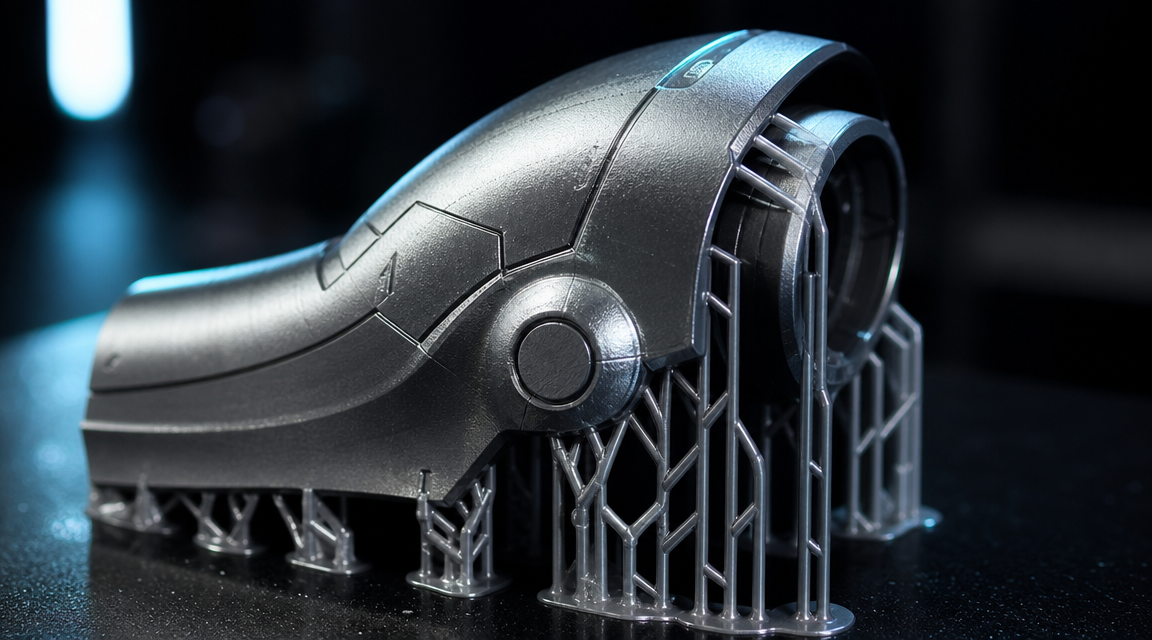
- Part 2: Resin vs. FDM for Gundam Armor
- Part 3: How to Convert a Reference Image into a Slicer-Ready Model
- Part 4: Cleaning and Prepping Your Gundam STL File
- Part 5: Post-Processing for an Anime-Accurate Finish
- Part 6: Common Questions on Gundam 3D Printing
- Start Printing Your Custom Gundam
Part 1: Why Most AI-Generated Gundam Models Fail in the Slicer
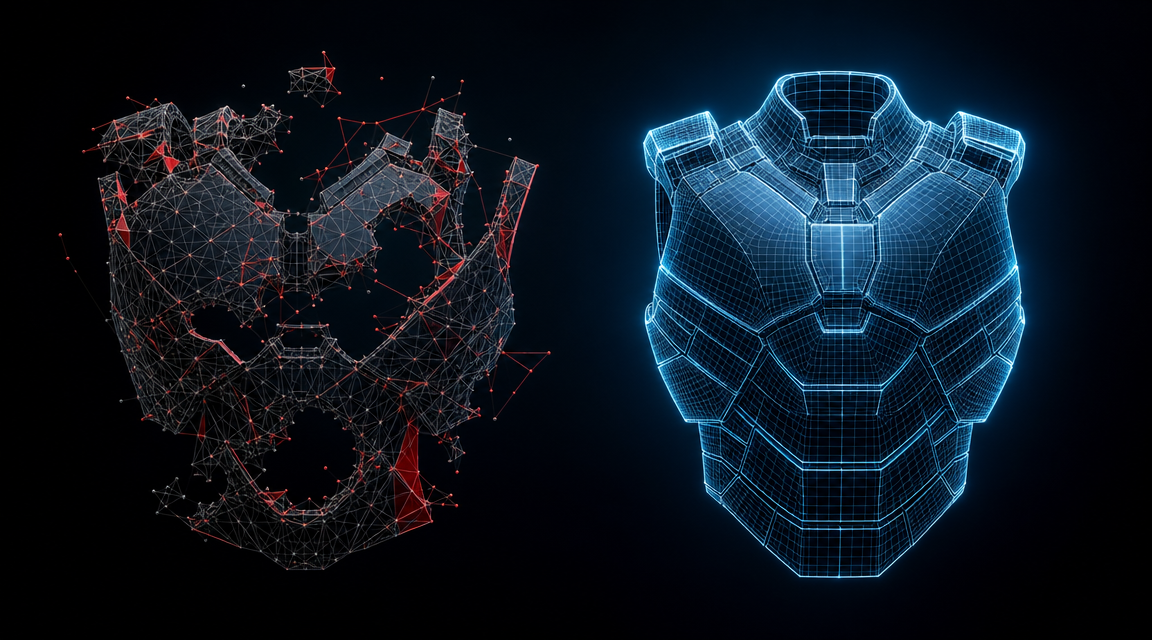
The problem with most Gundam STL files you download from Printables, Thingiverse, or community repositories is topology. Many are converted from 3D render meshes, not print-optimized geometry. Nearly 1 in 4 downloaded STL files contain serious mesh errors that prevent proper slicing.
The four most common failures are non-manifold edges (an edge shared by more than two faces, which makes the slicer unable to determine inside from outside), open surfaces (missing faces that leave the volume unsealed), inverted normals (faces pointing inward instead of outward), and degenerate zero-area triangles that generate phantom layers in the print.
Free AI mesh generators compound the problem. Tools that use generic diffusion pipelines produce what the community calls “triangle soup”: high-poly chaos where vertices float disconnected and normals contradict each other. You get a mesh that looks fine in a 3D viewer but collapses the moment a slicer tries to calculate toolpaths.
Neural4D’s Direct3D-S2 architecture approaches the geometry problem at the volumetric level. Instead of estimating surface from a depth map, it processes the full 3D volume to ensure the output mesh is mathematically watertight with zero non-manifold edges. For anime-style character 3D prints, this difference is the line between a print that works first time and one that consumes three hours of your Saturday on mesh repair.
Part 2: Resin vs. FDM for Gundam Armor
Both printer types can produce a Gundam. The choice comes down to what kind of Gundam you want.
FDM (Filament) Printing
FDM printers use PLA, PETG, or ABS filament. They are cheaper to run, better for large structural parts (frames, weapons, shields), and produce durable output. The weakness is resolution. FDM layer heights of 0.15mm to 0.2mm leave visible horizontal banding across curved armor surfaces and are incapable of capturing Gundam panel lines at 1/144 scale without significant post-processing to fill and sand them away.
Resin (SLA/DLP/LCD) Printing
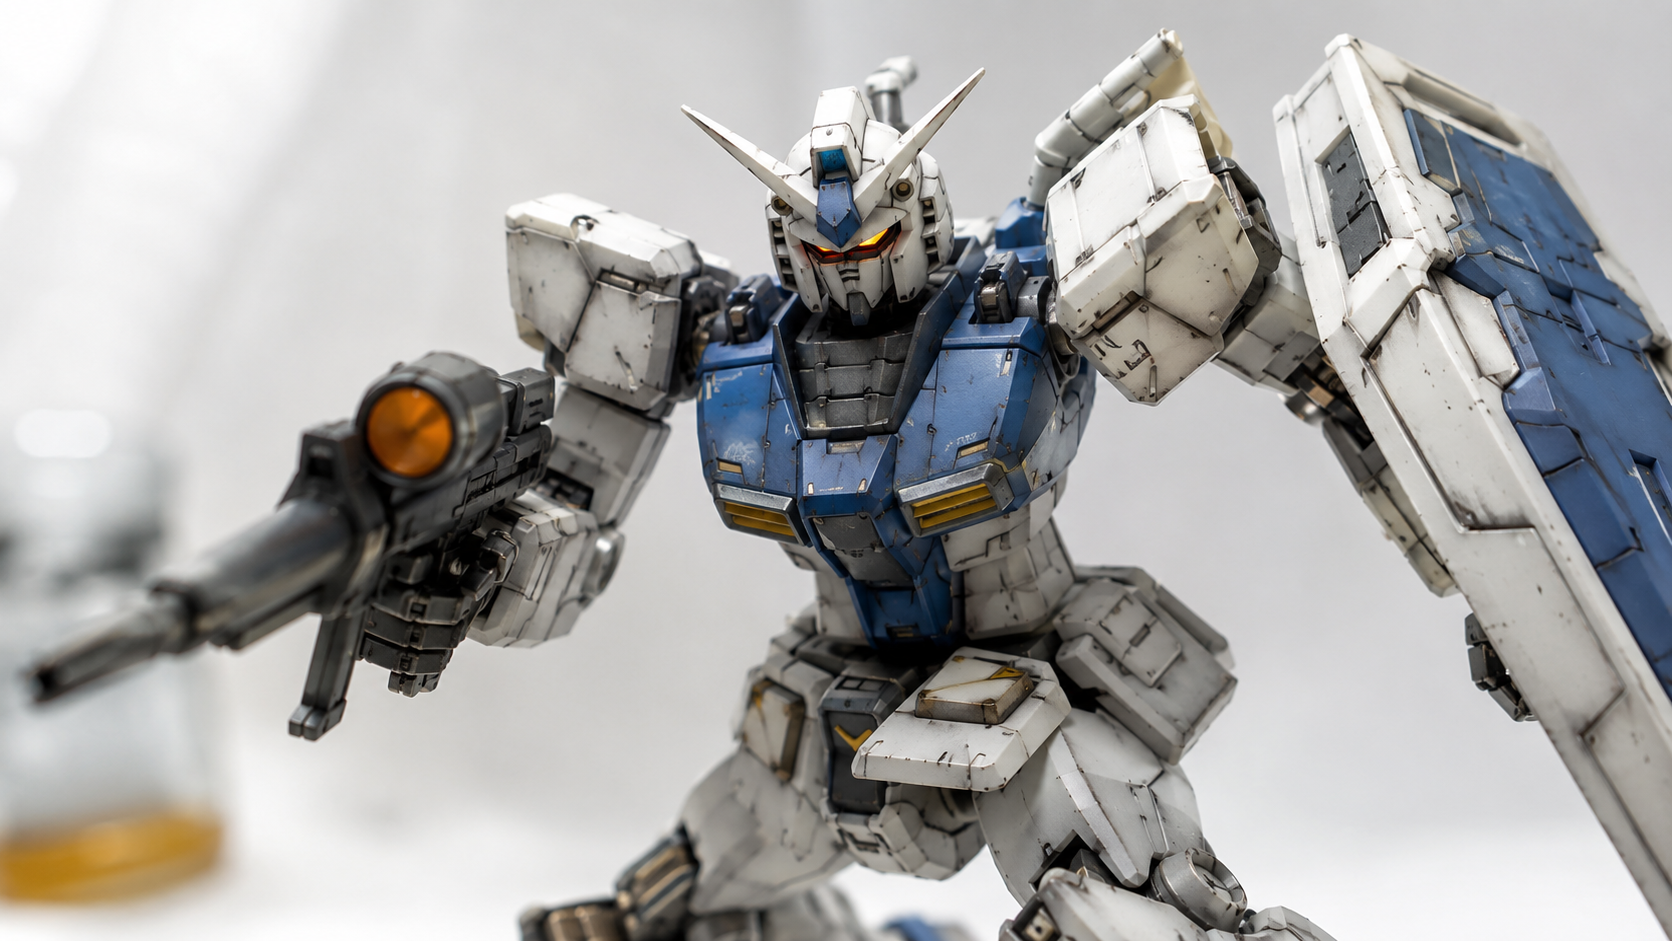
Resin printers expose a liquid photopolymer layer by layer at 0.025mm to 0.05mm resolution. At those settings, panel lines, joint detail, and surface texture come out clean. The finished surface is smooth enough to prime directly with minimal sanding. The tradeoff: resin is brittle, requires IPA washing and UV curing, and parts can warp if oriented poorly on the build plate. Siraya Tech Fast Navy Grey is a widely used resin for Gundam-scale pieces: it sands smoothly and holds fine surface detail better than standard gray resins at 0.05mm layers.
| Factor | FDM | Resin |
|---|---|---|
| Layer height | 0.15 – 0.2mm | 0.025 – 0.05mm |
| Panel line detail | Needs heavy sanding | Prints clean at 1/144 |
| Material cost | Lower (~$20/kg PLA) | Higher (~$30-60/500ml) |
| Part durability | High (PETG/ABS) | Moderate (brittle) |
| Post-processing | Sand, fill, prime | IPA wash, UV cure, light sand |
| Best for | Large frames, weapons | Armor, joints, figures |
| Joint articulation risk | Low — PLA/PETG flex before snapping | High — snap under stress; pin joints recommended |
| Support removal scarring | Visible on curved surfaces; filler needed | Minimal with proper 45° orientation |
The split that most experienced Gundam builders land on: resin for every piece a viewer sees at arm’s length (chest, helmet, shoulder armor, hands), FDM for the internal torso frame and weapon grips where surface texture is hidden or irrelevant. Printing joints in resin requires pinning — drill a 1.5mm channel and insert a brass rod — because resin snaps clean at stress points that PETG would flex through. For reference on applying the same precision logic to mechanical assemblies, see our article on high-precision mechanical 3D print models.
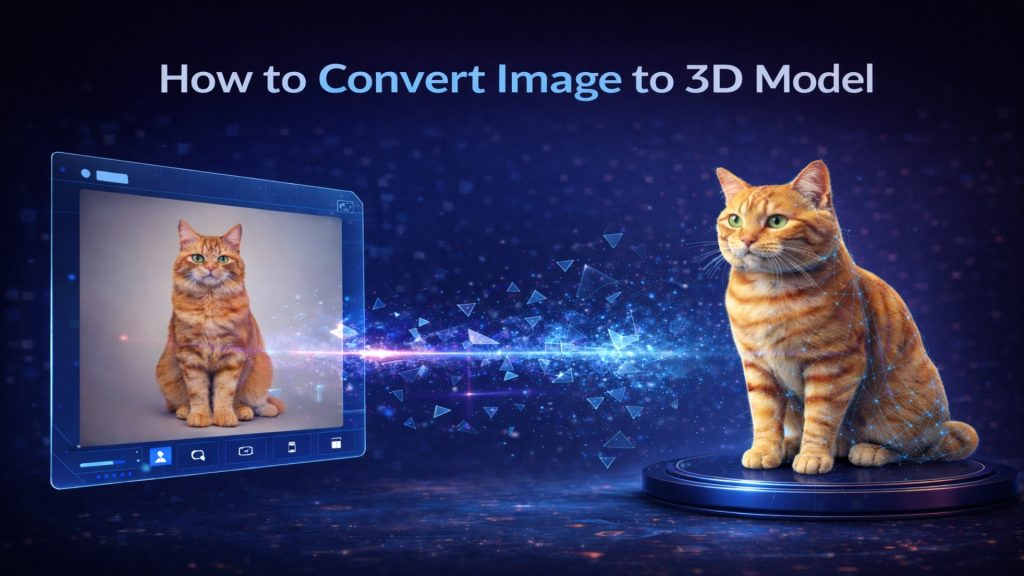
Part 3: How to Convert a Reference Image into a Slicer-Ready Model
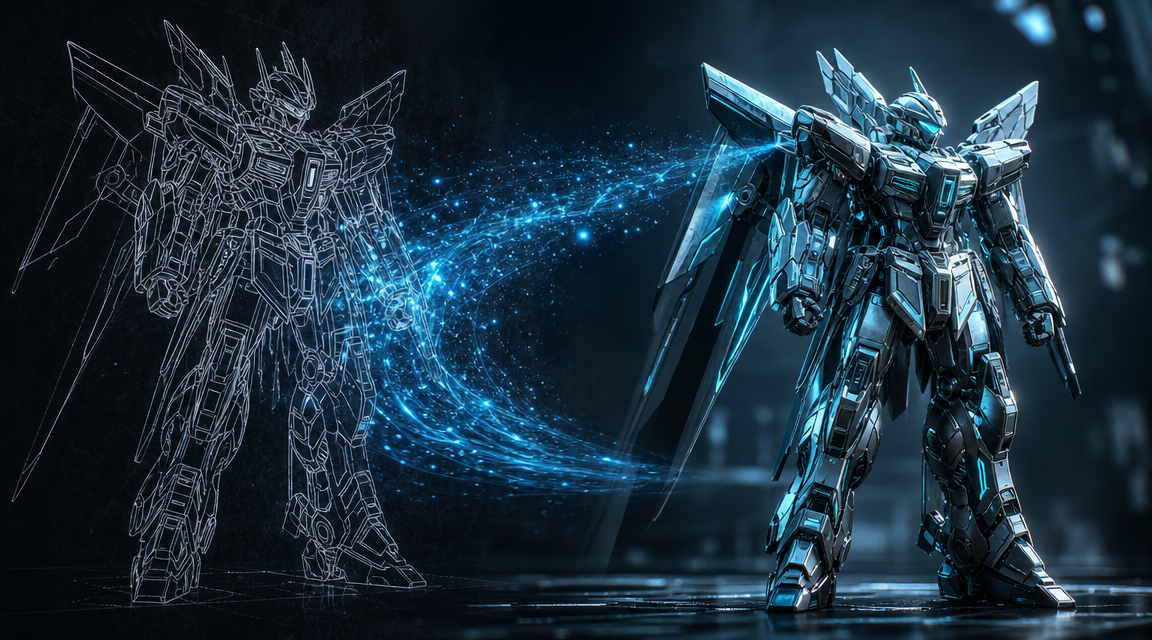
This is where Neural4D separates from every generic AI mesh generator. The workflow uses a single reference image, whether that is an official Bandai product photo, a screenshot from an anime, or your own original mech sketch, and reconstructs the full 3D volume from it.
Step 1: Prepare Your Reference Image
Use a 3/4 angle view whenever possible. A front-facing flat image gives the algorithm only one axis of reference. A slight 3/4 view provides two reference planes for the Direct3D-S2 engine to calculate accurate depth. Clean backgrounds significantly improve mesh boundary accuracy: a white or plain-colored background removes ambiguity at the silhouette edge of complex armor shapes.
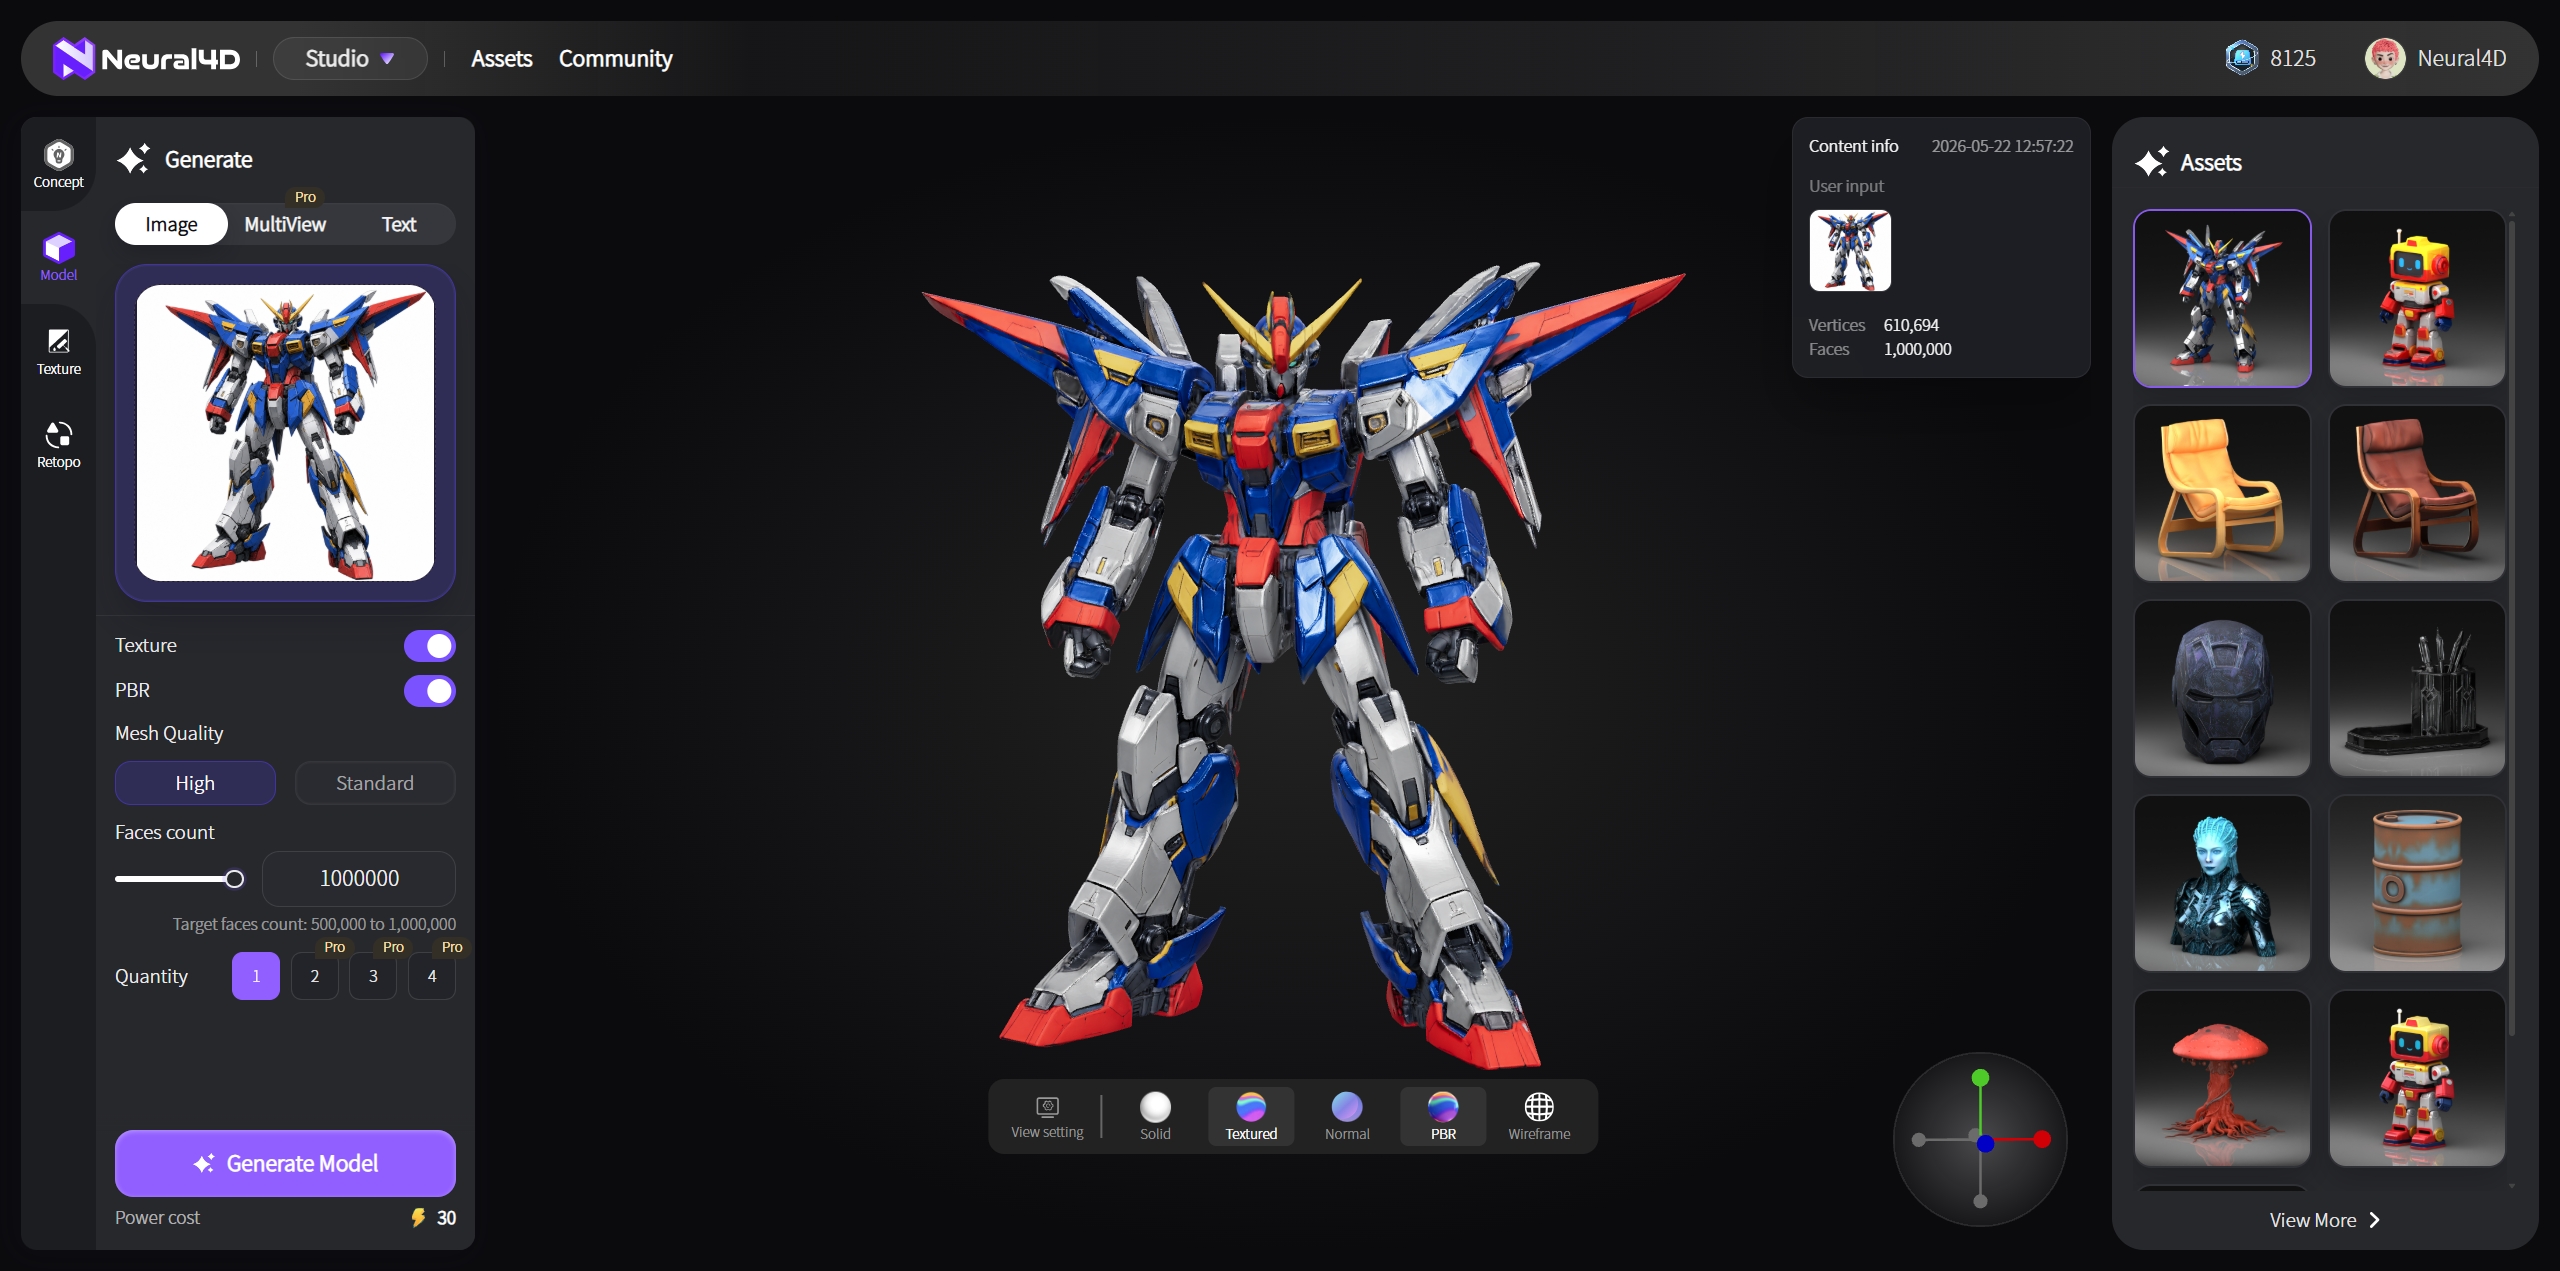
Step 2: Generate with Neural4D Image to 3D
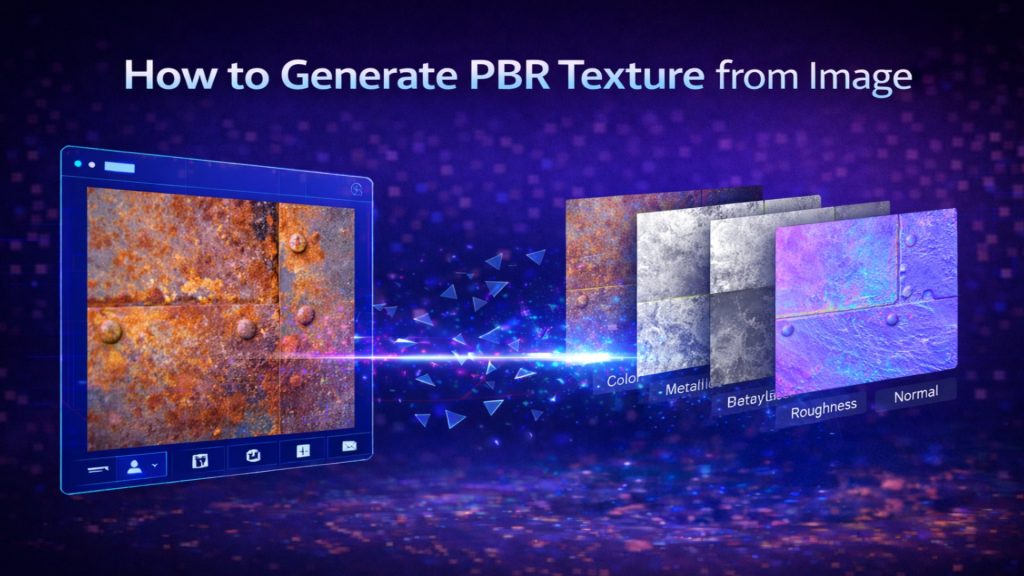
Upload your image to Neural4D’s Image to 3D tool. Select your texture preference upfront: choosing standard textures or full PBR maps is configured before clicking Generate, not as a second step afterward. The base mesh generates in approximately 90 seconds. If you selected PBR textures, the full textured output takes 2 minutes or more as the system calculates Normal, Roughness, and Metallic maps alongside the geometry.
For a complete step-by-step breakdown of the image-to-STL conversion process, see our guide on how to convert an image into a slicer-ready STL file.
Generate a Watertight Gundam STL in Minutes
Base mesh ready in approximately 90 seconds. Upload a reference image. Get a slicer-ready model with zero mesh repair needed.
50 Power credits free per week. No subscription required to generate your first model.
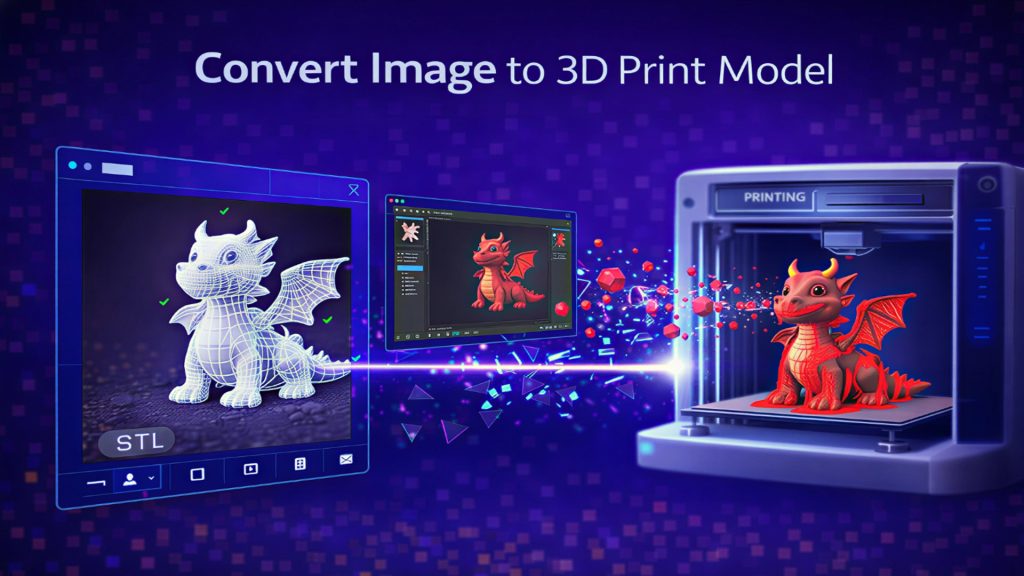
Step 3: Export as STL
Neural4D exports to STL, OBJ, FBX, GLB, and USDZ. For a full breakdown of when to use each format, see which 3D file formats Neural4D supports. For Gundam printing specifically:
- STL: the standard for all slicer software (Cura, PrusaSlicer, Chitubox, Lychee). Use this for everything going directly to print.
- OBJ: use when you need to bring the mesh into Blender first — for splitting the body into sub-assemblies, adding peg holes for joints, or scaling individual armor pieces before slicing.
- GLB: use for previewing the textured model in a real-time viewer (Sketchfab, Three.js) before committing to print.
The exported file is watertight with zero non-manifold edges, which means it passes Meshmixer’s Inspector check and slices without errors across all major slicers.
Part 4: Cleaning and Prepping Your Gundam STL File
Even with clean source geometry, a few preparation steps before slicing will save you failed prints downstream.
Scale Verification
Gundam models use standard scales: 1/144 (HG), 1/100 (MG), 1/60 (PG). Before adding supports, verify your model is set to the intended scale in your slicer. A 1/144 RX-78 should stand approximately 125mm tall from foot to crown. Measure this in your slicer’s preview before adding supports. Import errors frequently reset scale to millimeter values that look correct numerically but produce a model 10x too large or too small on the build plate.
Orientation on the Build Plate
Tilt armor pieces at 30 to 45 degrees on the build plate. This reduces the surface area in contact with each layer, which minimizes layer lines on visible faces and makes supports easier to remove without scarring the detail surface. For resin, orient the largest flat face away from the FEP film to reduce suction force.
Support Strategy
Use tree supports in Cura or auto-supports in Lychee/Chitubox for complex Gundam geometry. Grid supports attach to visible surfaces and leave scars that require filling. Tree supports contact fewer surface points and pull cleanly from most armor surfaces.
Part 5: Post-Processing for an Anime-Accurate Finish
The printed part is a substrate. The finish is what makes it look like a Gundam.
Support Removal and Surface Prep
Remove supports with flush cutters. For resin, wash in IPA first while the part is still slightly flexible so supports break cleanly. Sand in grit sequence: 80 or 120 for heavy layer line removal, 180 to 220 for blending, 400 for pre-primer prep. Do not skip grits. Deep scratches from coarse grits remain visible through primer.
Primer and Filler Application
Apply two or three thin coats of automotive filler primer, holding the can 25 to 30cm from the surface. The filler compound bridges microscopic layer line gaps that standard primer misses. Let each coat flash to matte before the next. Wet-sand with 400 to 600 grit between coats. Repeat the primer-sand cycle until the surface feels glassy under your finger.
Panel Lining
Apply a gloss clear coat over the primed and painted surface before panel lining. This gives the enamel panel liner a sealed surface to flow through capillary action. Use Tamiya Panel Line Accent Color, touch the brush tip to the recessed line, and let it flow. Wipe perpendicular to the line with an alcohol-dampened swab. Always wipe perpendicular, never parallel, or you drag the accent color out of the groove.
For detailed armor figures like the Iron Man helmet, the same primer-panel line sequence applies. See our Iron Man helmet 3D model guide for print settings and finish tips on complex armor pieces.
Topcoat
Seal the finished model with matte or semi-gloss clear topcoat. Matte topcoat is the standard for Gunpla to kill shine and give the surface a plastic-model look. Gloss topcoat is correct for clean-condition displays. Apply in thin passes from 25cm and let cure for at least 24 hours before handling.
Part 6: Common Questions on Gundam 3D Printing
Yes. Neural4D’s Image to 3D tool reconstructs a full 3D volume from a single reference photo. Upload a 3/4 angle view of any Gundam design, official or original, and the Direct3D-S2 engine generates a watertight STL. The output exports directly into any slicer without manual mesh repair.
Resin at 0.025 to 0.05mm layer height captures armor panel lines and joint detail that FDM cannot reproduce cleanly at standard settings. For full kits, use resin for all visible armor pieces and FDM for internal frames and weapons where surface quality matters less. This combination balances detail quality with material cost.
Holes in STL files are open surfaces left from mesh conversion errors or boolean operations in the original CAD software. Load the file into Meshmixer, run Analysis > Inspector, then click Auto Repair All. For complex self-intersecting geometry that auto-repair cannot solve, the Blender 3D Printing Toolbox add-on provides manual manifold correction. The root fix is starting from watertight source geometry.
Sand through grit sequence (80 to 2000), apply filler primer in two or three coats with wet-sanding between coats, then apply your color coats. Before panel lining, seal with gloss clear coat. Use Tamiya Panel Line Accent Color via capillary action into recessed lines. Wipe perpendicular to lines with alcohol. Finish with matte topcoat. Do not rush cure times between coats.
Full one-piece prints are only practical for static display bust models. Poseable kits require separate parts for each armor piece, joint, and weapon so that supports can be placed without scarring visible surfaces. Most 3D print-optimized Gundam designs come pre-split into sub-assemblies. For a model generated via Neural4D, you can export the full body mesh and split it in Meshmixer or Blender using the Separate by Parts function.
Downloaded files give you fixed designs created by someone else. AI generation lets you start from any reference image, including unofficial designs, original mech concepts, or specific era variants not available as free STLs. The output is also topology-correct from the start rather than a converted render mesh, which eliminates the repair step that breaks most beginner prints.
Start Printing Your Custom Gundam
The two biggest barriers to a successful Gundam 3D print are broken source geometry and skipping post-processing steps. Clean geometry means your slicer runs without errors and your print completes without voids or delamination. Correct post-processing means the finished figure looks like an intentional model, not a raw extrusion. Neural4D handles the geometry problem at source, and research published at NeurIPS 2025 on the Direct3D-S2 architecture confirms that volumetric generation outperforms surface-estimation approaches for closed, print-ready meshes. The post-processing sequence is yours to execute, but it starts with a file that actually works.
Upload a reference image, export the STL, load into your slicer, and print. No mesh repair. No wasted resin. The figure on your shelf is limited by your post-processing patience, not by the geometry.
Build Any Gundam Design. No Mesh Repair Required.
Base mesh in approximately 90 seconds. Upload your reference image and get a watertight, slicer-ready STL from Neural4D’s Direct3D-S2 engine.
Generate Your Gundam Model Free
50 Power credits free every week. No subscription required to start.